Maintaining a slate roof can seem daunting, but with the right knowledge and techniques, you can ensure its longevity and beauty. This comprehensive guide will walk you through the essential steps of slate roof repair, from identifying common problems to performing slate replacement and other crucial roofing techniques.
Whether you’re a seasoned stone mason or a homeowner looking to tackle some DIY projects, understanding the nuances of slate roof maintenance is vital. Let’s get started with understanding slate roofing.
We will cover everything from identifying common issues to performing effective repairs. With proper care, your slate roof can last for generations.
Understanding Slate Roofing
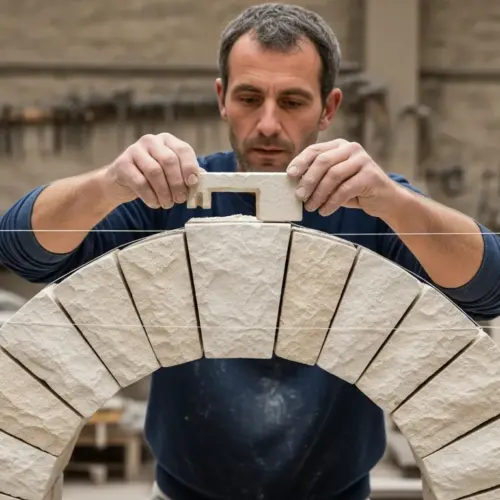
Slate roofing is renowned for its durability and aesthetic appeal, making it a popular choice for historic buildings and upscale homes. This roofing material is made from natural slate stone, which is known for its resistance to weather and fire.
However, understanding the properties and characteristics of slate is crucial for effective slate roof repair. Slate comes in various thicknesses, colors, and textures, each affecting its performance and appearance.
The lifespan of a slate roof can easily exceed 100 years with proper maintenance, but it’s essential to recognize the factors that contribute to its degradation. Environmental conditions, such as freeze-thaw cycles and exposure to harsh weather, can gradually weaken the slate.
Additionally, the quality of the original installation plays a significant role in the roof’s overall longevity, as poor installation can lead to premature failures. Regular inspections and timely repairs are necessary to preserve the integrity of a slate roof.
Slate is a metamorphic rock, meaning it was formed under extreme pressure and heat. This process gives it a layered structure, known as cleavage, which allows it to be split into thin, flat sheets ideal for roofing.
The color of slate is determined by its mineral composition, with variations ranging from gray and black to green, red, and purple. Different regions produce slate with unique characteristics, influencing its suitability for different climates and architectural styles.
When choosing slate for a new roof or repairs, consider the climate in your area. Some slates are more resistant to freeze-thaw cycles than others, making them better suited for colder regions.
Also, consider the aesthetic of your home. Matching the color and texture of existing slate is crucial for maintaining the roof’s overall appearance and historical accuracy.
Understanding the different types of slate, such as unfading, semi-weathering, and weathering varieties, is important for long-term maintenance. Unfading slate retains its original color, while weathering slate changes color over time due to mineral oxidation.
Semi-weathering slate falls in between, exhibiting some color change but not as much as weathering slate. Knowing which type of slate you have will help you anticipate how its appearance will evolve over the years.
The installation method also plays a crucial role in the performance of a slate roof. Proper overlapping and staggering of slates are essential for preventing water infiltration.
The use of appropriate fasteners, such as copper nails, is also vital for ensuring the slates remain securely attached to the roof deck. A well-installed slate roof can withstand high winds and heavy snow loads, providing exceptional protection for your home.
Identifying Common Slate Roof Problems
Recognizing common problems early can prevent extensive damage and costly repairs. One frequent issue is cracked or broken slate tiles, often caused by impact from falling debris, foot traffic, or extreme temperature fluctuations.
Another common problem is delamination, where the slate splits into layers, weakening its structural integrity. You also need to look for slipped or missing slates, which expose the underlayment to the elements and can lead to leaks.
Keep an eye out for nail fatigue, where the fasteners holding the slates in place corrode or break, causing the slates to loosen. Additionally, moss and lichen growth can trap moisture, accelerating the deterioration of the slate.
Flashing around chimneys, vents, and valleys is also susceptible to damage, leading to water infiltration if not properly maintained. Regular inspections, at least twice a year, can help identify these issues early and facilitate prompt slate roof repair.
Discoloration of the slate can also indicate underlying problems. Staining from rust or mineral deposits can signal water infiltration or issues with the flashing.
Efflorescence, a white, powdery substance, can appear on the surface of the slate, indicating moisture migration through the material. This can weaken the slate over time and should be addressed.
Pay attention to the condition of the surrounding materials, such as the gutters and downspouts. Clogged gutters can cause water to back up onto the roof, increasing the risk of leaks and damage to the slate.
Overhanging tree branches can also pose a threat to slate roofs. They can drop debris onto the roof, causing impact damage, and their shade can promote moss and lichen growth.
When inspecting your slate roof, use binoculars to get a closer look at hard-to-reach areas. This will allow you to identify potential problems without having to climb onto the roof.
Look for subtle signs of damage, such as hairline cracks or slight shifts in the alignment of the slates. These seemingly minor issues can quickly escalate into larger problems if left unaddressed.
Don’t neglect the attic during your roof inspection. Check for water stains on the underside of the roof deck, which can indicate leaks that are not immediately visible from the exterior.
Also, inspect the insulation for signs of moisture damage, as this can be a sign of a leaking roof. A thorough inspection of both the interior and exterior of the roof is essential for identifying and addressing potential problems early.
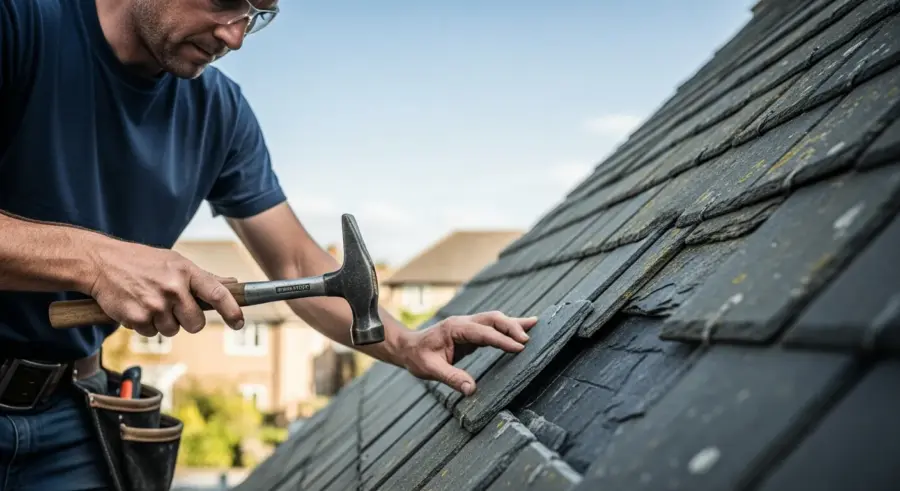
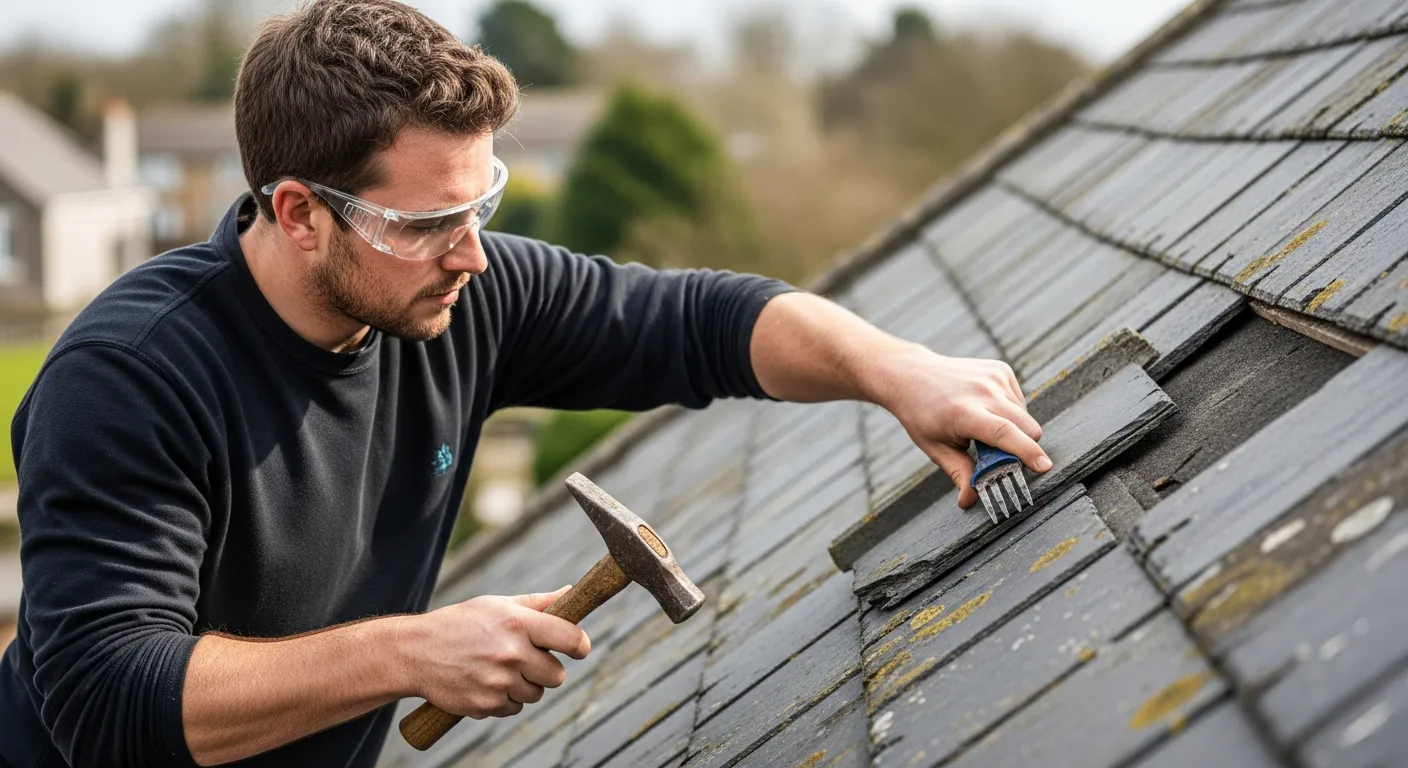
Replacing Damaged Slate Tiles
Replacing damaged slate tiles is a critical aspect of slate roof repair. The process involves carefully removing the damaged slate without disturbing the surrounding tiles.
You’ll then install a new slate tile using appropriate roofing techniques. Here’s a step-by-step guide to replacing damaged slate tiles.
| Step | Description | Tools/Materials |
|---|---|---|
| 1. Removal | Carefully remove the damaged slate using a slate ripper. | Slate ripper, hammer |
| 2. Preparation | Clean the area and inspect the underlayment for damage. | Brush, utility knife |
| 3. Installation | Slide the new slate into place and secure it with new nails or copper wire. | New slate, roofing nails, copper wire, hammer |
| 4. Securing | Ensure the slate is properly aligned and securely fastened. | Hammer, measuring tape |
| 5. Finishing | Bend over the nail heads to secure the slate, making sure they are not too tight. | Hammer |
When selecting a replacement slate, it’s important to match the color, size, and thickness of the existing tiles to maintain the roof’s aesthetic consistency. Use copper nails or wire for fastening, as they are resistant to corrosion and will extend the lifespan of the repair.
Before starting the replacement process, gather all the necessary tools and materials. This will help you work efficiently and avoid unnecessary trips up and down the ladder.
The slate ripper is a specialized tool designed to remove nails without damaging the surrounding slates. Insert the ripper under the damaged slate and use the hook to catch the nail heads.
Gently tap the ripper with a hammer to pull the nails free. Be careful not to apply too much force, as this could crack the surrounding slates.
Once the nails are removed, carefully slide the damaged slate out of place. Inspect the underlayment for any signs of damage, such as tears or rot.
If the underlayment is damaged, cut out the affected section and replace it with new material. Overlap the edges of the new underlayment with the existing material to create a watertight seal.
When installing the new slate, slide it into place, ensuring it aligns properly with the surrounding slates. Use copper nails or wire to secure the slate to the roof deck.
Position the nails or wire so they are covered by the overlapping slate above. This will protect them from the elements and prevent corrosion.
After securing the slate, bend over the nail heads to further secure the slate and prevent them from backing out over time. Make sure the nail heads are not bent over too tightly, as this could crack the slate.
If using copper wire, twist the ends together to create a secure loop around the nail. Trim any excess wire to prevent it from interfering with the surrounding slates.
Repairing Flashing and Other Components
Flashing plays a crucial role in preventing water damage around chimneys, vents, and roof valleys. Damaged or corroded flashing can lead to leaks and structural problems, making timely repairs essential.
To repair flashing, start by removing any damaged sections and cleaning the surrounding area. Install new flashing made from copper or aluminum, ensuring it is properly sealed and integrated with the slate tiles.
For chimney flashing, use a step-flashing method, where individual pieces of flashing are installed in overlapping layers to direct water away from the chimney. Inspect and repair any damaged mortar around the chimney to prevent water from seeping behind the flashing.
In valleys, ensure the flashing is free of debris and properly channels water off the roof. Replace any damaged valley flashing with new material, overlapping the edges to create a watertight seal.
When inspecting flashing, pay close attention to areas where it intersects with other roofing materials, such as slate tiles or shingles. These are common points of failure where water can easily penetrate.
Look for signs of corrosion, such as rust or pitting, which can weaken the flashing and compromise its ability to protect against water damage. Also, check for any gaps or cracks in the sealant around the flashing.
When repairing step flashing, make sure each piece is properly integrated with the slate tiles. The flashing should be bent and shaped to conform to the contours of the tiles, creating a tight seal.
Use roofing cement or sealant to fill any gaps or cracks in the flashing. Apply the sealant liberally, ensuring it completely covers the affected area.
For valley flashing, ensure the flashing extends far enough under the slate tiles to prevent water from seeping underneath. The edges of the flashing should be properly overlapped and sealed to create a watertight barrier.
If you’re replacing chimney flashing, consider using a high-quality sealant that is specifically designed for use with masonry. This will help prevent water from seeping behind the flashing and damaging the chimney structure.
Also, inspect the chimney cap for any signs of damage. A damaged chimney cap can allow water to enter the chimney, which can lead to further damage to the flashing and surrounding roofing materials.
Regularly cleaning your gutters and downspouts can also help prevent damage to the flashing. Clogged gutters can cause water to back up onto the roof, increasing the risk of leaks and damage to the flashing.
Addressing Underlayment Issues
The underlayment provides an additional layer of protection against water infiltration. Over time, the underlayment can deteriorate due to exposure to moisture and temperature changes.
When replacing slate tiles, inspect the underlayment for any signs of damage, such as tears, cracks, or rot. If the underlayment is damaged, carefully remove the surrounding slates and replace the affected section with new underlayment.
Use a high-quality roofing underlayment that is compatible with slate, such as synthetic underlayment or felt paper. Ensure the underlayment is properly sealed at the seams and around any penetrations to create a watertight barrier.
Properly installed underlayment will significantly extend the life of your slate roof and protect your home from water damage. Paying attention to the underlayment during slate roof repair can save you from more extensive problems later.
When selecting an underlayment for your slate roof, consider its water resistance, durability, and compatibility with slate. Synthetic underlayments are generally more durable and water-resistant than felt paper.
However, felt paper is a more traditional option and may be preferred for historic homes. Make sure the underlayment is properly installed according to the manufacturer’s instructions.
Overlap the edges of the underlayment by at least 6 inches to create a watertight seal. Use roofing nails or staples to secure the underlayment to the roof deck.
Pay special attention to areas around chimneys, vents, and valleys, as these are common points of water infiltration. Use flashing tape to seal the underlayment around these penetrations.
Inspect the underlayment regularly for any signs of damage. If you notice any tears, cracks, or rot, repair them immediately to prevent water damage.
Consider using a self-adhering underlayment for added protection. Self-adhering underlayments provide a superior seal and are less likely to leak than traditional underlayments.
When replacing underlayment, be sure to remove all old materials and debris from the roof deck. This will ensure a smooth, even surface for the new underlayment.
Also, inspect the roof deck for any signs of damage, such as rot or decay. Repair any damaged sections of the roof deck before installing the new underlayment.
Maintaining Your Slate Roof
Regular maintenance is essential for prolonging the life of your slate roof. Schedule inspections at least twice a year, ideally in the spring and fall, to identify and address any potential issues early.
Keep the roof free of debris, such as leaves, branches, and moss, which can trap moisture and accelerate deterioration. Here are some key maintenance tasks to keep your slate roof in top condition.
- Clear debris regularly
- Trim overhanging trees
- Clean gutters and downspouts
- Inspect flashing and seals
- Address minor repairs promptly
Consider applying a slate sealant to protect against water absorption and UV damage, but be sure to use a product specifically designed for slate. Avoid power washing slate roofs, as the high pressure can damage the tiles and force water under the slates.
When clearing debris from your roof, use a soft brush or broom to avoid damaging the slate tiles. Be careful not to dislodge any slates while you’re working.
Trim overhanging tree branches to prevent them from dropping debris onto the roof. This will also reduce the amount of shade on the roof, which can help prevent moss and lichen growth.
Clean your gutters and downspouts regularly to ensure they are free of debris. Clogged gutters can cause water to back up onto the roof, increasing the risk of leaks and damage to the slate.
Inspect your flashing and seals regularly for any signs of damage. Repair any damaged flashing or seals immediately to prevent water infiltration.
Address minor repairs promptly to prevent them from escalating into larger, more expensive problems. Replacing a few broken slates is much easier and cheaper than repairing extensive water damage.
Consider hiring a professional roofing contractor to perform regular maintenance on your slate roof. A professional can identify potential problems that you might miss and perform repairs safely and effectively.
Avoid walking on your slate roof as much as possible. Foot traffic can damage the slate tiles and loosen the fasteners.
If you must walk on your roof, use a roof ladder or crawling boards to distribute your weight and prevent damage to the slates. Be careful not to step on any loose or cracked slates.
Safety Considerations for Roof Work
Working on a roof can be dangerous, so it’s crucial to prioritize safety. Always wear appropriate safety gear, including a harness, non-slip shoes, and eye protection.
Use a sturdy ladder that is properly secured and positioned on a level surface. If you’re not comfortable working at heights, consider hiring a professional roofing contractor.
When working on a slate roof, be mindful of the fragile nature of the tiles and avoid walking directly on them. Use a roof ladder or crawling boards to distribute your weight and prevent damage to the slates.
Be aware of weather conditions and avoid working on the roof during rain, snow, or high winds. Always have a spotter on the ground to assist you and ensure you have a way to communicate in case of an emergency.
Before starting any roof work, inspect your ladder for any signs of damage. Make sure the rungs are clean and dry, and that the ladder is properly secured to the building.
Wear non-slip shoes with good traction to prevent falls. Avoid wearing loose clothing or jewelry that could get caught on the roof or ladder.
Use a safety harness and lifeline when working on steep or high roofs. Attach the lifeline to a secure anchor point on the roof.
Wear eye protection to protect your eyes from debris and dust. Use gloves to protect your hands from sharp edges and rough surfaces.
Be aware of your surroundings and watch out for power lines and other hazards. Never work on a roof alone.
Take frequent breaks to avoid fatigue. Fatigue can increase the risk of accidents.
If you’re not comfortable working on a roof, don’t do it. Hire a professional roofing contractor to perform the work for you.
Always follow the manufacturer’s instructions when using tools and materials. Use the right tool for the job.
Hiring a Professional for Slate Roof Repair
While some slate roof repair tasks can be handled by homeowners, certain jobs are best left to professionals. If you’re dealing with extensive damage, complex flashing issues, or you’re simply not comfortable working on the roof, it’s wise to hire a qualified roofing contractor.
When choosing a contractor, look for experience in slate roof repair and ask for references. Check their credentials and ensure they are licensed and insured.
A professional contractor will have the tools, knowledge, and expertise to properly assess the condition of your roof and perform the necessary repairs. They can also provide valuable advice on maintaining your slate roof and preventing future problems.
Investing in professional slate roof repair can save you money in the long run by ensuring the job is done correctly and preventing further damage. A skilled contractor will also be familiar with local building codes and regulations, ensuring your roof meets all requirements.
When interviewing potential contractors, ask about their experience with slate roofing specifically. Not all roofing contractors have the specialized knowledge and skills required to work with slate.
Ask for examples of previous slate roof repair projects they have completed. Contact the references provided to verify the contractor’s quality of work and customer service.
Make sure the contractor is licensed and insured. This will protect you in case of accidents or damage during the repair process.
Get a written estimate from each contractor that includes a detailed breakdown of the costs for materials and labor. Compare the estimates carefully and ask questions about any discrepancies.
Be wary of contractors who offer extremely low prices. This could be a sign that they are cutting corners or using substandard materials.
Ask the contractor about their warranty policy. A reputable contractor will stand behind their work and offer a warranty on both materials and labor.
Check the contractor’s reputation online by reading reviews on websites like Yelp and Google. Look for contractors with consistently positive reviews and a history of satisfied customers.
Trust your gut. If you don’t feel comfortable with a particular contractor, move on to the next one.
Cost Considerations for Slate Roof Repair
The cost of slate roof repair can vary depending on the extent of the damage and the complexity of the job. Replacing a few broken slates may only cost a few hundred dollars, while a more extensive repair involving flashing and underlayment replacement can run into the thousands.
When budgeting for slate roof repair, consider the cost of materials, labor, and any necessary permits. Get quotes from multiple contractors to ensure you’re getting a fair price.
While slate roof repair can be expensive, it’s important to view it as an investment in the longevity and value of your home. A well-maintained slate roof can last for generations, providing superior protection and aesthetic appeal.
Additionally, consider the potential cost savings of addressing minor repairs promptly before they escalate into larger, more expensive problems. Regular maintenance and timely repairs are key to minimizing the overall cost of owning a slate roof.
The cost of slate itself can vary depending on the type, color, and size. Imported slate may be more expensive than locally sourced slate.
Labor costs will also vary depending on the contractor’s experience and the complexity of the job. Contractors with extensive experience in slate roofing may charge more, but their expertise can be worth the investment.
Permit fees can also add to the overall cost of the repair. Check with your local building department to determine if a permit is required for your project.
Consider the long-term cost savings of using high-quality materials. While cheaper materials may save you money upfront, they may not last as long and could require more frequent repairs.
Ask your contractor about financing options. Some contractors offer financing plans to help homeowners spread out the cost of the repair over time.
Check with your insurance company to see if your homeowner’s insurance policy covers slate roof repairs. Some policies may cover damage caused by wind, hail, or other covered perils.
Get a detailed estimate from each contractor that includes a breakdown of the costs for materials, labor, permit fees, and any other expenses. This will help you compare the costs and make an informed decision.
Don’t be afraid to negotiate with contractors to get the best possible price. However, be wary of contractors who offer prices that are significantly lower than the competition.
Conclusion
Slate roof repair requires a combination of knowledge, skill, and attention to detail. By understanding the properties of slate, identifying common problems, and performing timely repairs, you can ensure the longevity and beauty of your roof.
Whether you choose to tackle some DIY projects or hire a professional contractor, remember that regular maintenance is key to preventing costly damage. With proper care, your slate roof will protect your home for many years to come.
Taking the time to learn about slate roofing and its maintenance requirements will pay off in the long run. A well-maintained slate roof not only protects your home but also adds to its value and curb appeal.
Remember to prioritize safety when working on your roof and don’t hesitate to seek professional help when needed. With the right approach, you can keep your slate roof in top condition for generations to come.