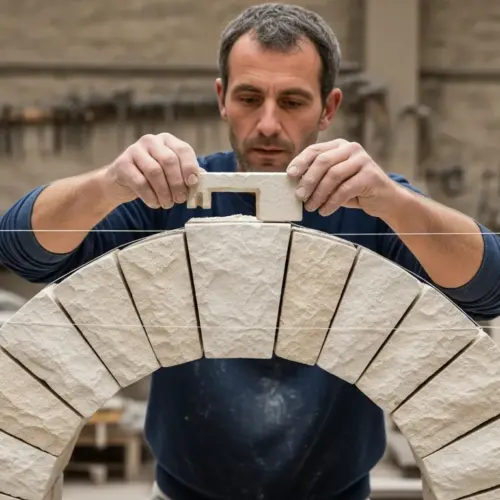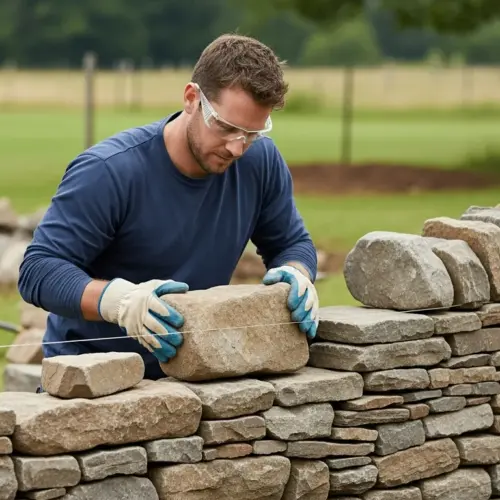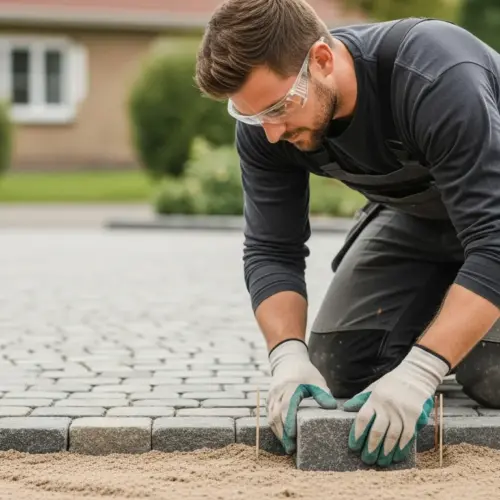
Stone walls add character and durability to any property. However, the mortar joints between the stones can deteriorate over time, leading to water damage and structural issues. Properly pointing stone walls, which involves repairing and replacing the mortar, is essential for preserving their integrity and appearance.
This guide will provide you with a comprehensive understanding of pointing stone walls, covering everything from choosing the right mortar to maintaining your finished work. By following these techniques, you can ensure your stone walls remain beautiful and structurally sound for years to come.
Whether you’re a seasoned stone mason or a homeowner looking to tackle a DIY project, this guide will equip you with the knowledge and skills you need. Let’s get started with an overview of why pointing is so important for stone wall maintenance.
Understanding the Importance of Pointing
Pointing is more than just filling gaps between stones; it’s a critical process that protects the entire wall structure. Deteriorated mortar joints allow water to penetrate, which can lead to freeze-thaw damage, erosion, and even structural instability.
When water freezes inside the mortar, it expands, causing cracks and weakening the bond between the mortar and the stones. Over time, this can lead to significant damage, requiring extensive and costly repairs.
Proper pointing also enhances the aesthetic appeal of a stone wall. Fresh mortar joints can dramatically improve the overall look, restoring the wall to its original beauty and highlighting the natural character of the stones.
Furthermore, well-maintained pointing helps to prevent plant growth and pest infestations. Damaged mortar provides a perfect environment for weeds and insects to take hold, which can further compromise the wall’s structure and appearance.
The structural integrity of a stone wall relies heavily on the mortar’s ability to bind the stones together. When the mortar fails, the wall’s stability is compromised, potentially leading to bowing, bulging, or even collapse in severe cases.
Pointing acts as a protective barrier against the elements, shielding the stone wall from harsh weather conditions. Rain, snow, and wind can all contribute to the deterioration of the mortar and the stones themselves.
Regular inspections of your stone walls are crucial to identify any signs of mortar deterioration early on. Catching these problems early can prevent more extensive and expensive repairs in the future.
Ignoring damaged pointing can lead to a cascade of problems, including water damage to the interior of your home. Moisture penetration can also foster mold growth, which can be detrimental to your health.
Investing in proper pointing is an investment in the long-term health and value of your property. A well-maintained stone wall not only looks beautiful but also adds significant value to your home.
Consider the historical significance of your stone wall as well. Many stone walls are part of a property’s heritage, and proper pointing helps to preserve this history for future generations.
Choosing the Right Mortar for Your Stone Wall
Selecting the appropriate mortar is paramount for a successful pointing project. The wrong mortar can cause more damage than good, especially if it’s too hard or incompatible with the existing stone and mortar.
The key is to use a mortar that is softer and more flexible than the surrounding materials. This allows the mortar to absorb movement and stress, preventing cracking and ensuring a long-lasting repair.
Lime-based mortars are generally the best choice for older stone walls. They are breathable, allowing moisture to evaporate, and they are less likely to damage the stones compared to modern cement-based mortars.
Different mortar types are available, each with varying levels of strength and flexibility. Consider the age and type of your stone wall when selecting the appropriate mortar mix.
Using a mortar that is too hard can actually cause the stones themselves to crack and spall. The mortar should be the sacrificial element, designed to fail before the stones do.
Consider the color of the mortar as well. The color should complement the stones and the overall aesthetic of the wall. You can often find pigments to add to the mortar mix to achieve the desired color.
Before selecting a mortar, it’s a good idea to analyze the existing mortar in your stone wall. This can help you determine the original mortar type and choose a compatible replacement.
Consult with a masonry expert if you’re unsure about which mortar to use. They can provide valuable advice based on their experience and knowledge of different mortar types and stone wall construction.
Always read the manufacturer’s instructions carefully before mixing and applying any type of mortar. Following the instructions will ensure that the mortar performs as expected.
Remember that the mortar is not just a filler; it’s an integral part of the stone wall system. Choosing the right mortar is essential for the wall’s long-term health and stability.
Mortar Types and Their Uses
Understanding the different mortar types will help you make an informed decision for your stone wall. Each type has specific properties that make it suitable for certain applications.
Consider the pros and cons of each type before making your final selection. Here’s a table to help you compare mortar types and their ideal applications.
| Mortar Type | Composition | Characteristics | Ideal Applications |
|---|---|---|---|
| Lime Mortar | Lime, sand, and water | Breathable, flexible, and softer than stone | Historic stone walls, soft stone types |
| Cement Mortar | Cement, sand, and water | Strong, durable, but less flexible | Modern construction, hard stone types |
| Hydraulic Lime Mortar | Hydraulic lime, sand, and water | Moderate strength and breathability | Exposed locations, moderate stone types |
| NHL Mortar | Natural Hydraulic Lime, sand, and water | Varies in strength, good breathability | Various stone types, depending on NHL grade |
Lime mortar is a traditional choice that has been used for centuries. Its breathability allows moisture to escape, preventing damage from freeze-thaw cycles.
Cement mortar is a more modern option that offers high strength and durability. However, its lack of flexibility can make it unsuitable for older stone walls.
Hydraulic lime mortar offers a balance between strength and breathability. It’s a good choice for walls that are exposed to harsh weather conditions.
NHL mortar is made from natural hydraulic lime and comes in different grades of strength. The appropriate grade should be selected based on the specific needs of your stone wall.
When choosing a mortar, consider the climate in your area. Mortars with good freeze-thaw resistance are essential in cold climates.
Also, think about the aesthetic you’re trying to achieve. Different mortars can create different visual effects, from rustic to refined.
Remember to always consult with a professional if you’re unsure about which mortar type is best for your stone wall. Their expertise can help you make the right decision.
Properly researching the different mortar types will pay off in the long run. It will ensure that your pointing project is successful and that your stone wall remains in good condition for many years.
Removing Old and Damaged Mortar
Before applying new mortar, it’s essential to remove all the old and damaged mortar from the joints. This ensures a strong bond between the new mortar and the existing stones.
Use hand tools like a chisel and hammer to carefully chip away at the old mortar. Avoid using power tools, as they can damage the surrounding stones.
Work slowly and methodically, removing the mortar to a depth of at least twice the width of the joint. This will provide enough space for the new mortar to adhere properly.
Once you’ve removed the old mortar, clean the joints thoroughly with a brush and water. This will remove any loose debris and ensure a clean surface for the new mortar to bond to.
When removing old mortar, wear safety glasses to protect your eyes from flying debris. Gloves are also recommended to protect your hands.
Be careful not to damage the edges of the stones when removing the mortar. A sharp chisel and a steady hand are essential for this task.
If the old mortar is particularly hard, you may need to use a specialized mortar rake. This tool is designed to remove mortar without damaging the stones.
After removing the old mortar, inspect the stones for any damage. Repair any cracks or chips before applying the new mortar.
Consider using a vacuum cleaner to remove dust and debris from the joints after cleaning them with a brush. This will ensure a perfectly clean surface for the new mortar.
Properly removing the old mortar is a crucial step in the pointing process. Taking the time to do it right will ensure a long-lasting and aesthetically pleasing result.
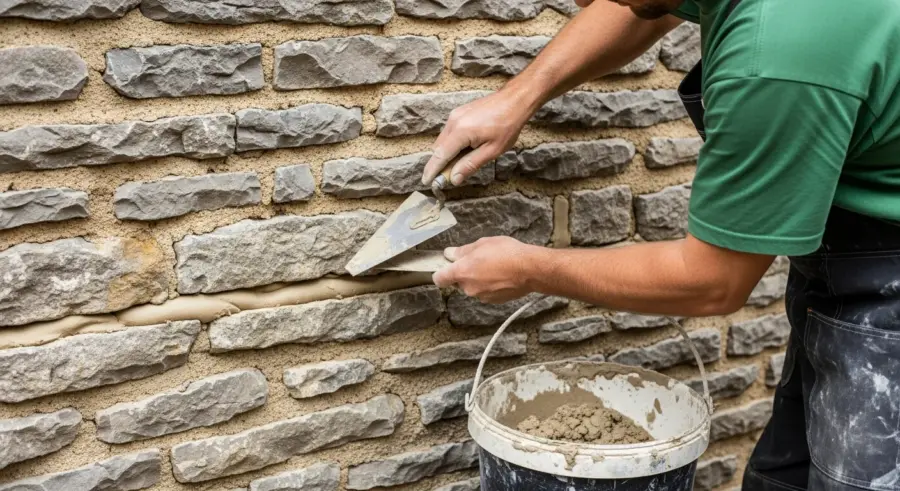
Mixing and Applying New Mortar
Mixing the mortar to the correct consistency is crucial for a successful application. Follow the manufacturer’s instructions carefully, adding water gradually until you achieve a workable mix.
The mortar should be plastic and cohesive, holding its shape without being too wet or too dry. A good test is to form a ball of mortar in your hand; it should hold its shape without crumbling or sagging.
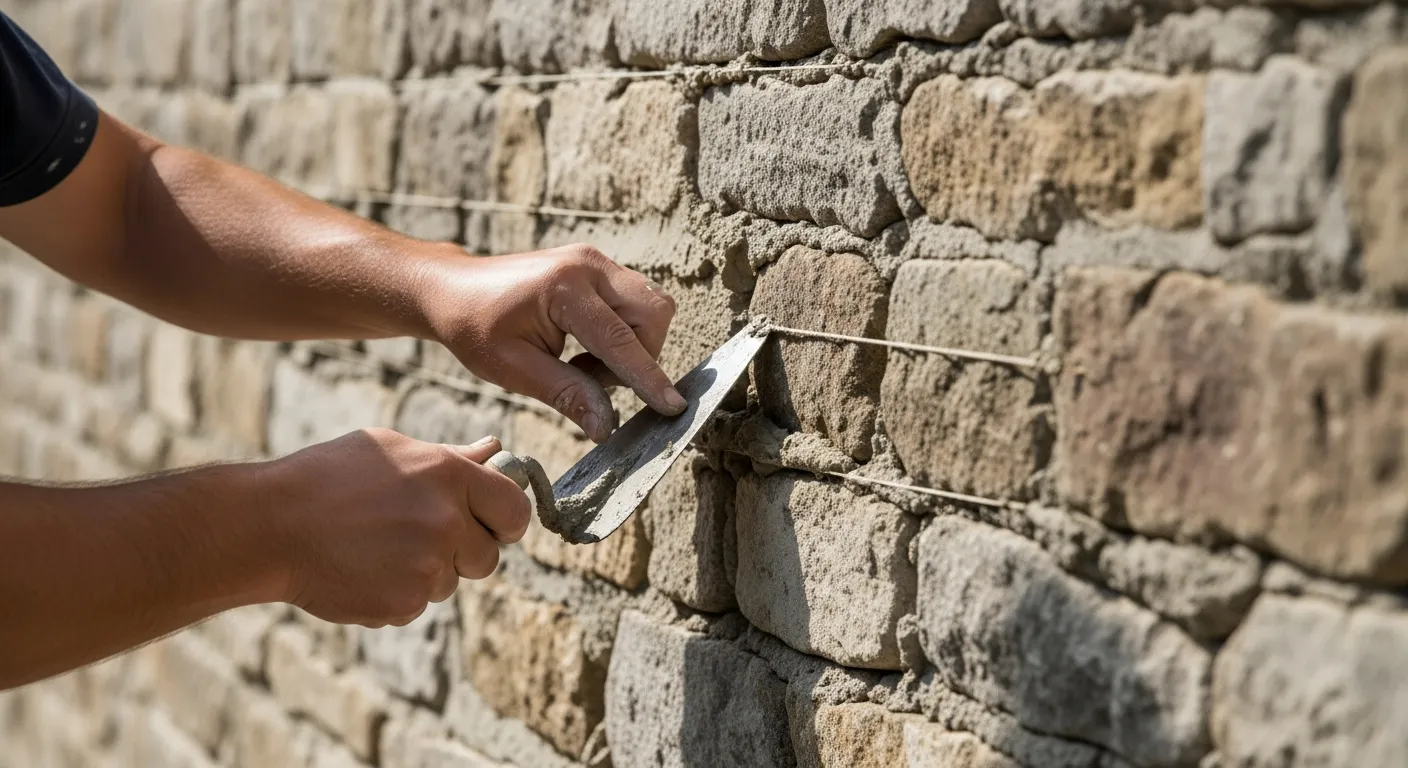
Use a hawk and trowel to apply the mortar to the joints, pressing it firmly into the gaps. Start with the vertical joints, then fill the horizontal joints, ensuring the mortar is packed tightly.
Overfill the joints slightly, as the mortar will shrink as it dries. Remove any excess mortar from the face of the stones with a trowel, being careful not to smear it.
When mixing mortar, use clean water and clean mixing tools. This will prevent contamination and ensure a consistent mix.
If you’re mixing a large batch of mortar, consider using a mechanical mixer. This will save you time and effort and ensure a more consistent mix.
When applying the mortar, work in small sections at a time. This will prevent the mortar from drying out before you have a chance to finish it.
Use a variety of pointing trowels to accommodate different joint sizes and shapes. A smaller trowel is ideal for narrow joints, while a larger trowel is better for wider joints.
After applying the mortar, use a damp sponge to clean any excess mortar from the face of the stones. This will prevent staining and ensure a clean, professional finish.
Properly mixing and applying the mortar is essential for a successful pointing project. Taking the time to do it right will ensure a long-lasting and aesthetically pleasing result.
Essential Tools for Pointing Stone Walls
Having the right tools will make the pointing process much easier and more efficient. Invest in quality tools that are designed for masonry work.
Proper tools will not only speed up the job but also help you achieve a professional finish. Here’s a list of essential tools for pointing stone walls:
- Chisel and hammer
- Mortar hawk
- Pointing trowel
- Joint raker
- Masonry brush
- Mixing tub
- Gloves and safety glasses
A good quality chisel and hammer are essential for removing old and damaged mortar. Choose a chisel with a comfortable grip and a sharp edge.
A mortar hawk is a flat, square tool used to hold mortar while you’re applying it to the joints. Choose a hawk that is comfortable to hold and the right size for your project.
Pointing trowels come in a variety of shapes and sizes. Choose a trowel that is comfortable to hold and the right size for the joints you’re working on.
A joint raker is a specialized tool used to remove old mortar from joints. It can be a manual tool or a power tool attachment.
A masonry brush is used to clean the joints after removing the old mortar. Choose a brush with stiff bristles that can effectively remove dust and debris.
A mixing tub is used to mix the mortar. Choose a tub that is the right size for your project and easy to clean.
Gloves and safety glasses are essential for protecting your hands and eyes while working with mortar. Choose gloves that are comfortable and durable, and safety glasses that fit snugly and provide good protection.
Having the right tools will make the pointing process much easier and more efficient. Invest in quality tools that are designed for masonry work.
Finishing and Curing the Mortar
Once the mortar has been applied, it’s important to finish the joints to create a neat and professional appearance. There are several different finishing techniques you can use, depending on the desired look.
A flush joint is created by smoothing the mortar flush with the surface of the stones. A recessed joint is created by pressing the mortar back slightly, creating a shadow line.
A weathered joint slopes downward from the top of the joint, shedding water away from the wall. A struck joint is similar to a weathered joint, but it slopes in the opposite direction.
After finishing the joints, it’s crucial to cure the mortar properly. This involves keeping the mortar damp for several days, which allows it to harden slowly and develop its full strength.
The finishing technique you choose will depend on the style of your stone wall and your personal preferences. Consider the overall aesthetic you’re trying to achieve.
To create a recessed joint, use a jointing tool to press the mortar back slightly from the surface of the stones. Be careful not to press too hard, as this can damage the mortar.
To create a weathered joint, use a trowel to slope the mortar downward from the top of the joint. This will help to shed water away from the wall.
Curing the mortar is essential for its strength and durability. Keep the mortar damp by spraying it with water several times a day, especially during hot or dry weather.
Cover the wall with plastic sheeting to help retain moisture during the curing process. This will prevent the mortar from drying out too quickly.
Proper finishing and curing will ensure that your pointing project is successful and that your stone wall remains in good condition for many years.
Maintaining Your Pointed Stone Wall
Proper maintenance is essential for extending the life of your pointed stone wall. Regularly inspect the mortar joints for any signs of cracking or deterioration.
Address any issues promptly to prevent further damage. Keep the wall clean by removing any dirt, debris, or plant growth.
Consider applying a breathable sealant to protect the mortar from water damage. Reapply the sealant every few years, as needed.
Avoid using harsh chemicals or pressure washers to clean the wall, as these can damage the mortar and stones. Gentle cleaning with a soft brush and water is usually sufficient.
Regularly check for any signs of plant growth, such as moss or ivy. These plants can damage the mortar and stones over time.
Remove any debris that accumulates at the base of the wall. This will help to prevent moisture from wicking up into the mortar.
Inspect the wall after heavy rains or snowstorms. Look for any signs of water damage or erosion.
If you notice any cracks or deterioration in the mortar joints, repair them promptly. This will prevent further damage and extend the life of your stone wall.
Consider hiring a professional to inspect your stone wall on a regular basis. They can identify potential problems and recommend appropriate maintenance measures.
Proper maintenance is essential for preserving the beauty and integrity of your stone wall. Taking the time to care for your wall will ensure that it remains in good condition for many years to come.
Tuckpointing: A Specialized Technique
Tuckpointing is a specialized pointing technique that creates the illusion of very fine mortar joints. It involves applying a colored mortar that matches the stones, then adding a thin ribbon of white or contrasting mortar on top.
This technique requires a high level of skill and precision. Tuckpointing is often used on historic buildings to restore their original appearance.
The process starts with raking out the existing mortar to a uniform depth. Next, the colored mortar is applied, filling the joints completely and matching the stone color as closely as possible.
Once the colored mortar has set, the thin ribbon of contrasting mortar is carefully applied using a tuckpointing tool. The result is a visually striking and historically accurate restoration.
Tuckpointing is a time-consuming and labor-intensive process. It requires a great deal of patience and attention to detail.
The colored mortar used in tuckpointing is typically a lime-based mortar that is tinted to match the color of the stones. This creates a seamless background for the thin ribbon of contrasting mortar.
The contrasting mortar is typically white or a light color. This creates a sharp contrast with the colored mortar and the stones, highlighting the fine lines of the joints.
Tuckpointing requires specialized tools, including a tuckpointing trowel and a jointing tool. These tools help to create the precise lines and smooth surfaces that are characteristic of tuckpointing.
If you’re considering tuckpointing your stone wall, it’s important to hire a qualified professional. Tuckpointing is a complex technique that requires a high level of skill and experience.
The results of tuckpointing can be truly stunning. A well-tuckpointed stone wall can look like a work of art.
Conclusion
Pointing stone walls is a vital task for maintaining their structural integrity and aesthetic appeal. By understanding the importance of pointing, choosing the right mortar, and following proper techniques, you can ensure your stone walls remain beautiful and durable for years to come.
Remember to prioritize safety and take your time, and don’t hesitate to consult with a professional if you’re unsure about any aspect of the process. With the right knowledge and skills, you can successfully point stone walls and preserve their timeless beauty.
The information provided in this guide is intended to be a general overview of pointing stone walls. It is not a substitute for professional advice.
Always consult with a qualified masonry expert before undertaking any pointing project. They can assess your specific needs and recommend the best course of action.
With proper care and maintenance, your stone walls can last for generations. Pointing is an essential part of that care, ensuring that your walls remain strong and beautiful for years to come.
Take pride in your stone walls and the history they represent. By investing in their maintenance, you’re preserving a valuable part of your property and its heritage.