Embarking on a home improvement project can be both exciting and rewarding. One such project that can significantly enhance your home’s curb appeal and value is stone veneer installation.
With the right tools, materials, and a bit of know-how, you can achieve a professional-looking result with stone veneer installation. This guide will walk you through the process step-by-step, covering everything from choosing the right veneer to maintaining its beauty for years to come.
Whether you’re a seasoned DIY enthusiast or a first-timer, this comprehensive guide will provide you with the knowledge and confidence to tackle your stone veneer installation project. Let’s get started and transform your space with the timeless elegance of stone.
Choosing the Right Stone Veneer for Your Project
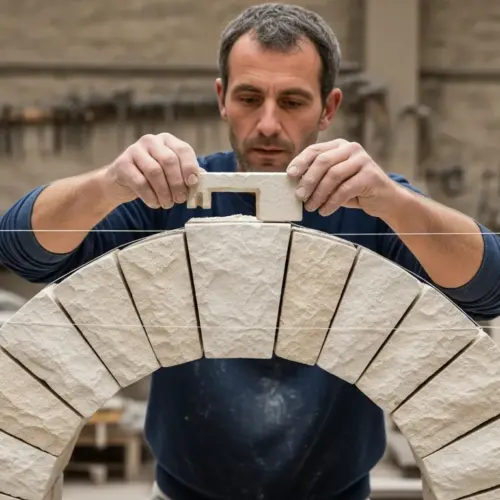
Selecting the appropriate stone veneer is a critical first step in any stone veneer installation project. The market offers a wide array of veneer types, each with its unique aesthetic and performance characteristics.
Consider the overall style you want to achieve, as well as the specific application, before settling on a stone veneer. Natural stone veneer offers a genuine, timeless look, while manufactured stone veneer provides a more cost-effective and lightweight alternative.
Natural stone options include granite, limestone, slate, and sandstone, each boasting distinct colors and textures. These stones bring an unmatched authenticity to any project, adding a touch of nature’s artistry to your home.
Manufactured stone veneer, on the other hand, is crafted from concrete and aggregates, molded to replicate the look of natural stone. It’s lighter weight simplifies installation, and it’s often more budget-friendly, making it a popular choice for DIYers.
When choosing between natural and manufactured stone veneer, consider the project’s budget and timeline. Natural stone typically requires more specialized installation techniques, potentially increasing labor costs.

Manufactured stone veneer offers a consistent look and feel, making it easier to estimate the amount of material needed. Its uniformity also simplifies the installation process, reducing the likelihood of waste.
Think about the architectural style of your home and choose a stone veneer that complements it. A rustic, textured veneer might be perfect for a country-style home, while a sleek, modern veneer would suit a contemporary design.
Don’t forget to factor in the color and texture of the surrounding landscape. A stone veneer that blends seamlessly with the natural environment can create a harmonious and inviting outdoor space.
Before making a final decision, obtain samples of different stone veneer options and compare them side-by-side. This allows you to assess the color, texture, and overall appearance in the actual lighting conditions of your project area.
Consider the long-term maintenance requirements of each stone veneer type. Natural stone may require periodic sealing to protect it from the elements, while manufactured stone is generally more resistant to staining and fading.
Pay attention to the size and shape of the individual stone veneer pieces. Smaller, more irregular pieces can create a more rustic and textured look, while larger, uniform pieces offer a cleaner and more modern aesthetic.
Research different stone veneer manufacturers and suppliers to ensure you’re getting a high-quality product. Look for companies with a proven track record and positive customer reviews.
Finally, consult with a professional contractor or installer for expert advice on choosing the right stone veneer for your specific project. They can assess your needs and recommend the best options based on your budget, style preferences, and the structural requirements of your home.
Preparing the Wall Surface for Stone Veneer Installation
Proper wall preparation is paramount to ensure a successful and long-lasting stone veneer installation. The surface must be clean, structurally sound, and properly prepared to receive the mortar and veneer.
Start by thoroughly cleaning the wall surface, removing any dirt, dust, debris, or loose paint. A pressure washer can be effective for exterior walls, while a wire brush and scraper can tackle interior surfaces.
Inspect the wall for any structural issues, such as cracks, rot, or water damage, and address them before proceeding. Repairing these problems now will prevent future issues and ensure the veneer adheres properly.
Next, apply a layer of weather-resistant barrier, such as building paper or a synthetic wrap, to protect the wall from moisture. Overlap the edges of the barrier by at least 6 inches and secure it with staples or nails.
For wood-framed walls, attach a layer of metal lath to provide a secure surface for the mortar to adhere to. Secure the lath with nails or screws, overlapping the edges by at least 1 inch.
When installing stone veneer over concrete or masonry walls, ensure the surface is free of any sealers or coatings that could interfere with adhesion. Etch the surface with a concrete etching solution to create a rough texture for better bonding.
Check the wall for plumb and level, and make any necessary adjustments before applying the stone veneer. An uneven surface can make installation difficult and result in an unprofessional-looking finish.
Consider applying a scratch coat of mortar to the wall surface before installing the stone veneer. This provides a level surface and enhances the bond between the veneer and the wall.
Allow the scratch coat to dry completely before proceeding with the stone veneer installation. This typically takes 24 to 48 hours, depending on the weather conditions.
If you’re installing stone veneer in a cold climate, take extra precautions to protect the mortar from freezing. Cover the wall with insulation blankets or use a heated enclosure to maintain a temperature above freezing during installation and curing.
Ensure proper ventilation in the work area to prevent the buildup of moisture and fumes. Open windows and doors or use a fan to circulate air.
Wear appropriate safety gear, including gloves, eye protection, and a dust mask, when preparing the wall surface. This will protect you from dust, debris, and chemicals.
Double-check all measurements and calculations before cutting any stone veneer pieces. Accurate measurements are essential for a professional-looking installation.
Keep the work area clean and organized to prevent accidents and ensure efficient installation. Remove any debris or tools that could get in the way.
Understanding Mortar Techniques
Mortar is the glue that binds the stone veneer to the wall, so choosing the right type and mixing it correctly is vital. Several mortar types are available, each formulated for specific applications and veneer types.
Type S mortar is a popular choice for stone veneer installation due to its high strength and bonding capabilities. Polymer-modified mortars offer enhanced adhesion and flexibility, making them suitable for demanding applications.
| Mortar Type | Application | Characteristics |
|---|---|---|
| Type S | General stone veneer installation | High strength, good bonding |
| Polymer-Modified | Demanding applications, enhanced adhesion | Flexible, water-resistant |
| Pre-Mixed | Small projects, convenience | Easy to use, consistent mix |
| Dry-Stack | Dry-stack veneer, no visible mortar joints | Specialized, requires expertise |
Pre-mixed mortars offer convenience for smaller projects, ensuring a consistent mix without the need for measuring and mixing. Dry-stack mortars are specialized for dry-stack veneer applications, creating a seamless look with no visible mortar joints.
When selecting a mortar, consider the climate in your area and the exposure of the stone veneer to the elements. Some mortars are better suited for wet or freezing conditions than others.
Always read and follow the manufacturer’s instructions for mixing and applying the mortar. Incorrect mixing can weaken the mortar and compromise the integrity of the installation.
Use a clean mixing container and tools to avoid contaminating the mortar. Contaminants can affect the mortar’s bonding properties and cause discoloration.
Mix the mortar in small batches to prevent it from drying out before you can use it. Mortar that has dried out should not be re-tempered with water, as this will weaken it.
Apply the mortar to the back of the stone veneer pieces with a notched trowel. The notches create ridges in the mortar, which increase the surface area for bonding.
Press the stone veneer pieces firmly into the mortar, using a slight twisting motion to ensure good contact. This helps to squeeze out any air pockets and create a strong bond.
Remove any excess mortar from the face of the stone veneer pieces immediately after installation. Dried mortar can be difficult to remove and may stain the stone.
Use a damp sponge to clean the mortar joints and create a smooth, professional finish. Be careful not to remove too much mortar, as this can weaken the joints.
Allow the mortar to cure for the recommended time before applying any sealant or grout. Curing time varies depending on the type of mortar and the weather conditions.
Protect the mortar from rain and direct sunlight during the curing process. This can help to prevent cracking and ensure a strong bond.
Inspect the mortar joints regularly for any signs of cracking or deterioration. Repair any damaged joints promptly to prevent water damage and maintain the integrity of the installation.
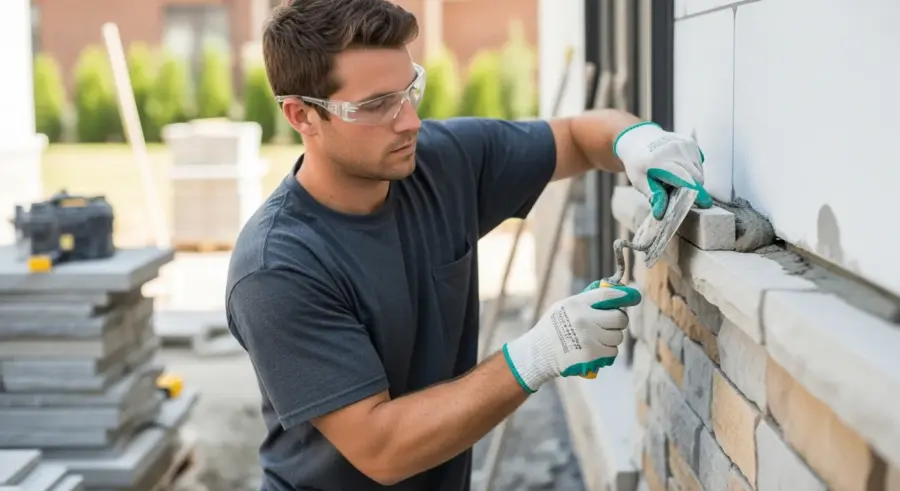
Mixing and Applying the Mortar
Once you’ve selected the appropriate mortar, it’s time to mix it according to the manufacturer’s instructions. Use a clean mixing container and add water gradually while mixing with a mortar mixer or a drill with a mixing attachment.
The consistency should be similar to a thick paste, holding its shape without being too stiff or runny. Allow the mortar to slake, or sit undisturbed, for about 10 minutes, then remix it before application.
Using a notched trowel, apply a layer of mortar to the back of each stone veneer piece, ensuring full coverage. The notches create ridges in the mortar, providing a better grip and preventing air pockets.
Apply a thin, even layer of mortar to the prepared wall surface, covering an area slightly larger than the stone veneer piece. This “scratch coat” provides a bonding surface for the veneer, ensuring a strong and lasting connection.
When mixing the mortar, pay close attention to the water-to-mortar ratio. Adding too much water can weaken the mortar, while adding too little can make it difficult to work with.
Use a mortar mixer for larger projects to ensure a consistent and thorough mix. A mortar mixer can save time and effort compared to mixing by hand.
If you’re mixing the mortar by hand, use a sturdy mixing container and a margin trowel to thoroughly combine the ingredients. Be sure to break up any lumps of dry mortar.
After slaking the mortar, remix it for a few minutes to ensure a smooth and consistent consistency. This helps to activate the bonding agents in the mortar.
When applying the mortar to the back of the stone veneer pieces, use a consistent pressure to create uniform ridges. This helps to ensure a strong and even bond.
Avoid applying too much mortar to the back of the stone veneer pieces. Excess mortar can squeeze out between the stones and create a messy appearance.
When applying the scratch coat to the wall surface, use a consistent thickness to create a level bonding surface. This helps to ensure that the stone veneer pieces are properly aligned.
Use a damp sponge to clean any excess mortar from the wall surface before it dries. Dried mortar can be difficult to remove and may stain the wall.
Work in small sections to prevent the mortar from drying out before you can install the stone veneer pieces. This is especially important in hot or dry weather.
Clean your tools immediately after use to prevent the mortar from hardening. Dried mortar can be difficult to remove from tools.
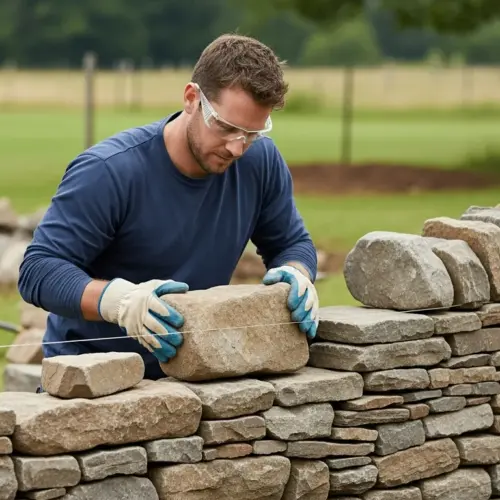
Installing the Stone Veneer
With the mortar applied, carefully position the stone veneer piece onto the wall, pressing it firmly into place. Use a level to ensure the veneer is straight and plumb, making adjustments as needed.
Maintain consistent spacing between the stones, using spacers or small pieces of cardboard to create uniform mortar joints. This not only enhances the aesthetic appeal but also allows for proper grout application later on.
Work from the bottom up, staggering the joints to create a natural, random pattern. Avoid creating long, continuous vertical or horizontal joints, as this can detract from the overall look.
For corners, use corner stones specifically designed for veneer installation, or carefully cut and miter the edges of the veneer pieces. Proper corner installation is crucial for a professional and seamless appearance.
Before you start installing the stone veneer, dry-fit the pieces to ensure a pleasing arrangement. This allows you to adjust the layout and avoid any awkward gaps or patterns.
Use a diamond blade saw to cut the stone veneer pieces to the desired size and shape. A diamond blade provides a clean and precise cut without damaging the stone.
When installing the stone veneer around windows and doors, use a level to ensure that the pieces are aligned properly. This creates a clean and professional look.
Use shims to support the stone veneer pieces while the mortar is drying. This prevents the pieces from sliding or shifting out of place.
Periodically check the level and plumb of the stone veneer as you are installing it. This helps to ensure that the finished product is straight and even.
Use a rubber mallet to gently tap the stone veneer pieces into place. This helps to ensure that the pieces are fully embedded in the mortar.
Remove any excess mortar from the face of the stone veneer pieces immediately after installation. Dried mortar can be difficult to remove and may stain the stone.
Allow the mortar to cure for the recommended time before applying any grout or sealant. Curing time varies depending on the type of mortar and the weather conditions.
Protect the stone veneer from rain and direct sunlight during the curing process. This can help to prevent cracking and ensure a strong bond.
Inspect the stone veneer regularly for any signs of cracking or deterioration. Repair any damaged pieces promptly to prevent water damage and maintain the integrity of the installation.
Achieving Perfect Grouting and Finishing
Grouting is the process of filling the mortar joints between the stone veneer pieces, adding a finished look and preventing water penetration. Choose a grout color that complements the stone veneer, either matching or contrasting to create the desired effect.
Using a grout bag or a small trowel, carefully apply the grout to the mortar joints, filling them completely. Avoid getting grout on the face of the stone veneer, as it can be difficult to remove.
- Use a damp sponge to clean excess mortar
- Tool the joints to create a smooth, professional finish
- Allow the grout to cure per manufacturer’s instructions
- Apply a sealer to protect the stone and grout
- Inspect for any imperfections
Once the grout has partially set, use a jointing tool or a rounded stick to smooth and shape the joints, creating a consistent and professional finish. A variety of jointing styles are available, from concave to flush, so choose one that suits your aesthetic preference.
Before grouting, ensure that the mortar has fully cured and is dry to the touch. Grouting over wet mortar can lead to cracking and discoloration.
Choose a grout color that complements the stone veneer and enhances its natural beauty. Consider using a contrasting grout color to highlight the texture and pattern of the stone.
Mix the grout according to the manufacturer’s instructions, adding water gradually until you achieve a smooth, creamy consistency. Avoid adding too much water, as this can weaken the grout.
Use a grout bag or a small trowel to apply the grout to the mortar joints, filling them completely. Work in small sections to prevent the grout from drying out before you can tool it.
Avoid getting grout on the face of the stone veneer pieces. If you do, wipe it off immediately with a damp sponge.
Use a jointing tool or a rounded stick to smooth and shape the grout joints. Experiment with different jointing styles to find one that suits your aesthetic preference.
Remove any excess grout from the face of the stone veneer pieces with a damp sponge. Be careful not to remove too much grout from the joints.
Allow the grout to cure for the recommended time before applying any sealant. Curing time varies depending on the type of grout and the weather conditions.
Apply a sealant to the stone veneer and grout to protect them from water damage and staining. Choose a sealant that is specifically designed for stone veneer.
Inspect the grouted stone veneer for any imperfections, such as cracks or voids. Repair any imperfections promptly to prevent water damage and maintain the integrity of the installation.
Sealing Stone Veneer for Longevity
Sealing your newly installed stone veneer is a proactive step toward preserving its beauty and protecting it from the elements. A quality sealer will help prevent water penetration, staining, and fading, ensuring your investment lasts for years to come.
Choose a sealer specifically designed for stone veneer, and follow the manufacturer’s instructions carefully. Apply the sealer with a brush, roller, or sprayer, ensuring even coverage and avoiding pooling.
Allow the sealer to dry completely before exposing the veneer to water or other elements. Depending on the product and the climate, you may need to reapply the sealer every few years to maintain optimal protection.
Regular cleaning and maintenance can also extend the life of your stone veneer. Gently wash the surface with a mild soap and water solution, avoiding harsh chemicals or abrasive cleaners.
Before applying any sealer, ensure the stone veneer is clean and dry. Remove any dirt, dust, or debris that could interfere with the sealer’s adhesion.
Choose a sealer that is compatible with the type of stone veneer you have installed. Some sealers are designed for natural stone, while others are formulated for manufactured stone.
Test the sealer on a small, inconspicuous area of the stone veneer before applying it to the entire surface. This will help you ensure that the sealer does not discolor or damage the stone.
Apply the sealer in thin, even coats, following the manufacturer’s instructions. Avoid applying too much sealer, as this can create a sticky or glossy finish.
Allow the sealer to dry completely before exposing the stone veneer to water or other elements. Drying time varies depending on the type of sealer and the weather conditions.
Reapply the sealer every few years, or as needed, to maintain optimal protection. The frequency of reapplication will depend on the type of sealer and the exposure of the stone veneer to the elements.
Inspect the sealed stone veneer regularly for any signs of damage or deterioration. Repair any damaged areas promptly to prevent water damage and maintain the integrity of the installation.
Clean the sealed stone veneer regularly with a soft brush and a mild detergent solution. Avoid using harsh chemicals or abrasive cleaners, as these can damage the sealer.
Consider applying a water repellent to the sealed stone veneer to further protect it from water damage. A water repellent will help to prevent water from penetrating the stone and causing staining or cracking.
Protect the sealed stone veneer from extreme temperatures and weather conditions. Extreme temperatures can cause the stone to expand and contract, which can lead to cracking.
Maintaining Your Stone Veneer
Proper maintenance is essential to keep your stone veneer looking its best and prevent costly repairs. Regular cleaning and inspections can help identify and address potential issues before they escalate.
Inspect the veneer periodically for any cracks, loose stones, or damaged grout, and address them promptly. Small repairs can prevent water damage and further deterioration, extending the life of your investment.
Clean the veneer regularly with a soft brush and a mild detergent solution to remove dirt, dust, and algae. Avoid using harsh chemicals or pressure washing, as these can damage the stone and grout.
Consider applying a protective sealant every few years to help repel water and prevent staining. This is especially important in areas with harsh weather conditions or high levels of moisture.
Regularly inspect the stone veneer for signs of efflorescence, a white, powdery deposit that can form on the surface. Efflorescence is caused by mineral salts that dissolve in water and migrate to the surface of the stone.
Remove efflorescence with a stiff brush and a solution of water and vinegar. Avoid using harsh chemicals or abrasive cleaners, as these can damage the stone.
Trim any vegetation that is growing near the stone veneer. Plants can trap moisture and promote the growth of algae and mold.
Repair any cracks in the grout promptly to prevent water damage. Use a grout saw to remove the damaged grout and apply new grout according to the manufacturer’s instructions.
Replace any loose stones immediately to prevent them from falling and causing injury. Use a strong adhesive to attach the stones to the wall.
Consider applying a water repellent to the stone veneer to further protect it from water damage. A water repellent will help to prevent water from penetrating the stone and causing staining or cracking.
Protect the stone veneer from extreme temperatures and weather conditions. Extreme temperatures can cause the stone to expand and contract, which can lead to cracking.
Avoid using de-icing salts on stone veneer surfaces, as these can damage the stone. Use sand or other non-corrosive materials to provide traction on icy surfaces.
If you live in an area with heavy snowfall, clear the snow from the stone veneer surfaces regularly. The weight of the snow can damage the stone.
Consult with a professional stone veneer contractor for advice on maintaining your stone veneer. A professional contractor can provide you with valuable tips and recommendations for keeping your stone veneer looking its best.
Conclusion
Installing stone veneer is a rewarding project that can significantly enhance the beauty and value of your home. By following these steps and taking the time to do it right, you can achieve a professional-looking result that you’ll enjoy for years to come.
From choosing the right veneer types to mastering mortar techniques and maintaining its beauty, this guide has provided you with the knowledge and confidence to tackle your stone veneer installation project. Now, go forth and transform your space with the timeless elegance of stone veneer.
Remember to always prioritize safety and follow all applicable building codes and regulations. A well-executed stone veneer installation can add character and sophistication to your home for decades.
With careful planning, diligent execution, and proper maintenance, your stone veneer project will be a resounding success. Enjoy the process and the beautiful transformation it brings to your living space.