
Adding stone garden edging is a fantastic way to enhance the beauty and functionality of your outdoor space. It provides a clean, defined border that separates your garden beds from your lawn or pathways. With careful planning and a bit of elbow grease, installing stone garden edging can be a rewarding DIY project that adds value to your home.
This guide will walk you through the process, from choosing the right stone to maintaining your new edging for years to come. We’ll cover essential steps like design planning, ground preparation, installation techniques, and backfilling to ensure a professional-looking result.
Whether you’re an experienced gardener or a complete beginner, you’ll find helpful tips and tricks to make your stone garden edging project a success. By the end, you’ll have a beautiful and durable addition to your yard that you can be proud of.
Choosing the Right Stone for Your Garden Edging
Selecting the appropriate stone is the first and perhaps most crucial step in your stone garden edging project. The type of stone you choose will significantly impact the overall look and feel of your garden.
Consider the existing style of your home and garden when making your selection. Do you prefer a rustic, natural look, or a more formal, polished appearance?
For a natural, informal garden, consider using fieldstones or river rocks. These stones have a rounded, organic shape and come in a variety of sizes and colors.
They blend seamlessly into a natural environment, creating a relaxed and inviting atmosphere. These types of edging types are a great choice for a cottage or woodland garden.
If you prefer a more formal, structured look, consider using cut stones like flagstone, slate, or limestone. These stones have clean lines and consistent shapes, offering a sophisticated and polished appearance.
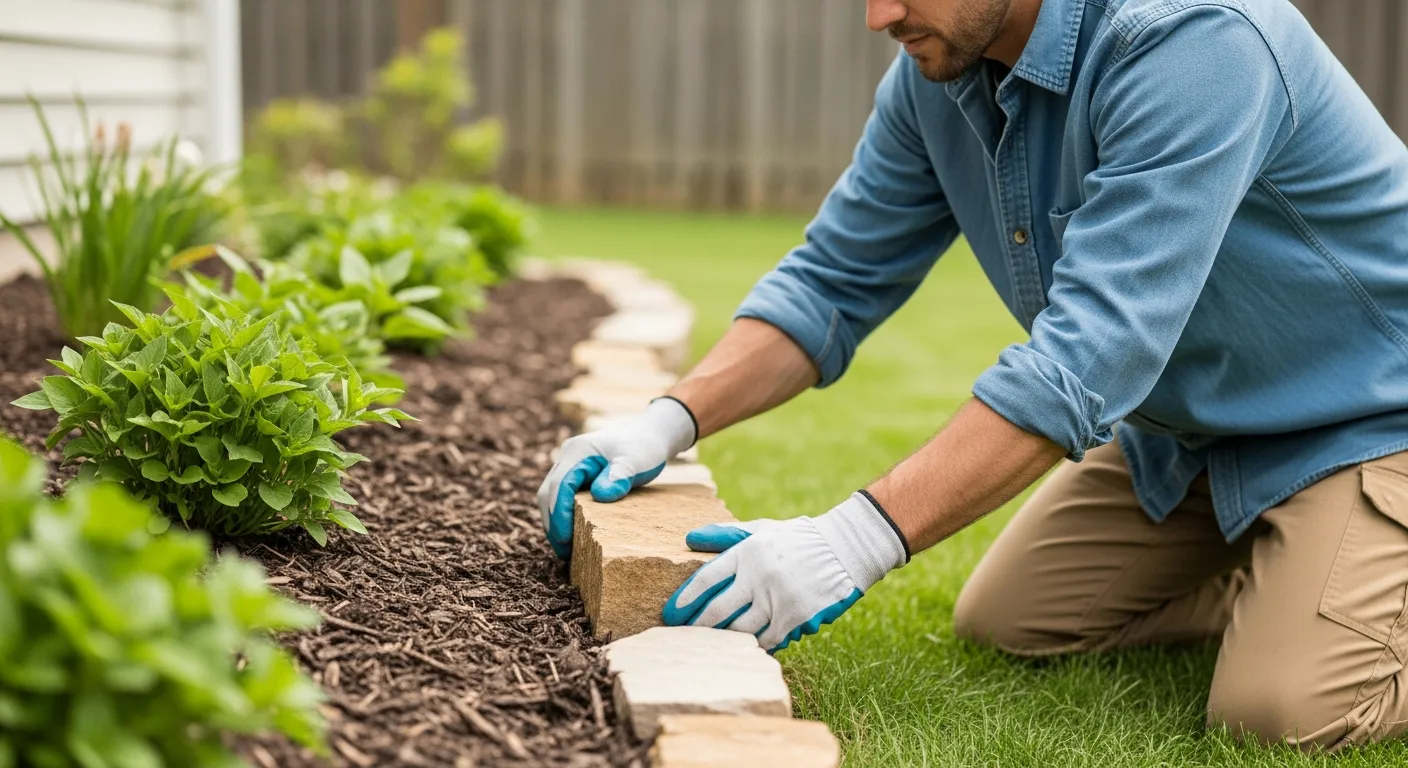
They are perfect for creating a neat and tidy border that complements a well-manicured lawn or a formal garden design. Cut stone is often used in more modern or contemporary landscape edging designs.
Beyond aesthetics, consider the durability of the stone you choose. Some stones are more resistant to weathering and erosion than others.
For example, granite and basalt are extremely durable and can withstand harsh weather conditions, making them ideal for areas with heavy rainfall or extreme temperatures. Softer stones like sandstone or limestone may require more maintenance and may not be suitable for all climates.
Think about the color of the stone and how it will complement the plants in your garden. A contrasting color can create a striking visual effect, while a complementary color can create a more harmonious look.
Consider the size and shape of the stones as well. Larger stones will create a bolder, more substantial border, while smaller stones will create a more delicate and subtle effect. The shape of the stones can also influence the overall look of your edging.
River rocks, for example, have a smooth, rounded shape that is perfect for creating a natural, informal border. Flagstones, on the other hand, have a flat, irregular shape that is ideal for creating a more rustic and textured look. The possibilities are endless when it comes to choosing the right stone for your garden edging.
Don’t forget to consider the cost of the stone as well. Some stones are more expensive than others, so it’s important to find a stone that fits your budget. You can often find good deals on stone at local landscaping supply stores or quarries.
It’s also a good idea to check with your local building codes to see if there are any restrictions on the type of stone you can use for your garden edging. Some municipalities may have regulations regarding the size, shape, or color of stones used in landscaping projects.
Finally, consider the long-term maintenance requirements of the stone you choose. Some stones require more maintenance than others, so it’s important to choose a stone that you are willing to care for. For example, some stones may need to be sealed regularly to protect them from the elements.
Take your time and do your research before making a final decision. The right stone will not only enhance the beauty of your garden but also provide years of enjoyment.
Consider visiting local gardens or nurseries to see examples of different types of stone edging. This can give you a better idea of what you like and what will work well in your own garden.
You can also consult with a landscape designer or contractor for advice on choosing the right stone for your garden edging project. They can provide valuable insights and help you make the best decision for your needs and budget.
Planning Your Garden Edging Design
Before you start digging, take the time to carefully plan your garden edging design. This will help you visualize the final product and ensure a smooth installation process.
Start by measuring the perimeter of your garden bed or the area you want to edge. This will give you an idea of how much stone you’ll need to purchase.
Consider the height and width of the stone you plan to use, and calculate how many stones you’ll need per linear foot. It’s always a good idea to buy a little extra to account for breakage or waste.
Next, decide on the style of edging you want to create. Do you want a straight, formal border, or a more curved, natural one?
Straight lines are easier to install and create a clean, modern look. Curved lines are more challenging but can add a touch of whimsy and charm to your garden design.
Use a garden hose or rope to lay out the desired shape of your edging. This will allow you to visualize the final product and make any necessary adjustments before you start digging.
Pay attention to the existing features of your garden, such as trees, shrubs, and pathways. Make sure your edging complements these elements and doesn’t create any awkward transitions.
Consider the overall flow of your garden design and how the edging will guide the eye. A well-planned garden design will enhance the beauty and functionality of your outdoor space.
Think about the height of your garden edging. Do you want it to be flush with the ground, or do you want it to stand out as a more prominent feature? The height of your edging will affect the overall look and feel of your garden.
Consider the function of your garden edging as well. Is it simply decorative, or will it also serve to retain soil or prevent grass from spreading into your garden bed? The function of your edging will influence the type of stone you choose and the way you install it.
Think about the overall scale of your garden. A small garden may look overwhelmed by large, imposing stones, while a large garden may require larger stones to create a visual impact. Choose stones that are proportional to the size of your garden.
Consider the existing color palette of your garden. Choose stones that complement the colors of your plants, flowers, and other landscape features. A well-coordinated color scheme will create a harmonious and visually appealing garden.
Think about the texture of the stones. Do you want a smooth, polished texture, or a rough, natural texture? The texture of the stones will affect the overall look and feel of your garden.
Consider the maintenance requirements of different edging styles. Some edging styles require more maintenance than others. For example, mortared stone edging may require occasional repairs, while dry-laid stone edging may need to be adjusted periodically.
Don’t be afraid to experiment with different designs and styles. There are no hard and fast rules when it comes to garden edging. The most important thing is to create a design that you love and that complements your garden.
Sketch out your design on paper before you start digging. This will help you visualize the final product and make any necessary adjustments. You can also use online design tools to create a more detailed plan.
Take photos of your garden from different angles. This will help you see how the edging will look from different perspectives. It will also help you identify any potential problems or challenges.
Consult with a landscape designer or contractor for advice on planning your garden edging design. They can provide valuable insights and help you create a design that is both beautiful and functional.
Preparing the Ground for Installation
Proper ground preparation is essential for a stable and long-lasting stone garden edging. A well-prepared base will prevent the stones from shifting or sinking over time.
Start by removing any existing grass, weeds, or debris from the area where you plan to install the edging. Use a shovel or spade to create a trench that is deep enough to accommodate the bottom portion of your stones.
| Stone Type | Trench Depth | Base Material |
|---|---|---|
| Small River Rocks | 4-6 inches | Gravel or Sand |
| Medium Fieldstones | 6-8 inches | Compacted Soil & Gravel |
| Large Flagstones | 8-10 inches | Concrete or Mortar |
| Slate Edging | 4-6 inches | Sand or Paver Base |
The depth of the trench will depend on the size and type of stone you’re using. Consult the table above for general guidelines.
Once you’ve dug the trench, it’s important to create a solid base for the stones. This will help to prevent them from shifting or sinking over time. The type of base you use will depend on the type of stone you’re using and the soil conditions in your area.
For small river rocks or pebbles, a layer of sand or gravel is usually sufficient. Simply pour a layer of sand or gravel into the trench and compact it using a tamper or the back of a shovel. Make sure the base is level before you start laying the stones.
For medium-sized fieldstones, a more substantial base of compacted soil and gravel is recommended. Start by adding a layer of compacted soil to the trench, followed by a layer of gravel. Compact both layers thoroughly to create a solid base.
For large flagstones or other heavy stones, a concrete or mortar base is often necessary. This will provide the most stable and durable foundation for your edging. Pour a layer of concrete or mortar into the trench and level it using a trowel. Allow the concrete or mortar to cure completely before you start laying the stones.
If you have clay soil, it’s important to improve the drainage before you install your garden edging. Clay soil tends to retain water, which can cause the stones to shift or sink over time. To improve drainage, you can add a layer of sand or gravel to the bottom of the trench.
You can also install a drainage system to help remove excess water from the area. A simple drainage system can consist of a perforated pipe buried in the trench, surrounded by gravel. The pipe will collect water and carry it away from the edging.
Before you start digging, it’s a good idea to call your local utility companies to mark any underground lines. This will help you avoid damaging any pipes or cables while you’re digging.
Wear appropriate safety gear when preparing the ground for your garden edging. This includes gloves, safety glasses, and sturdy shoes. Protect yourself from injury by taking the necessary precautions.
Use a level to ensure that the base of the trench is even. This will help to prevent the stones from wobbling or tilting. A level base is essential for a stable and professional-looking edging.
Take your time and do a thorough job of preparing the ground. The effort you put in at this stage will pay off in the long run. A well-prepared base will ensure that your stone garden edging lasts for many years to come.
Laying the Stone Edging
With the ground prepared, it’s time to start laying your stone garden edging. This is where your planning and preparation will pay off, as you begin to see your design come to life.
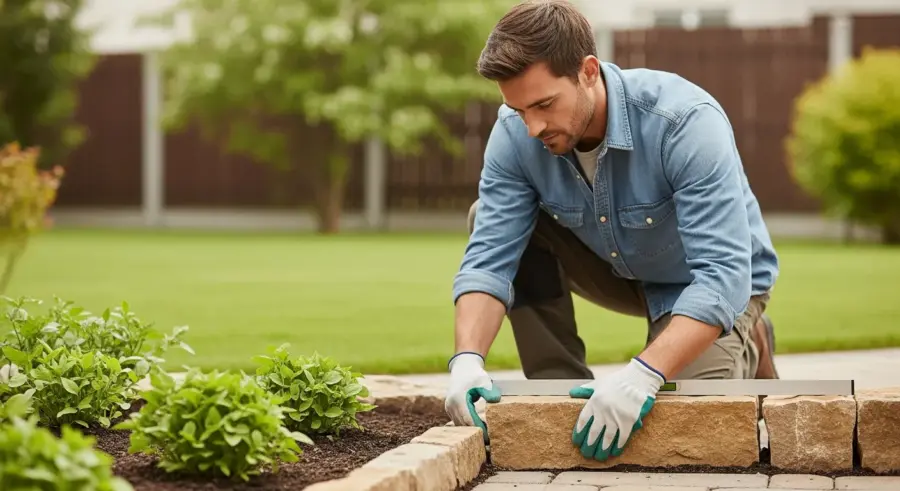
Begin by placing the first stone at one end of your prepared trench. Ensure that it is level and stable, using a level and rubber mallet to make any necessary adjustments.
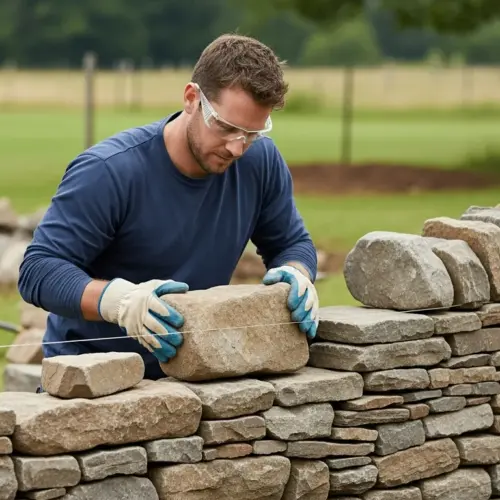
For dry-laid stone edging, which is the most common DIY method, fit the stones together as closely as possible. Varying the sizes and shapes of the stones can create a more natural, organic look.
However, ensure that each stone is stable and doesn’t wobble. Use smaller stones or gravel to fill in any gaps between the larger stones.
For a more permanent and formal look, you can use mortar to set the stones in place. Mix the mortar according to the manufacturer’s instructions and apply it to the base of each stone before setting it in the trench.
Use a trowel to smooth the mortar and remove any excess. Mortared stone edging requires more skill and time, but it provides a very durable and professional-looking result.
As you lay each stone, check its alignment with the previous one. Use a string line or level to ensure that the edging remains straight and consistent.
For curved sections, you may need to use smaller stones or cut larger stones to fit the desired shape. A wet saw with a diamond blade is ideal for cutting stone, but a hammer and chisel can also be used for smaller adjustments.
If you’re using dry-laid stone, consider interlocking the stones for added stability. This can be done by overlapping the stones slightly or by using stones with irregular shapes that fit together like puzzle pieces. Interlocking the stones will help to prevent them from shifting or being dislodged.
When laying the stones, pay attention to the overall appearance of the edging. Try to create a consistent height and spacing between the stones. However, don’t be afraid to add some variation to create a more natural look.
If you’re using mortar, be sure to clean any excess mortar from the stones before it dries. Dried mortar can be difficult to remove and can detract from the appearance of the edging.
Use a rubber mallet to gently tap the stones into place. This will help to ensure that they are firmly seated in the trench and that they are level with each other. Avoid using a metal hammer, as this can damage the stones.
If you’re working on a slope, you may need to use retaining wall blocks to create a stable edging. Retaining wall blocks are designed to withstand the pressure of the soil behind them and can help to prevent erosion.
Consider using landscape fabric behind the edging to prevent weeds from growing through the stones. Landscape fabric is a permeable material that allows water to drain through but prevents weeds from sprouting.
Take breaks as needed to avoid fatigue. Laying stone edging can be physically demanding, so it’s important to pace yourself and take breaks when you need them.
Don’t be afraid to ask for help if you need it. If you’re struggling to lay the stones, ask a friend or family member to lend a hand. Two people can often work much faster than one.
Step back and admire your work periodically. This will help you see how the edging is coming together and identify any areas that need adjustment. It’s also a good way to stay motivated and inspired.
Backfilling and Securing the Edging
Once you’ve laid all the stones, it’s time to backfill the trench and secure the edging. This will provide additional stability and prevent the stones from shifting over time.
Start by filling the trench behind the stones with soil or gravel. Compact the backfill material using a tamper or the back of a shovel.
This will help to settle the soil and prevent it from eroding. Ensure that the backfill material is level with the surrounding ground.
For added stability, you can use landscape adhesive to glue the stones together. Apply the adhesive to the joints between the stones, following the manufacturer’s instructions.
This is especially useful for dry-laid stone edging, as it helps to prevent the stones from shifting or being dislodged. Landscape adhesive is a great way to ensure your edging lasts for years to come.
If you’re using mortar, allow it to cure for at least 24 hours before backfilling. This will give the mortar time to harden and provide a strong bond between the stones.
Once the backfilling is complete, you can add a layer of mulch or decorative gravel to the garden bed. This will help to retain moisture, suppress weeds, and enhance the overall appearance of your garden.
Consider using a mulch that complements the color and texture of your stone edging. This will create a cohesive and visually appealing landscape design.
If you’re using soil as backfill, make sure it’s free of rocks and debris. This will help to prevent the stones from shifting or settling unevenly. You can also amend the soil with compost or other organic matter to improve its drainage and fertility.
Consider using edging restraints to further secure the stones. Edging restraints are plastic or metal strips that are buried in the ground behind the edging. They help to prevent the stones from shifting or tilting.
If you’re using landscape adhesive, be sure to apply it sparingly. Too much adhesive can create a messy appearance. Apply just enough adhesive to hold the stones together securely.
Use a tamper to compact the backfill material thoroughly. This will help to prevent the soil from settling and creating gaps between the stones. A well-compacted backfill is essential for a stable and long-lasting edging.
If you’re using mulch, be sure to apply it evenly. A thick layer of mulch can smother plants, while a thin layer may not be effective at suppressing weeds. Aim for a layer of mulch that is about 2-3 inches thick.
Consider adding a layer of topsoil to the garden bed after you’ve backfilled the trench. This will provide a nutrient-rich layer for your plants to grow in. Topsoil is a great way to improve the health and vitality of your garden.
Water the backfilled area thoroughly after you’ve completed the project. This will help to settle the soil and encourage plant growth. Watering is an important step in ensuring the success of your garden edging project.
Inspect the edging regularly for any signs of shifting or erosion. Address any issues promptly to prevent them from worsening. Regular maintenance is essential for keeping your edging looking its best.
Enjoy your beautiful new stone garden edging! It will add beauty and value to your home for many years to come. Your hard work and effort will be well worth it.
Maintaining Your Stone Garden Edging
With your stone garden edging installed, it’s important to maintain it properly to ensure its longevity and beauty. Regular maintenance will prevent problems and keep your edging looking its best.
Inspect your edging regularly for any signs of shifting, cracking, or erosion. Address any issues promptly to prevent them from worsening.
- Pull weeds regularly
- Reapply mulch annually
- Clean stones as needed
- Check for loose stones
- Repair mortar joints
This will help to keep your edging looking its best. A little bit of maintenance goes a long way.
Weeds can be a persistent problem in garden edging. They can grow between the stones and detract from the overall appearance of your garden. To prevent weeds from growing, pull them regularly by hand or use a weed killer.
Mulch helps to suppress weeds, retain moisture, and regulate soil temperature. Reapply mulch annually to keep your garden looking its best. Choose a mulch that complements the color and texture of your stone edging.
Over time, stones can become dirty or stained. Clean them as needed with a brush and soapy water. For stubborn stains, you can use a pressure washer.
Check for loose stones regularly and re-secure them as needed. Loose stones can be a tripping hazard and can also detract from the appearance of your edging. Use landscape adhesive or mortar to re-secure the stones.
If you used mortar to set the stones, inspect the mortar joints regularly for any cracks or damage. Repair any damaged mortar joints with fresh mortar. This will help to prevent water from seeping into the joints and causing further damage.
Consider applying a sealant to the stones to protect them from the elements. A sealant will help to prevent staining and erosion. Choose a sealant that is specifically designed for use on stone.
Trim any overhanging plants or shrubs that are blocking the edging. This will help to keep the edging visible and prevent it from becoming overgrown.
Avoid using harsh chemicals or abrasive cleaners on the stones. These can damage the surface of the stones and detract from their appearance. Use mild soap and water for cleaning.
Protect the edging from damage during the winter months. If you live in an area with heavy snowfall, consider covering the edging with a tarp to protect it from the weight of the snow.
Regularly inspect the drainage around the edging. Make sure that water is draining away from the edging and not pooling around it. Poor drainage can cause the stones to shift or sink over time.
Take pride in your stone garden edging and enjoy its beauty for many years to come. With proper maintenance, it will continue to enhance your outdoor space for years to come.
Consider adding lighting to your stone garden edging. This will enhance its beauty at night and create a warm and inviting atmosphere in your garden. You can use solar lights, LED lights, or traditional landscape lighting.
Conclusion
Installing stone garden edging is a simple way to add beauty and value to your home. By following these steps, you can create a durable and attractive border that enhances your outdoor space.
Remember to choose the right stone, plan your design carefully, and prepare the ground properly. With a little bit of effort, you can transform your garden into a stunning oasis.
Don’t be afraid to get creative with your design and experiment with different stone types and styles. The possibilities are endless, and the results can be truly rewarding.
Enjoy your beautiful new stone garden edging and the many years of enjoyment it will bring. This DIY project is sure to impress your neighbors and enhance your curb appeal.
Stone garden edging is not only aesthetically pleasing but also a practical solution for defining garden spaces. It helps to contain mulch, prevent soil erosion, and keep grass from encroaching on your flower beds. This creates a cleaner and more organized look for your entire yard.
The durability of stone ensures that your edging will withstand the elements and last for many years. Unlike wood or plastic edging, stone is resistant to rot, pests, and fading, making it a low-maintenance option for your garden.
Adding stone garden edging can also increase the value of your home. It’s a relatively inexpensive project that can have a big impact on your curb appeal. A well-maintained garden with attractive edging can make your home more appealing to potential buyers.
So, gather your tools, choose your stones, and get ready to transform your garden with beautiful and durable stone edging. It’s a project you’ll be proud of for years to come, adding both beauty and functionality to your outdoor space.