Creating a beautiful and functional outdoor space can significantly enhance your home’s value and your enjoyment of the property. A well-designed and properly installed stone patio can become the centerpiece of your outdoor living area, providing a space for relaxation, entertainment, and connection with nature.
This guide will provide you with a comprehensive, step-by-step approach to stone patio installation, perfect for beginners eager to transform their backyards. From initial planning and design to the final touches, we’ll cover every aspect of the process, ensuring a successful and satisfying DIY project.
Get ready to roll up your sleeves and create a stunning stone patio that you’ll be proud of for years to come. With the right tools, materials, and a bit of patience, stone patio installation is within reach for any homeowner looking to elevate their outdoor space.
Planning Your Stone Patio Design and Size
Before you even think about digging, take some time to carefully plan your patio design. Consider the size, shape, and location of your patio in relation to your house and yard.
Think about how you intend to use the space; will it be primarily for dining, lounging, or entertaining? The intended use will influence the size and layout of your stone patio installation.
When planning the size, bigger isn’t always better, especially if you’re tackling this project yourself. A smaller, well-executed patio will be more enjoyable than a sprawling, poorly installed one, so start small and focus on quality.
Sketch out a few different patio designs, paying attention to the flow of traffic and the placement of furniture. Consider the existing features of your yard, such as trees, shrubs, and pathways, and how your patio design can complement them.
Consider the overall style of your home and garden when brainstorming patio designs. A rustic stone patio might perfectly complement a cottage-style garden, while a sleek, modern design could be a better fit for a contemporary home.
Think about the view from your patio. Position it to take advantage of scenic vistas or to create a private retreat shielded from neighbors.
Also, consider the sun exposure your patio will receive. A south-facing patio will get the most sun, while a north-facing patio will be shadier. Plan accordingly to ensure your patio is comfortable to use throughout the day.
Don’t forget to factor in drainage when planning your patio. Ensure that water will flow away from your house and prevent puddling on the patio surface. A slight slope is usually sufficient for proper drainage during stone patio installation.
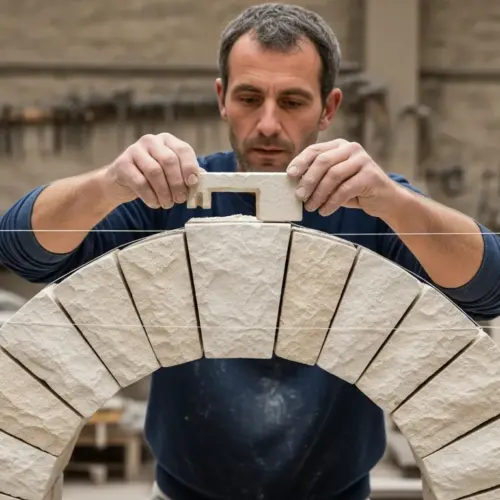
Choosing the Right Stone for Your Patio
The type of stone you choose will significantly impact the look and feel of your patio. Some popular options include flagstone, pavers, brick, and concrete, each with its own unique characteristics and aesthetic appeal.
Flagstone offers a natural, irregular look, while pavers provide a more uniform and structured appearance. Brick adds a classic charm, and concrete can be customized with various colors and textures.
Consider the climate in your area when selecting your stone. Some stones are more resistant to weathering and temperature changes than others, which is an important factor to consider for long-term durability.
Also, think about the color and texture of the stone in relation to your home’s exterior and the surrounding environment. A cohesive design will create a more visually appealing and harmonious outdoor space.
Beyond aesthetics, consider the cost and availability of different stone options. Some stones are more expensive and harder to find than others, which can impact your budget and timeline for stone patio installation.
Think about the maintenance requirements of different stones. Some stones are more porous and require more frequent sealing than others to prevent staining and water damage.
Consider the size and shape of the stones you choose. Larger stones can create a more dramatic look, while smaller stones are easier to work with and can be used to create intricate patterns.
Visit local stone yards and suppliers to see and feel the different stone options in person. This will help you make a more informed decision and ensure that you choose a stone that you love.
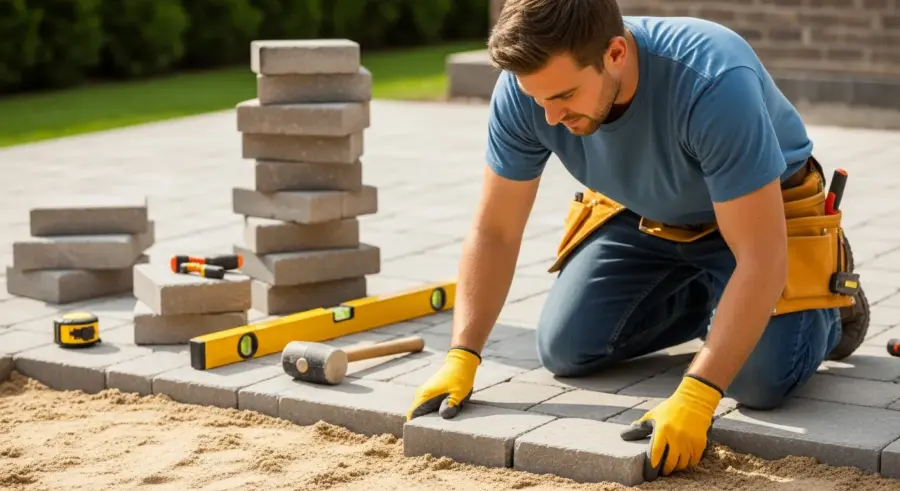
Gathering the Necessary Tools and Materials
Before you begin the actual stone patio installation, make sure you have all the necessary tools and materials on hand. This will help streamline the process and prevent unnecessary delays.
You’ll need tools like a shovel, rake, tamper, level, measuring tape, and a wheelbarrow. For cutting stones, you might need a circular saw with a diamond blade or a masonry chisel and hammer.
| Tool/Material | Purpose | Quantity |
|---|---|---|
| Shovel | Digging and moving soil | 1 |
| Rake | Leveling the base | 1 |
| Tamper | Compacting the base | 1 |
| Level | Ensuring a flat surface | 1 |
| Measuring Tape | Measuring dimensions | 1 |
| Wheelbarrow | Transporting materials | 1 |
| Stone Pavers | Patio surface | Sufficient for area |
| Gravel Base | Foundation for patio | Varies by area |
| Sand | Setting bed for pavers | Varies by area |
In addition to the tools and materials listed above, consider renting or borrowing a plate compactor for compacting the gravel base. A plate compactor will provide a more thorough and even compaction than a hand tamper, resulting in a more stable patio.
Make sure you have safety gear, such as safety glasses, gloves, and a dust mask. Protecting yourself from flying debris and dust is essential during stone patio installation.
Consider using landscape fabric underneath the gravel base to prevent weeds from growing up through the patio. Landscape fabric will also help to stabilize the base and prevent it from shifting over time.
Purchase extra stone pavers or slabs to account for breakage and cutting waste. It’s always better to have too much material than not enough, especially when working with natural stone.
Preparing the Base for Your Stone Patio
A solid base is crucial for the longevity and stability of your stone patio. Proper base preparation will prevent settling, shifting, and other problems down the road, so don’t skip this step.
Start by excavating the area for your patio to a depth of at least 6-8 inches. Remove any grass, roots, and debris, and level the ground as much as possible.
Next, add a layer of gravel base material, typically 4-6 inches thick. This layer provides drainage and helps distribute weight evenly, so be sure to use a high-quality gravel that is well-graded.
Compact the gravel base thoroughly using a tamper. A well-compacted base is essential for preventing settling and ensuring a stable foundation for your stone patio installation.
Before excavating, call your local utility companies to mark any underground lines or pipes. Digging without knowing the location of these utilities can be dangerous and costly.
Use a laser level or string level to ensure that the excavated area is perfectly level. A level base is essential for creating a flat and even patio surface.
Consider using a geotextile fabric between the soil and the gravel base to prevent the soil from mixing with the gravel. This will help to maintain the integrity of the base and prevent settling.
When compacting the gravel base, work in layers, compacting each layer thoroughly before adding the next. This will ensure that the base is evenly compacted and stable.
Creating a Level Sand Bed
After compacting the gravel base, add a layer of sand, about 1-2 inches thick. This sand bed will serve as a cushion for your stone pavers or slabs and help you achieve a perfectly level surface.
Use a rake to spread the sand evenly, and then use a screed board to create a smooth, level surface. A screed board is simply a straight piece of wood or metal that you drag across the sand to remove excess material and fill in any low spots.
Check the level of the sand bed frequently with a level, and make any necessary adjustments. A level sand bed is crucial for ensuring that your stone patio is flat and even.
Avoid compacting the sand bed, as this can make it difficult to adjust the pavers later. The goal is to create a loose, even surface that allows you to easily set the stones in place.
Use a coarse sand, such as paver sand, for the sand bed. Fine sand can compact too easily and make it difficult to adjust the pavers.
Create a screed board that is long enough to span the width of your patio. This will make it easier to create a perfectly level sand bed.
Consider using PVC pipes as guides for your screed board. Place the pipes on the gravel base and spread the sand between them, then use the screed board to level the sand to the top of the pipes.
Check the level of the sand bed in multiple directions to ensure that it is perfectly flat. A slight slope away from your house is still recommended for drainage during stone patio installation.
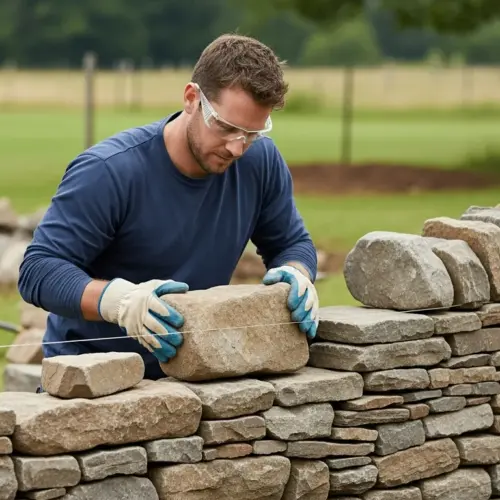
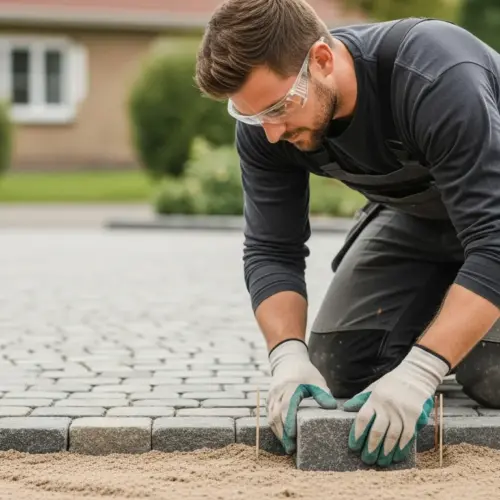
Laying the Stone Pavers or Slabs
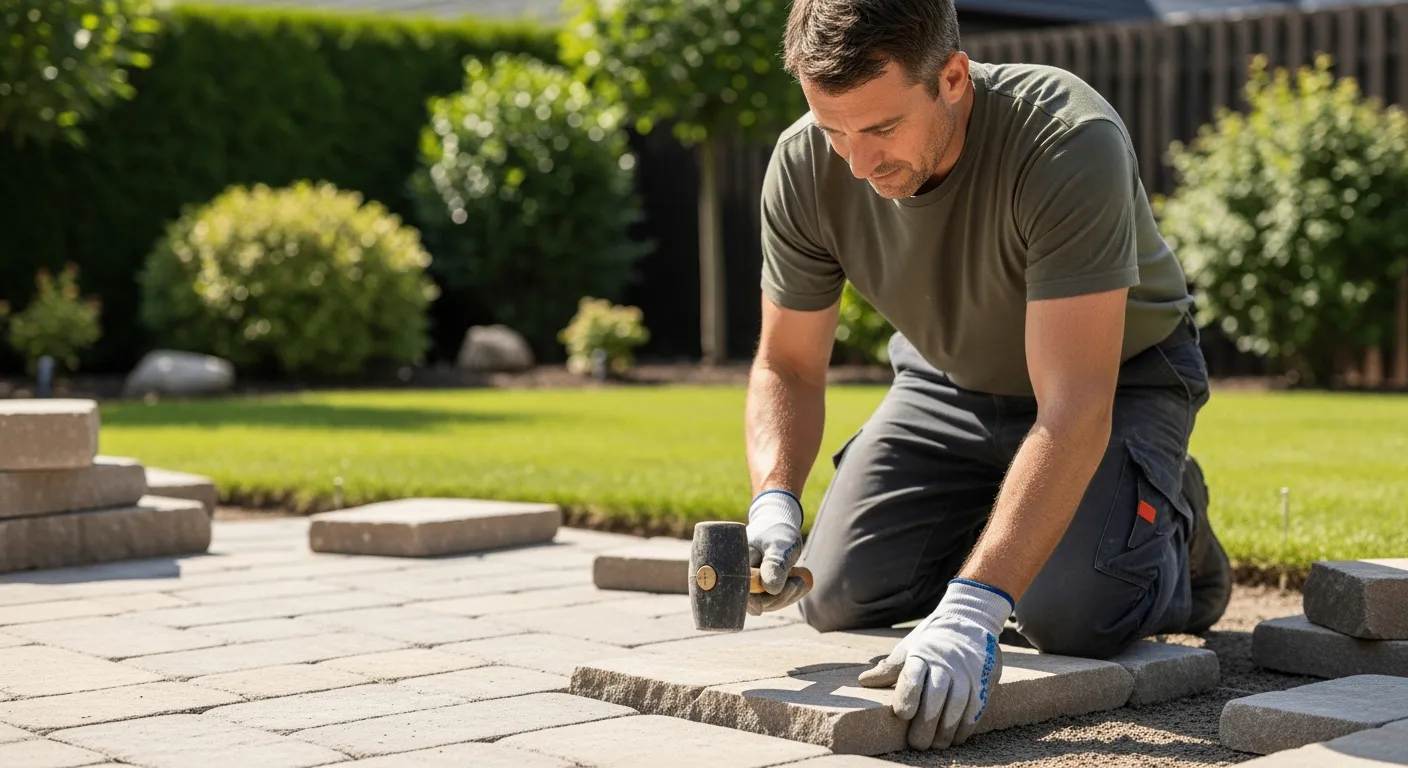
Now comes the fun part: laying the stone pavers or slabs. Start by placing the first paver in a corner or along an edge, and then work your way across the patio area.
Gently press each paver into the sand bed, and use a rubber mallet to tap it into place. Be careful not to hit the pavers too hard, as this can damage them.
Check the level of each paver with a level, and make any necessary adjustments by adding or removing sand underneath. Aim for a perfectly level surface, but allow for a slight slope away from your house to ensure proper drainage.
Maintain consistent spacing between the pavers, using spacers if necessary. Consistent spacing will not only look better but also make it easier to fill the joints later.
When laying irregular-shaped stones, such as flagstone, try to create a natural-looking pattern. Avoid creating long, straight lines, as these can look unnatural.
Stagger the joints between the pavers to create a stronger and more visually appealing patio. Staggering the joints will also help to prevent cracking and shifting.
Use a string line to ensure that the pavers are laid in a straight line. A string line will help you maintain consistent spacing and alignment.
Periodically step back and look at your work from a distance to check for any inconsistencies or imperfections. Addressing these issues early on will save you time and effort in the long run during stone patio installation.
Cutting Stones to Fit
Inevitably, you’ll need to cut some stones to fit around edges, corners, and other obstacles. Use a circular saw with a diamond blade or a masonry chisel and hammer to cut the stones to the desired shape and size.
Measure carefully and mark the cutting line on the stone. When using a circular saw, wear safety glasses and a dust mask to protect yourself from flying debris.
For a cleaner cut, make several shallow passes with the saw instead of trying to cut through the stone in one go. If using a masonry chisel and hammer, score the cutting line first, and then gently tap the chisel along the line until the stone breaks.
Take your time and be patient, as cutting stones can be tricky. A well-cut stone will blend seamlessly into the patio and create a more professional finish for your stone patio installation.
Consider renting a wet saw for cutting stones. A wet saw uses water to cool the blade and reduce dust, resulting in a cleaner and more precise cut.
Practice cutting on scrap pieces of stone before cutting the actual pavers. This will help you get a feel for the cutting process and avoid mistakes.
Use a grinder with a diamond blade to smooth the edges of cut stones. This will prevent sharp edges and create a more finished look.
When cutting stones with a chisel and hammer, use a bolster chisel for a cleaner and more controlled break. A bolster chisel has a wide, flat blade that distributes the force evenly across the cutting line.
Filling the Joints and Sealing the Patio
Once all the pavers are in place, it’s time to fill the joints between them. This will help stabilize the patio and prevent weeds from growing in the cracks.
There are several options for filling the joints, including polymeric sand, gravel, or mortar. Polymeric sand is a popular choice because it hardens when wet, creating a durable and weed-resistant joint.
To apply polymeric sand, sweep it into the joints using a broom, and then use a leaf blower to remove any excess sand from the paver surfaces. Next, lightly mist the patio with water to activate the polymer and harden the sand.
Allow the polymeric sand to dry completely before using the patio. Sealing the patio can provide added protection against stains, weathering, and other damage, extending the life of your stone patio installation.
Choose a polymeric sand that is specifically designed for paver joints. These sands are formulated to provide the best combination of durability, weed resistance, and flexibility.
Avoid over-watering the polymeric sand, as this can cause it to become too soft and wash away. Lightly mist the patio with water, following the manufacturer’s instructions.
Apply a sealer that is specifically designed for stone patios. These sealers will protect the stone from stains, weathering, and UV damage.
Reapply the sealer every few years to maintain its protective properties. The frequency of reapplication will depend on the type of sealer used and the amount of traffic the patio receives.
Adding Finishing Touches to Your Patio
Now that the stone patio installation is complete, it’s time to add the finishing touches that will make it a truly inviting and enjoyable space. Consider adding furniture, plants, lighting, and other decorative elements to personalize your patio.
Choose comfortable and durable outdoor furniture that suits your style and needs. Add potted plants or flower beds to bring color and life to the patio, and install outdoor lighting to create a warm and inviting ambiance in the evenings.
- Install string lights or lanterns
- Add an outdoor rug for comfort
- Incorporate a fire pit or chiminea
- Include a water feature for relaxation
- Hang outdoor art or decorations
Don’t be afraid to experiment and get creative with your patio design. The goal is to create a space that reflects your personality and provides a comfortable and enjoyable outdoor living area.
Consider adding a pergola or gazebo to provide shade and create a focal point on your patio. A pergola or gazebo can also add privacy and protection from the elements.
Incorporate built-in seating or a retaining wall to create a more permanent and functional outdoor space. Built-in seating can save space and provide a comfortable place to relax.
Add outdoor speakers to create a relaxing and enjoyable atmosphere. Outdoor speakers can be used to play music, podcasts, or audiobooks.
Don’t forget to add some personal touches, such as family photos, artwork, or other decorative items that reflect your personality. These personal touches will make your patio feel like home.
Maintaining Your Stone Patio
To keep your stone patio looking its best, regular maintenance is essential. Sweep or hose off the patio regularly to remove dirt, leaves, and other debris.
Inspect the patio for any cracks, chips, or loose pavers, and make repairs as needed. Reapply polymeric sand to the joints every few years to maintain their stability and weed-resistance.
Clean the patio with a mild detergent and water to remove stains and grime. Avoid using harsh chemicals or abrasive cleaners, as these can damage the stone.
Consider sealing the patio every few years to protect it from the elements and extend its lifespan. With proper care and maintenance, your stone patio will provide years of enjoyment and enhance the beauty of your outdoor space.
Use a pressure washer with a wide nozzle to clean the patio, but be careful not to damage the stone or joints. Avoid using a high-pressure setting, as this can erode the stone and wash away the joint filler.
Remove any weeds that grow in the joints between the pavers. Weeds can be removed by hand or with a weed killer specifically designed for paver patios.
Protect the patio from snow and ice in the winter. Use a snow shovel or snow blower to remove snow, and apply a de-icing agent to prevent ice from forming.
Inspect the patio regularly for any signs of damage, such as cracks, chips, or loose pavers. Addressing these issues early on will prevent them from becoming more serious and costly to repair.
Conclusion
Installing a stone patio is a rewarding DIY project that can transform your outdoor living space. By following these step-by-step instructions and taking the time to plan and execute each stage carefully, you can create a beautiful and functional patio that you’ll be proud of for years to come.
Remember to choose the right stone, prepare a solid base, and pay attention to detail when laying the pavers. With a little effort and creativity, your new stone patio will become the centerpiece of your outdoor oasis.