Creating a stone bench can transform your outdoor space into a charming and inviting area. It offers a perfect spot for relaxation, contemplation, or simply enjoying the beauty of nature. Building a stone bench is a rewarding project that combines functionality with aesthetic appeal, providing a unique and personalized touch to your garden or patio.
This step-by-step guide will walk you through the process of building a stone bench, from the initial design considerations to the final finishing touches. Whether you’re an experienced DIY enthusiast or a beginner, this guide will provide you with the knowledge and confidence to tackle this project successfully. Let’s get started and turn your outdoor space into a beautiful and functional retreat by building a stone bench.
With careful planning and attention to detail, you can create a stunning outdoor feature that will last for years to come. This guide focuses on the practical aspects of building a stone bench diy, ensuring that the process is straightforward and enjoyable. By the end of this article, you’ll have a beautiful and functional stone bench ready for use.
Designing Your Stone Bench
Before you begin the physical construction, it’s important to carefully design your stone bench. Consider the overall style and aesthetic you want to achieve. A rustic, natural look might involve using irregularly shaped stones, while a more modern design could feature clean lines and uniform blocks.
Think about the dimensions of your bench, ensuring it fits comfortably in the intended space. Standard bench heights range from 16 to 20 inches, but you can adjust this based on your personal preference and the height of any existing seating. The length and depth of the bench should also be proportional to the space and provide ample seating area.
Sketch out a few different designs to visualize how the bench will look in your outdoor area. Take into account any existing features like trees, pathways, or garden beds. Integrating the bench seamlessly into its surroundings will enhance its overall appeal.
Also, consider the practical aspects of your design, such as drainage and stability. Ensure the bench is positioned on a level surface to prevent wobbling or instability. Planning for proper drainage will protect the stone from water damage and extend the life of your bench.
Consider the ergonomics of your stone bench design. A slight backrest can significantly increase comfort for extended periods of sitting. You can achieve this with carefully placed stones or by incorporating a separate backrest structure.

Think about the overall purpose of the bench within your outdoor space. Is it intended for solitary relaxation, or will it be used for social gatherings? This will influence the size, shape, and placement of your stone bench.
Don’t forget to factor in any weight restrictions or load-bearing considerations. Ensure that the chosen stones and base are capable of supporting the intended weight. Overbuilding is always preferable to underbuilding when it comes to structural integrity.
Consider the surrounding landscape and how the bench will interact with it. Will it be nestled amongst flowers, overlooking a scenic view, or placed near a water feature? The location and orientation of the bench can greatly enhance its appeal and functionality.
Think about incorporating different textures and colors into your design. Mixing different types of stone can create a visually interesting and unique look. Consider adding decorative elements like pebbles, mosaics, or carvings to personalize your stone bench.
Remember to check local building codes and regulations before starting your project. Some areas may have restrictions on the size, height, or placement of outdoor structures. Ensuring compliance with these regulations will prevent any potential issues down the line.
Consider the long-term maintenance requirements of your chosen design. Simpler designs with fewer intricate details will generally be easier to maintain. Choose materials and finishes that are resistant to weathering and require minimal upkeep.
Think about the accessibility of your stone bench. Ensure that it is easily accessible from pathways or other areas of your outdoor space. Consider adding ramps or other features to make it accessible to people with mobility issues.
Finally, consider the overall flow of your outdoor space. The stone bench should complement the existing layout and enhance the overall functionality of the area. Avoid placing it in areas that obstruct pathways or create bottlenecks.
Selecting the Right Stone
Choosing the right stone is crucial for both the appearance and durability of your outdoor stone bench. Different types of stone offer varying degrees of weather resistance, color, and texture. Some popular options include sandstone, limestone, granite, and slate.
Sandstone is known for its warm, earthy tones and relatively soft texture, making it easy to work with. Limestone offers a similar aesthetic but can be more susceptible to weathering in certain climates. Granite is extremely durable and resistant to scratches and stains, but it can be more challenging to cut and shape.
Slate provides a sleek, modern look with its dark, smooth surface, but it can be prone to chipping if not handled carefully. Consider the local climate and the level of maintenance you’re willing to undertake when making your selection. Opting for locally sourced stone can often be a more sustainable and cost-effective choice.
When selecting individual stones, look for pieces that are relatively flat and stable. Avoid stones with large cracks or fissures, as these can weaken over time. It’s also a good idea to choose stones that are consistent in size and shape to simplify the assembly process.
Consider the weight of the stones you select. Larger stones can be difficult to maneuver and may require specialized equipment. Ensure you have the necessary tools and manpower to safely handle the chosen stones.
Think about the color variations within the stone. Some stones have natural variations in color that can add character and interest to your bench. However, too much variation can create a disjointed or chaotic look.
Consider the texture of the stone. Rough, textured stones can provide a more rustic and natural feel, while smooth, polished stones can create a more modern and sophisticated look. Choose a texture that complements the overall style of your outdoor space.
Don’t forget to consider the cost of the stone. Different types of stone vary significantly in price. Set a budget before you start shopping and stick to it. Locally sourced stone is often a more affordable option.
Think about the environmental impact of your stone selection. Choosing sustainably sourced stone can help minimize your carbon footprint. Look for stone suppliers who are committed to responsible quarrying practices.
Consider the long-term availability of the stone. If you plan to add to your bench or build other stone features in the future, ensure that the chosen stone will be readily available. This will help maintain a consistent look throughout your outdoor space.
Think about the ease of working with the stone. Some stones are easier to cut, shape, and drill than others. If you are a beginner, choose a stone that is relatively easy to work with to avoid frustration and potential injuries.
Consider the porosity of the stone. Porous stones are more susceptible to water damage and staining. If you choose a porous stone, be sure to apply a sealant to protect it from the elements.
Think about the overall aesthetic you want to achieve. The stone you choose should complement the style of your home and garden. Consider the colors, textures, and patterns that will best enhance your outdoor space.
Finally, don’t be afraid to ask for advice from stone suppliers or landscape professionals. They can provide valuable insights and recommendations based on your specific needs and preferences. Their expertise can help you make the best possible choice for your stone bench project.
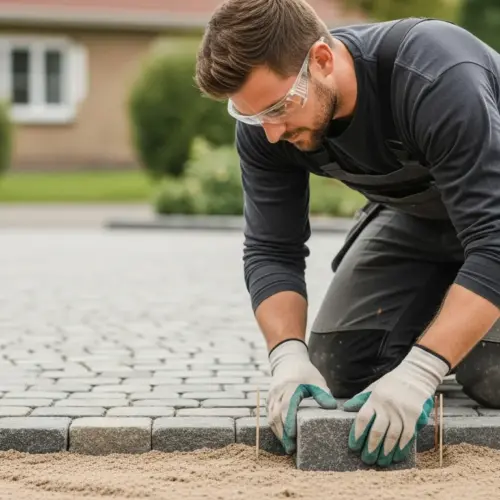
Preparing the Base
A solid and well-prepared base is essential for the stability and longevity of your stone bench diy. Start by selecting a suitable location that is level and free from obstructions. Clear away any grass, weeds, or debris from the area.
Dig down approximately 6 to 8 inches to create a foundation for the base. This will help prevent the bench from shifting or sinking over time.
| Material | Purpose | Application |
|---|---|---|
| Gravel | Provides drainage and stability | Spread evenly across the excavated area |
| Sand | Creates a level surface | Layer on top of the gravel, compacting as you go |
| Concrete Pavers | Distributes weight and prevents sinking | Place on top of the sand layer |
| Landscape Fabric | Prevents weed growth | Lay between the gravel and sand layers |
Add a layer of gravel to the excavated area, spreading it evenly to a depth of about 4 inches. Compact the gravel using a hand tamper or plate compactor to create a stable and level surface.
Consider using landscape fabric beneath the gravel layer to prevent weed growth. This will help keep your base clean and free from unwanted vegetation. Landscape fabric is a permeable material that allows water to drain through while blocking weed seeds.
After compacting the gravel, add a layer of sand to create a smooth and level surface for the stones. Use a level to ensure that the sand layer is perfectly even. This will provide a stable foundation for the stones and prevent them from wobbling.
Consider using concrete pavers or stepping stones as a base for your stone bench. These can provide a more solid and stable foundation than gravel or sand alone. Ensure that the pavers are level and evenly spaced to distribute the weight of the bench evenly.
If you are building a larger or heavier stone bench, consider pouring a concrete foundation. This will provide the most stable and durable base for your bench. Be sure to consult with a professional contractor to ensure that the foundation is properly designed and installed.
Think about the drainage of your base. Ensure that water can drain away from the bench to prevent erosion and water damage. Consider adding a drainage system or sloping the base slightly to promote water runoff.
Consider the surrounding soil conditions. If the soil is unstable or prone to shifting, you may need to take additional steps to reinforce the base. This could involve adding additional layers of gravel or using soil stabilization techniques.
Think about the long-term maintenance of your base. Choose materials that are durable and resistant to weathering. Regularly inspect the base for any signs of damage or erosion and make repairs as needed.
Consider the aesthetic of your base. The base should complement the overall design of your stone bench and outdoor space. Choose materials and colors that blend in with the surrounding landscape.
Finally, don’t be afraid to ask for help from a professional contractor or landscaper. They can provide valuable advice and assistance in preparing a solid and durable base for your stone bench. Their expertise can help ensure that your bench will last for years to come.
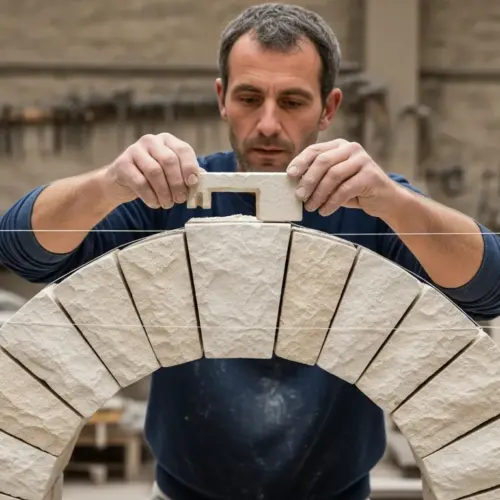
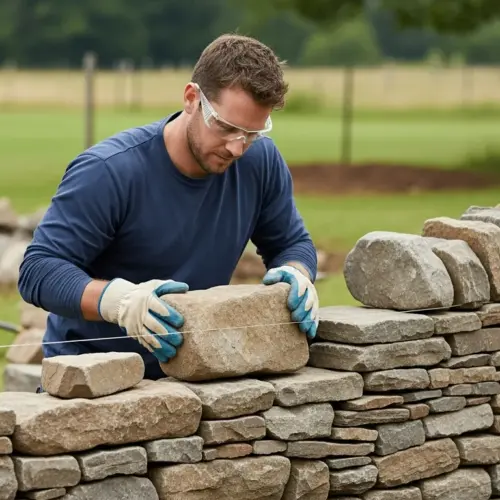
Assembling the Stone Bench
With the base prepared, you can begin assembling the stone bench. Start by positioning the largest and sturdiest stones as the base supports. These stones will bear the majority of the bench’s weight, so it’s important to ensure they are stable and level.
Use a level to check the alignment of each stone, making adjustments as needed by adding or removing small amounts of sand or gravel underneath. Once the base supports are in place, you can start adding the remaining stones to create the seating surface.
Arrange the stones in a way that is both aesthetically pleasing and structurally sound. Overlap the stones slightly to distribute the weight evenly and prevent any gaps or weak points. If necessary, use a hammer and chisel to shape the stones for a better fit.
As you assemble the bench, continuously check for stability and alignment. Use shims or small pieces of stone to fill any gaps and ensure the seating surface is as level as possible. Take your time and make adjustments as needed to achieve the desired look and feel.
Consider using construction adhesive to secure the stones together. This will provide added stability and prevent the stones from shifting over time. Apply the adhesive to the contact points between the stones before placing them in position.
Think about the overall balance and symmetry of your stone bench. Arrange the stones in a way that is visually appealing and creates a sense of harmony. Avoid placing too much weight on one side of the bench, as this could compromise its stability.
Consider using a rubber mallet to gently tap the stones into place. This will help ensure that they are properly seated and aligned. Avoid using excessive force, as this could damage the stones.
Think about the spacing between the stones. Leave small gaps between the stones to allow for drainage and prevent water from pooling on the surface. These gaps can also add to the aesthetic appeal of the bench.
Consider using a stone saw to cut the stones to the desired shape and size. This will allow you to create a more precise and professional-looking bench. Be sure to wear safety glasses and gloves when using a stone saw.
Think about the overall comfort of your stone bench. Consider adding a slight slope to the seating surface to improve drainage and prevent water from pooling. You can also add cushions or pillows to make the bench more comfortable to sit on.
Consider the long-term durability of your stone bench. Choose stones that are resistant to weathering and erosion. Apply a sealant to protect the stones from water damage and staining.
Think about the aesthetic of your stone bench. Choose stones that complement the style of your home and garden. Consider the colors, textures, and patterns that will best enhance your outdoor space.
Finally, don’t be afraid to experiment with different arrangements and designs. The best stone benches are often those that are unique and personalized. Let your creativity guide you and have fun with the process.
Mortaring and Finishing
To provide additional stability and durability, consider mortaring the stones together. Mortar is a mixture of cement, sand, and water that acts as a binding agent between the stones. Before applying the mortar, make sure the stones are clean and dry.
Mix the mortar according to the manufacturer’s instructions, creating a thick, paste-like consistency. Apply the mortar to the joints between the stones using a trowel, pressing it firmly into the gaps. Remove any excess mortar with a damp sponge to create a clean, professional finish.
Allow the mortar to cure for at least 24 to 48 hours before using the bench. During this time, keep the area moist to prevent the mortar from drying out too quickly. Once the mortar is fully cured, you can apply a sealant to protect the stone from water damage and staining.
Choose a sealant that is specifically designed for natural stone and follow the manufacturer’s instructions for application. A sealant will help preserve the appearance of your stone bench and extend its lifespan. Regularly inspect the mortar joints for any cracks or damage and repair them as needed to maintain the bench’s structural integrity.
Consider using a colored mortar to enhance the aesthetic appeal of your stone bench. Choose a mortar color that complements the color of the stones. This can create a more cohesive and visually appealing look.
Think about the texture of the mortar joints. You can create different textures by using different troweling techniques. A smooth, flush joint will create a more modern look, while a recessed or textured joint will create a more rustic look.
Consider using a pointing trowel to create a more precise and professional-looking mortar joint. A pointing trowel is a small, narrow trowel that is specifically designed for filling mortar joints. It allows you to apply the mortar more accurately and create a cleaner finish.
Think about the long-term maintenance of your mortar joints. Regularly inspect the joints for any signs of cracking or damage. Repair any cracks or damage as soon as possible to prevent water from seeping into the joints and causing further damage.
Consider using a sealant that is specifically designed for mortar joints. This will help protect the mortar from water damage and staining. It will also help prevent the mortar from cracking or crumbling over time.
Think about the overall aesthetic of your stone bench. The mortar joints should complement the style of your home and garden. Consider the colors, textures, and patterns that will best enhance your outdoor space.
Consider using a wire brush to clean the mortar joints after they have cured. This will help remove any excess mortar or debris and create a cleaner finish. Be careful not to damage the stones when using a wire brush.
Think about applying a water repellent to the stone surface after the mortar has cured. This will help protect the stone from water damage and staining. It will also help prevent the stone from fading or discoloring over time.
Consider using a pressure washer to clean the stone surface periodically. This will help remove any dirt, grime, or algae that may have accumulated over time. Be careful not to use too much pressure, as this could damage the stone.
Finally, don’t be afraid to ask for help from a professional mason or stone contractor. They can provide valuable advice and assistance in mortaring and finishing your stone bench. Their expertise can help ensure that your bench will last for years to come.
Adding Comfort and Style
While a stone bench is beautiful on its own, adding cushions and other accessories can enhance its comfort and style. Choose outdoor cushions that are weather-resistant and easy to clean. Look for fabrics that are fade-resistant and designed to withstand the elements.
Consider adding a few throw pillows to create a more inviting and comfortable seating area. These can be easily changed out to match the seasons or your personal style.
- Outdoor cushions
- Throw pillows
- Blankets for cooler evenings
- Potted plants
- String lights
Potted plants can add a touch of greenery and soften the hard edges of the stone bench. Choose plants that are appropriate for your local climate and the amount of sunlight the area receives. Arrange the plants around the bench to create a cohesive and inviting outdoor space.
Consider adding an outdoor rug to define the seating area and add a touch of warmth and texture. Choose a rug that is weather-resistant and easy to clean. A rug can help tie the entire space together and create a more inviting atmosphere.
Think about adding string lights or lanterns to create a more ambient and inviting atmosphere in the evening. String lights can be hung from nearby trees or structures, while lanterns can be placed on the ground or on the bench itself. Soft lighting can transform your outdoor space into a magical retreat.
Consider adding a small side table to provide a convenient surface for drinks, snacks, or books. Choose a table that is weather-resistant and complements the style of your stone bench. A side table can add both functionality and style to your outdoor seating area.
Think about adding a water feature, such as a small fountain or birdbath, to create a more relaxing and tranquil atmosphere. The sound of running water can be incredibly soothing and can help drown out unwanted noise. A water feature can also attract birds and other wildlife to your garden.
Consider adding a fire pit or outdoor fireplace to create a cozy and inviting gathering space. A fire pit can provide warmth and ambiance on cool evenings, making your stone bench a perfect spot for socializing with friends and family. Be sure to follow all safety precautions when using a fire pit or outdoor fireplace.
Think about adding a pergola or other overhead structure to provide shade and shelter from the elements. A pergola can create a more defined and intimate seating area. It can also provide a framework for climbing plants, adding a touch of greenery and beauty.
Consider adding artwork or sculptures to personalize your outdoor space and add a touch of visual interest. Choose pieces that are weather-resistant and complement the style of your stone bench. Artwork can help express your personality and create a more unique and inviting atmosphere.
Think about adding comfortable seating options for those who may find the stone bench too firm. Adirondack chairs, rocking chairs, or even hammocks can be placed nearby to provide alternative seating choices. This will ensure that everyone can enjoy your outdoor space in comfort.
Consider adding a personalized touch to your stone bench, such as engraving your family name or a favorite quote onto one of the stones. This can make your bench a truly unique and cherished feature of your outdoor space. Engraving can be done by a professional stone carver or with the right tools and skills, you can even do it yourself.
Finally, don’t be afraid to experiment with different combinations of accessories and styles. The best outdoor spaces are those that reflect your personal taste and create a welcoming and comfortable environment for you and your guests. Let your creativity guide you and have fun with the process of creating your perfect outdoor retreat.
Maintenance and Care
To keep your outdoor stone bench looking its best, regular maintenance is essential. Clean the stone surface regularly with a mild soap and water solution. Avoid using harsh chemicals or abrasive cleaners, as these can damage the stone.
Remove any leaves, dirt, or debris that accumulates on the bench to prevent staining. Inspect the mortar joints regularly for any cracks or damage and repair them as needed. Reapply sealant every one to two years to protect the stone from water damage and staining.
During the winter months, consider covering the bench with a tarp or other protective material to shield it from snow and ice. This will help prevent freeze-thaw damage and extend the life of your bench. With proper care and maintenance, your stone bench will provide years of enjoyment.
Regular cleaning, inspection, and protection will ensure that your outdoor stone bench remains a beautiful and functional feature of your outdoor space. Taking these steps will help maintain its appearance and structural integrity for years to come.
Consider using a soft-bristled brush to scrub the stone surface. This will help remove any stubborn dirt or grime without damaging the stone. A soft-bristled brush is also ideal for cleaning textured or porous stones.
Think about using a pressure washer to clean the stone surface periodically. Be sure to use a low-pressure setting to avoid damaging the stone. A pressure washer can be an effective way to remove moss, algae, or other stubborn stains.
Consider applying a moss and algae killer to the stone surface. This will help prevent the growth of these organisms and keep your bench looking clean and well-maintained. Be sure to follow the manufacturer’s instructions carefully when using these products.
Think about using a stone cleaner specifically designed for natural stone. These cleaners are formulated to remove dirt, grime, and stains without damaging the stone. Avoid using acidic or alkaline cleaners, as these can etch or discolor the stone.
Consider using a sealant that is specifically designed for natural stone. This will help protect the stone from water damage, staining, and fading. Reapply the sealant every one to two years, or as recommended by the manufacturer.
Think about inspecting the mortar joints regularly for any signs of cracking or damage. Repair any cracks or damage as soon as possible to prevent water from seeping into the joints and causing further damage. Use a mortar repair kit to patch any cracks or holes.
Consider using a weed killer to prevent weeds from growing around the base of the bench. Be careful not to spray the weed killer directly on the stone, as this could damage it. Apply the weed killer carefully to the soil around the base of the bench.
Think about trimming any plants or shrubs that are growing too close to the bench. This will help prevent the plants from damaging the stone or blocking sunlight. Trim the plants regularly to keep them under control.
Consider covering the bench with a tarp or other protective material during periods of heavy rain or snow. This will help prevent water damage and extend the life of your bench. Be sure to secure the tarp properly to prevent it from blowing away.
Finally, don’t be afraid to ask for help from a professional stone cleaner or restorer. They can provide valuable advice and assistance in maintaining and caring for your stone bench. Their expertise can help ensure that your bench will last for many years to come.
Conclusion
Building a stone bench is a rewarding project that adds both beauty and functionality to your outdoor space. By following these step-by-step instructions, you can create a unique and personalized seating area that will last for years to come. Remember to carefully plan your design, select the right stone, and prepare a solid base for stability.
With attention to detail and proper maintenance, your outdoor stone bench will become a cherished feature of your garden or patio. Enjoy the process of creating your own outdoor oasis and the satisfaction of knowing you built it yourself.