Creating a stone fountain is a rewarding project that combines artistic expression with practical craftsmanship. The soothing sound of water and the natural beauty of stone can transform any outdoor space into a tranquil oasis.
Whether you’re an experienced stone mason or a DIY enthusiast, this guide provides a comprehensive, step-by-step approach to stone fountain building. We will discuss everything from initial fountain design to plumbing installation and ongoing maintenance, ensuring a successful and enjoyable project.
With careful planning and execution, you can create a stunning water feature that enhances your garden or patio for years to come. Let’s begin this exciting stone fountain building adventure!
Designing Your Stone Fountain
The design phase is a crucial first step in stone fountain building. Consider the overall aesthetic you want to achieve, as this will influence the type of stone, fountain style, and placement within your outdoor space.
Think about the size and shape of your fountain, ensuring it complements the surrounding environment. A small, tiered fountain may be perfect for a cozy garden nook, while a larger, more elaborate design could become a focal point in a spacious yard.
Sketch out several fountain design ideas, experimenting with different stone arrangements and water flow patterns. Consider incorporating multiple tiers, cascading waterfalls, or a simple, elegant basin.
Also, keep in mind the practical aspects of your design, such as access for maintenance and the location of power sources for the pump. Proper planning during the design phase will save you time and effort later on.
Consider the style of your home and garden when choosing your fountain design. A modern home might benefit from a sleek, minimalist fountain, while a more traditional garden could accommodate a rustic, multi-tiered design.
Think about the sound you want the fountain to produce. A gentle trickle can be relaxing, while a more forceful cascade can be invigorating. The height and angle of the water flow will influence the sound.
Don’t forget to factor in the prevailing winds in your area. Position the fountain so that the wind doesn’t blow water onto nearby surfaces, which could cause damage or create a slippery hazard.
Consider the surrounding vegetation. Choose plants that complement the fountain’s design and won’t drop excessive leaves or debris into the water. Ferns, mosses, and small flowering plants are often good choices.
Think about the viewing angles. From which locations will you primarily be viewing the fountain? Design the fountain so that it looks its best from those vantage points.
Consider the possibility of adding lighting to your fountain design. This can enhance its beauty and make it a focal point even at night. Submersible LED lights are a popular choice.
Also consider the wildlife in your area. A fountain can attract birds and other animals, so choose a design that provides them with easy access to water. A shallow basin or a gently sloping surface is ideal.
Remember to check local building codes and regulations before starting your project. Some areas may require permits for water features, especially if they involve electrical work.
Finally, don’t be afraid to get creative and personalize your fountain design. Add unique features or embellishments that reflect your individual style and taste. Your stone fountain should be a reflection of you.
Gathering the Necessary Materials and Tools
Once you have a design in mind, it’s time to gather the necessary materials and tools for your stone fountain building project. The type of stone you choose will greatly impact the fountain’s appearance and durability.
Common choices include granite, limestone, slate, and fieldstone, each offering a unique texture and color palette. You’ll also need a basin or reservoir to hold the water, a submersible pump, tubing, and fittings to circulate the water, and mortar or adhesive to secure the stones.
The size of the basin will depend on the size of your fountain and the amount of water you want to circulate. Choose a basin that is large enough to accommodate the pump and tubing, with enough extra space to prevent splashing.
The submersible pump should be sized appropriately for the height and flow rate of your fountain. Consult the pump manufacturer’s specifications to determine the correct size for your project. A pump that is too small will not provide enough water flow, while a pump that is too large will waste energy and may cause excessive splashing.
The tubing should be flexible and durable, capable of withstanding the constant flow of water. Choose tubing that is the correct diameter for the pump outlet and the water outlet point.
The mortar or adhesive should be specifically designed for use with stone and water features. Choose a product that is waterproof and resistant to weathering. Follow the manufacturer’s instructions carefully when mixing and applying the mortar or adhesive.
In addition to the stone, basin, pump, tubing, and mortar, you may also need other materials such as gravel, sand, concrete, and reinforcement mesh. These materials will be used to create a solid foundation for the fountain and to provide drainage.
Consider purchasing extra stone to account for breakage or waste during the cutting and shaping process. It’s always better to have too much stone than not enough.
When selecting your materials, prioritize quality and durability. Choose materials that will withstand the elements and provide years of reliable performance. This will save you time and money in the long run by reducing the need for repairs or replacements.
Before purchasing any materials, create a detailed list of everything you need and estimate the quantities required. This will help you stay organized and avoid unnecessary trips to the hardware store.
Shop around for the best prices on materials. Compare prices from different suppliers and consider buying in bulk to save money. Don’t be afraid to negotiate with suppliers to get a better deal.
When transporting the materials, be sure to use appropriate safety equipment such as gloves, eye protection, and a back brace. Stone can be heavy and difficult to handle, so take precautions to avoid injuries.
Store the materials in a safe and dry location until you are ready to use them. Protect the stone from the elements to prevent damage or discoloration.
Finally, remember to dispose of any waste materials properly. Follow local regulations for disposing of concrete, mortar, and other construction debris.
Essential Tools for Stone Fountain Building
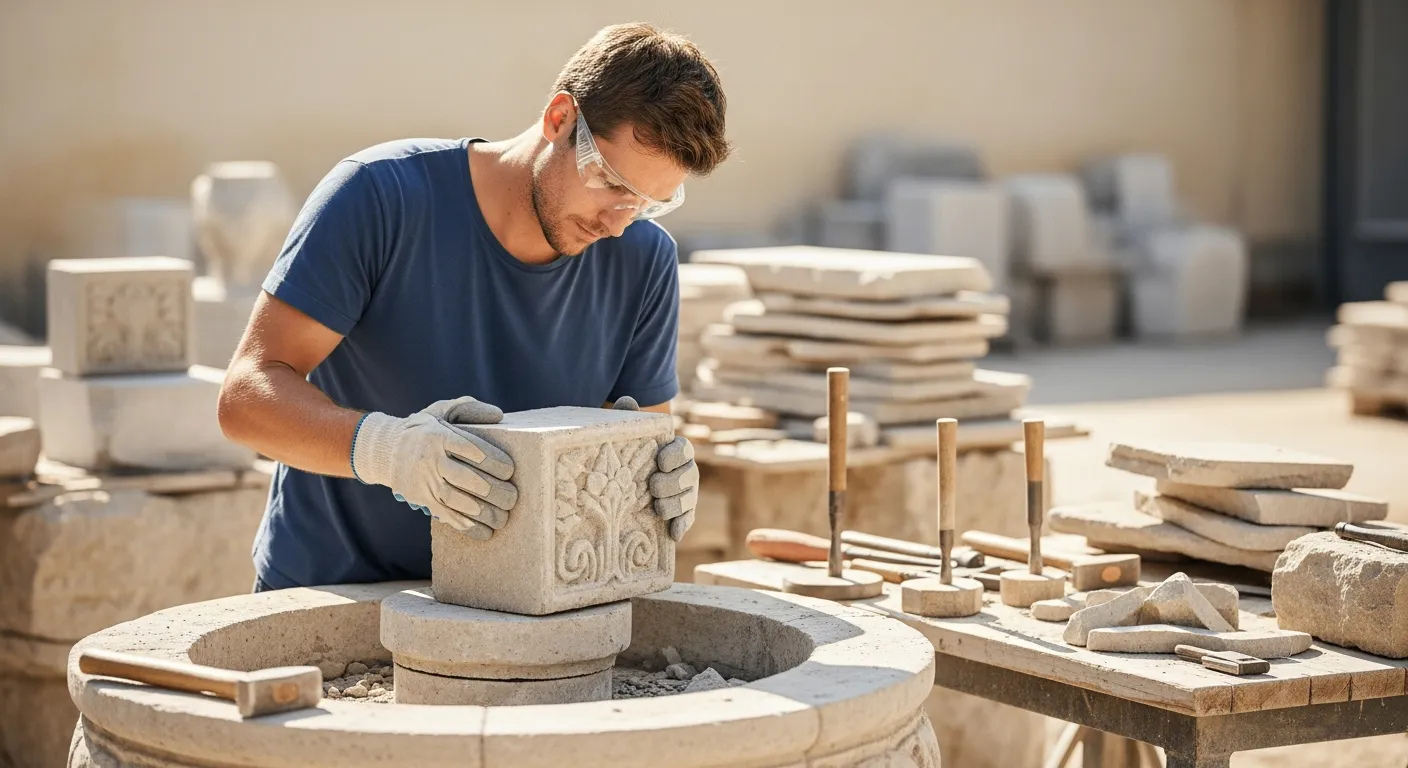
Having the right tools on hand will make the construction process much smoother. Essential tools include a trowel, level, rubber mallet, chisel, and safety glasses.
You may also need a wet saw or angle grinder with a diamond blade to cut and shape the stones as needed. Proper safety equipment, such as gloves and a dust mask, is crucial when working with stone.
| Tool | Purpose | Safety Considerations |
|---|---|---|
| Trowel | Applying mortar or adhesive | Wear gloves to protect skin |
| Level | Ensuring horizontal and vertical alignment | Check calibration before use |
| Rubber Mallet | Positioning stones without damage | Avoid excessive force |
| Chisel | Shaping and splitting stones | Wear safety glasses to protect eyes |
| Wet Saw/Angle Grinder | Cutting stones to desired shapes | Use with water to reduce dust, wear eye and ear protection |
| Safety Glasses | Protecting eyes from debris | Ensure proper fit and coverage |
| Gloves | Protecting hands from cuts and abrasions | Choose durable, non-slip material |
| Dust Mask | Preventing inhalation of stone dust | Use a NIOSH-approved respirator |
Investing in quality tools will not only improve the final result but also ensure a safer and more efficient stone fountain building experience. Take the time to gather everything you need before starting the project.
A good set of measuring tools is also essential. This includes a tape measure, a ruler, and a protractor. These tools will help you accurately measure and mark the stones before cutting or shaping them.
You’ll also need a mixing container and a mixing tool for the mortar or adhesive. A large bucket and a sturdy hoe or paddle are ideal for mixing mortar. For smaller projects, a smaller container and a trowel may be sufficient.
A wheelbarrow or hand truck can be helpful for transporting heavy stones and materials around the work site. This will save you time and effort and reduce the risk of injury.
Consider investing in a stone splitter if you plan to work with large or irregularly shaped stones. A stone splitter is a specialized tool that allows you to split stones cleanly and accurately, without the need for hammering or chiseling.
A power drill with a variety of drill bits can be useful for creating holes in the stones for plumbing or lighting fixtures. Choose drill bits that are specifically designed for drilling through stone.
A set of clamps can be helpful for holding stones in place while the mortar or adhesive dries. Choose clamps that are strong and durable, with adjustable jaws to accommodate different sizes and shapes of stones.
A sponge and a bucket of water are essential for cleaning up spills and removing excess mortar or adhesive. Keep these items close at hand throughout the construction process.
A work table or sawhorse can provide a stable surface for cutting and shaping the stones. Choose a work table that is sturdy and level, with enough space to accommodate the stones and tools.
A first-aid kit is essential for treating minor injuries that may occur during the construction process. Be sure to include bandages, antiseptic wipes, pain relievers, and other essential items.
Before using any power tools, read the manufacturer’s instructions carefully and follow all safety precautions. Wear appropriate safety gear, such as eye protection, hearing protection, and a dust mask.
Keep your tools clean and well-maintained. Clean your tools after each use and store them in a safe and dry location. This will help to prolong their life and ensure that they are always ready to use.
If you are not comfortable using any of the tools required for this project, consider hiring a professional stone mason to do the work for you. This will ensure that the project is completed safely and correctly.
Preparing the Base and Foundation
Before you start assembling the fountain, you must prepare a solid base and foundation. This will ensure the fountain is stable and prevent settling or shifting over time.
Begin by excavating the area where the fountain will be located, removing any grass, roots, or debris. Pour a layer of gravel to provide drainage and level the surface.
Next, pour a concrete pad that is slightly larger than the base of your fountain. Allow the concrete to cure completely before proceeding with the assembly.
Alternatively, you can use pre-cast concrete pavers or a large, flat stone as a foundation. Ensure the foundation is level and stable before placing the fountain basin on top.
The depth of the excavation will depend on the size and weight of your fountain. For smaller fountains, a depth of 6-8 inches may be sufficient. For larger fountains, you may need to excavate deeper.
The gravel layer should be at least 4 inches thick. This will provide adequate drainage and prevent water from pooling around the base of the fountain.
When pouring the concrete pad, be sure to use a concrete mix that is appropriate for outdoor use. Add reinforcement mesh to the concrete to increase its strength and durability.
The concrete pad should be at least 4 inches thick. Use a level to ensure that the surface of the pad is perfectly level. Allow the concrete to cure for at least 7 days before proceeding with the assembly.
If you are using pre-cast concrete pavers, choose pavers that are thick and durable. Arrange the pavers in a level and stable pattern. Fill the gaps between the pavers with sand or gravel.
If you are using a large, flat stone as a foundation, choose a stone that is thick and free of cracks or flaws. Ensure that the stone is level and stable before placing the fountain basin on top.
Consider using a geotextile fabric beneath the gravel layer to prevent weeds from growing up through the foundation. This will help to keep your fountain looking clean and well-maintained.
Before pouring the concrete pad, consider installing underground plumbing or electrical conduits if you plan to add lighting or other features to your fountain. This will make it easier to add these features later on.
Protect the foundation from damage during the construction process. Cover the foundation with a tarp or plywood to prevent it from being scratched or stained.
Inspect the foundation regularly for cracks or damage. Repair any damage immediately to prevent it from worsening over time.
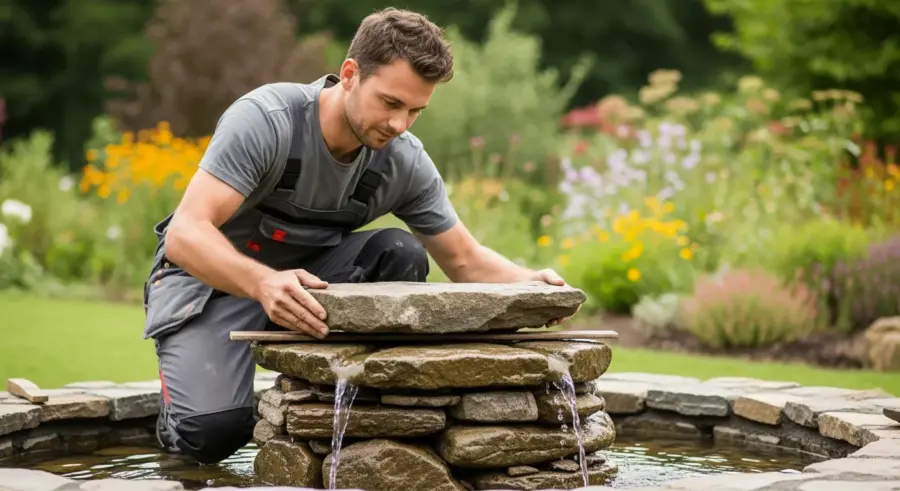
Assembling the Fountain Structure
With the foundation in place, you can begin assembling the stone fountain structure. Start by positioning the basin or reservoir on the prepared base.
If using a pre-formed basin, ensure it is level and properly aligned. If building a custom basin, use mortar or adhesive to secure the stones together, creating a watertight seal.
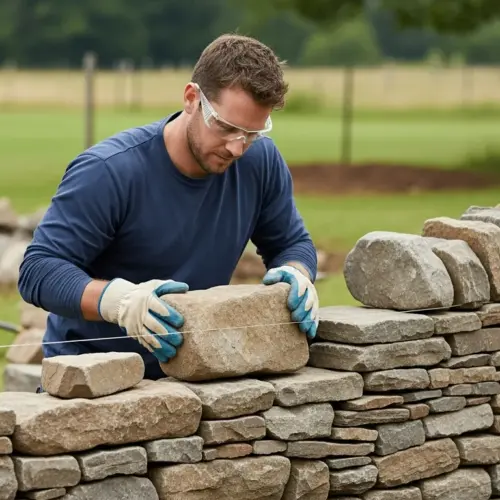
Next, begin stacking the stones according to your design, using mortar or adhesive to bond them together. Work in layers, allowing each layer to dry before adding the next.
Be creative with the stone arrangement, varying the sizes, shapes, and textures to create a visually appealing structure. Leave openings or channels for the water to flow through, creating the desired water feature effect.
When building a custom basin, start by laying the bottom layer of stones. Use a level to ensure that the stones are perfectly level. Apply a generous amount of mortar or adhesive to the bottom of each stone and press it firmly into place.
As you stack the stones, stagger the joints to create a stronger and more stable structure. Use a rubber mallet to gently tap the stones into place.
Periodically check the level of the stones to ensure that the structure is building straight and true. Use shims to adjust the level of the stones as needed.
When creating openings or channels for the water to flow through, be sure to leave enough space for the water to flow freely. Avoid creating sharp edges or corners that could restrict the water flow.
Consider using different types of stone to create a more visually interesting structure. Mix and match different colors, textures, and sizes of stones to create a unique and eye-catching design.
If you are using mortar, be sure to clean up any excess mortar before it dries. Use a sponge and a bucket of water to remove any mortar from the surface of the stones.
Allow each layer of stones to dry completely before adding the next layer. This will prevent the structure from collapsing or shifting.
Protect the structure from the elements during the drying process. Cover the structure with a tarp to prevent it from being damaged by rain or sun.
Inspect the structure regularly for cracks or damage. Repair any damage immediately to prevent it from worsening over time.
Consider adding decorative elements to the structure, such as pebbles, plants, or lighting fixtures. These elements can enhance the beauty of the fountain and make it a focal point in your outdoor space.
Installing the Plumbing and Pump
Once the stone structure is complete, it’s time to install the plumbing and pump. Place the submersible pump in the basin or reservoir, ensuring it is fully submerged in water.
Connect the tubing to the pump outlet and run it up through the fountain structure to the desired water outlet point. Secure the tubing in place using clips or adhesive.
Consider using adjustable flow valves to control the water pressure and flow rate, allowing you to customize the water feature’s appearance. Ensure all connections are tight and watertight to prevent leaks.
Conceal the tubing and pump as much as possible, using stones or decorative elements to hide them from view. Plug the pump into a GFCI-protected outlet to ensure electrical safety.
Before placing the pump in the basin, clean the basin thoroughly to remove any debris or sediment. This will prevent the pump from becoming clogged.
Choose tubing that is flexible and durable, and that is the correct diameter for the pump outlet and the water outlet point. Use Teflon tape to seal the connections between the tubing and the pump outlet.
When running the tubing through the fountain structure, be sure to avoid sharp bends or kinks that could restrict the water flow. Use clips or adhesive to secure the tubing in place.
Position the adjustable flow valves in a location that is easily accessible for adjustments. Use Teflon tape to seal the connections between the flow valves and the tubing.
When concealing the tubing and pump, be sure to leave enough space for ventilation. This will prevent the pump from overheating.
Use stones or decorative elements that are similar in color and texture to the surrounding stones to conceal the tubing and pump. This will help to create a more natural and seamless appearance.
When plugging the pump into a GFCI-protected outlet, be sure to use an outdoor-rated extension cord. This will protect the pump from damage and prevent electrical hazards.
Consider using a timer to control the pump. This will allow you to set the pump to run only during certain hours of the day, saving energy and extending the life of the pump.
Inspect the plumbing and pump regularly for leaks or damage. Repair any damage immediately to prevent it from worsening over time.
Consider adding a filter to the pump to prevent debris from clogging the pump and tubing. This will help to keep your fountain running smoothly and efficiently.
Adding Water and Testing the Fountain
With the plumbing and pump installed, it’s time to add water and test the fountain. Slowly fill the basin or reservoir with water, ensuring the pump is fully submerged.
Turn on the pump and observe the water flow, making any necessary adjustments to the flow valves or tubing. Check for leaks and address them immediately.
Adjust the positioning of the stones or water outlets to achieve the desired water feature effect. Listen to the sound of the water, ensuring it is soothing and pleasant.
If necessary, add decorative elements such as pebbles, plants, or lighting to enhance the fountain’s appearance. Allow the fountain to run for several hours to ensure everything is working properly.
When filling the basin, use a hose with a nozzle to control the water flow. Avoid filling the basin too quickly, as this could damage the pump or plumbing.
Before turning on the pump, check to make sure that all of the connections are tight and watertight. This will prevent leaks and ensure that the pump is working properly.
When observing the water flow, pay attention to the height and angle of the water jets. Adjust the flow valves or tubing to achieve the desired effect.
If you notice any leaks, turn off the pump immediately and address the problem. Use Teflon tape or plumber’s putty to seal any leaks in the plumbing.
Experiment with different positions for the stones or water outlets to create different water feature effects. Try creating a cascading waterfall, a gentle trickle, or a powerful jet of water.
Listen to the sound of the water carefully. The sound should be soothing and pleasant, without any harsh or jarring noises. Adjust the water flow or positioning of the stones to improve the sound.
When adding decorative elements, choose elements that are appropriate for the size and style of the fountain. Avoid adding elements that are too large or that could obstruct the water flow.
Consider adding aquatic plants to the fountain. Aquatic plants can help to filter the water and keep it clean. Choose plants that are appropriate for the climate and the amount of sunlight that the fountain receives.
Allow the fountain to run for several hours to ensure that everything is working properly. Check the water level regularly and add water as needed.
Maintaining Your Stone Fountain
Regular maintenance is essential to keep your stone fountain looking and functioning its best. Clean the basin or reservoir regularly to remove algae, debris, and mineral buildup.
Check the pump and tubing for clogs or damage, and replace them as needed. Monitor the water level and add water as necessary to keep the pump submerged.
- Clean the fountain basin every 2-4 weeks
- Inspect and clean the pump monthly
- Check water levels weekly, add as needed
- Winterize the fountain before freezing weather
- Address any leaks or cracks promptly
To clean the basin, drain the water and scrub the surfaces with a brush and a solution of water and vinegar. Rinse the basin thoroughly with clean water before refilling it.
To clean the pump, remove it from the basin and disassemble it. Rinse the pump components with clean water to remove any debris or mineral buildup. Reassemble the pump and test it to make sure it is working properly.
To prevent algae growth, add an algaecide to the water. Choose an algaecide that is safe for aquatic plants and animals.
To prevent mineral buildup, use distilled water or filtered water in the fountain. Avoid using tap water, as it contains minerals that can cause buildup.
Inspect the stones regularly for cracks or damage. Repair any damage immediately to prevent it from worsening over time. Use a stone adhesive or mortar to repair cracks or chips in the stones.
Trim any plants that are growing around the fountain. This will prevent the plants from obstructing the water flow or damaging the fountain structure.
Remove any leaves or debris that fall into the fountain. This will help to keep the water clean and prevent the pump from becoming clogged.
Consider using a fountain cover to protect the fountain from the elements. This will help to prevent damage from rain, snow, and sun.
Store the pump indoors during the winter months to prevent it from freezing. This will extend the life of the pump.
Winterizing Your Stone Fountain
In colder climates, it’s important to winterize your stone fountain to prevent damage from freezing temperatures. Drain the water from the basin and tubing to prevent ice from forming and cracking the stones or plumbing.
Remove the pump and store it indoors in a frost-free location. Cover the fountain with a waterproof tarp or cover to protect it from snow and ice.
Consider adding a de-icer to the water if you want to keep the fountain running during the winter months. This will prevent the water from freezing and damaging the fountain.
Inspect the fountain in the spring for any damage and make necessary repairs before starting it up again. Proper winterization will extend the life of your stone fountain and ensure it remains a beautiful feature in your outdoor space for years to come.
Before draining the water, disconnect the power supply to the pump. This will prevent the pump from running dry and being damaged.
Use a wet/dry vacuum to remove any remaining water from the basin and tubing. This will help to prevent ice from forming in the plumbing.
Clean the basin thoroughly before covering the fountain. This will help to prevent algae growth during the winter months.
Use a heavy-duty waterproof tarp or cover to protect the fountain from snow and ice. Secure the cover tightly to prevent it from being blown away by the wind.
If you are using a de-icer, follow the manufacturer’s instructions carefully. Use only the recommended amount of de-icer, as too much de-icer can damage the fountain.
Inspect the fountain regularly during the winter months. Remove any snow or ice that accumulates on the cover. Check for any signs of damage, such as cracks or leaks.
In the spring, remove the cover and inspect the fountain for any damage. Repair any damage before starting up the fountain.
Clean the basin thoroughly before refilling it with water. Add fresh water and start up the pump.
Check the water flow and adjust the flow valves as needed. Add any decorative elements that you removed for the winter.
Troubleshooting Common Issues
Even with careful planning and maintenance, you may encounter some common issues with your stone fountain. One common problem is algae growth, which can make the water look murky and unsightly.
To combat algae, clean the basin regularly with a brush and a solution of water and vinegar. You can also add an algaecide to the water to prevent algae growth.
Another common issue is pump failure, which can be caused by clogs, mineral buildup, or simply wear and tear. Clean the pump regularly and replace it if necessary.
Leaks can also be a problem, especially in custom-built fountains. Inspect the fountain regularly for leaks and address them promptly by sealing any cracks or gaps with mortar or adhesive. With proper troubleshooting and maintenance, you can keep your stone fountain running smoothly for years to come.
If the pump is not working, first check the power supply. Make sure the pump is plugged in and that the outlet is working. Check the circuit breaker to make sure it has not tripped.
If the pump is working but the water flow is weak, check the pump intake for clogs. Clean the pump intake as needed. Check the tubing for kinks or obstructions.
If the water is cloudy or discolored, clean the basin and refill it with fresh water. Add an algaecide to the water to prevent algae growth. Consider using a fountain filter to remove debris and sediment.
If the stones are stained or discolored, clean them with a stone cleaner. Use a soft brush and a gentle scrubbing motion to remove the stains. Rinse the stones thoroughly with clean water.
If the fountain is leaking, inspect the basin and plumbing for cracks or gaps. Seal any cracks or gaps with a stone adhesive or mortar. Check the connections between the tubing and the pump or water outlets.
If the water is splashing excessively, adjust the flow valves to reduce the water pressure. Reposition the stones or water outlets to direct the water flow more effectively.
If the fountain is attracting mosquitoes, add a mosquito larvicide to the water. This will kill the mosquito larvae and prevent them from breeding in the fountain.
If the fountain is making excessive noise, check the pump for wear and tear. Replace the pump if necessary. Adjust the water flow to reduce the noise level.
If you are unable to troubleshoot the problem yourself, consult a professional fountain repair service. A professional can diagnose the problem and recommend the best course of action.
Enhancing Your Fountain with Lighting
Adding lighting to your stone fountain can create a dramatic and visually stunning effect, especially at night. Consider using submersible LED lights to illuminate the water and highlight the stone textures.