
Building a fieldstone wall is a rewarding project that adds rustic charm and timeless appeal to any property. The beauty of a fieldstone wall lies in its natural appearance, blending seamlessly with the surrounding environment. It’s a project that combines artistry with practical walling techniques, creating a durable and aesthetically pleasing structure.
Whether you’re aiming to define property lines, create a garden border, or simply enhance your outdoor space, understanding the nuances of fieldstone wall construction is essential. This guide will walk you through every step of the process, from selecting the right stones to mastering the walling techniques, ensuring a successful and long-lasting result.
We’ll explore everything from stone selection and foundation preparation to mortaring and maintenance, equipping you with the knowledge to tackle this project with confidence. Let’s get started on building your own stunning fieldstone wall, a true expression of natural beauty and craftsmanship that will last for generations.
Understanding Fieldstone Characteristics
Fieldstones are naturally occurring stones found on the surface of the ground or in shallow deposits. These stones have been shaped over time by natural forces like erosion and weathering, resulting in a variety of sizes, shapes, and textures.
Understanding the characteristics of fieldstones is crucial for successful fieldstone wall construction. The type of stone, its size, shape, and texture all play a role in the wall’s stability, appearance, and overall durability.
Common types of fieldstone include granite, sandstone, limestone, and shale, each offering unique qualities. Granite is known for its hardness and durability, making it ideal for load-bearing walls, while sandstone offers a warmer tone and is easier to shape.
Limestone provides a classic, elegant look and is commonly used in decorative walls. Shale, with its layered composition, can add interesting textures but may require more careful handling due to its tendency to split.
Beyond these common types, you might also encounter fieldstones composed of basalt, gneiss, or even quartzite, depending on your region’s geological history. Each of these stones will bring its own unique set of properties to your wall-building project. Understanding the mineral composition and weathering resistance of each stone type is key to making informed decisions about their placement and use within your wall.
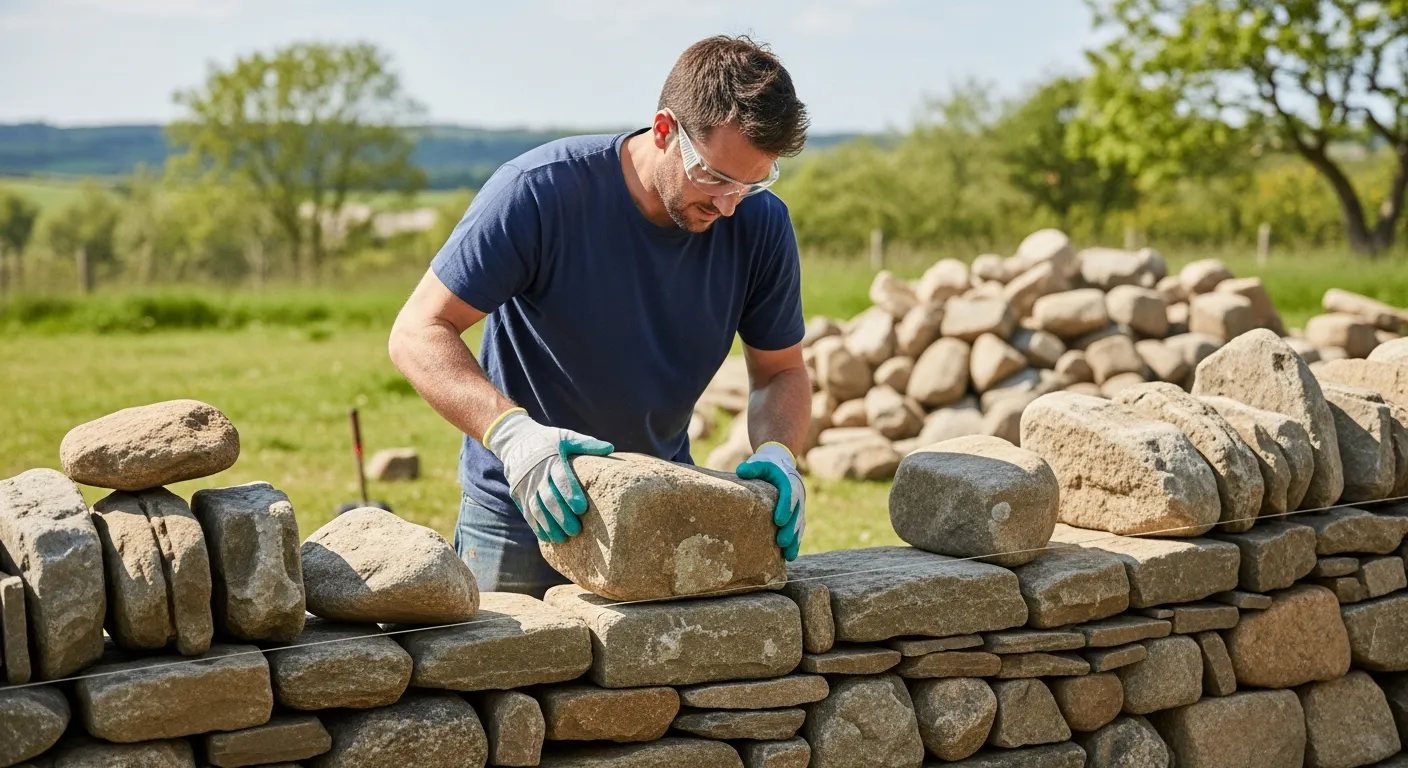
The size and shape of the fieldstones you choose will influence the overall aesthetic and structural integrity of your wall. Larger, flatter stones are ideal for creating stable base courses and load-bearing sections, while smaller, more irregular stones can be used to fill gaps and add visual interest. The texture of the stone, whether smooth or rough, can also contribute to the wall’s character, adding depth and dimension to the finished product.
Consider the color of the stones as well, as this will have a significant impact on the wall’s overall appearance. A mix of colors can create a rustic, natural look, while a more uniform color palette can lend a sense of elegance and sophistication. Think about how the color of the stones will complement your existing landscape and architectural features, ensuring a cohesive and harmonious design.
Finally, remember that the age and weathering of fieldstones can also affect their suitability for wall construction. Stones that have been exposed to the elements for a long time may have developed a patina or surface weathering that adds character but can also weaken the stone. It’s important to carefully inspect each stone for signs of damage or deterioration before incorporating it into your wall.
Selecting and Sourcing Fieldstones
The selection and sourcing of fieldstones is a critical step in fieldstone wall construction, directly impacting the wall’s aesthetics and structural integrity. Choosing the right stones involves considering factors like size, shape, color, and availability.
When selecting stones, aim for a variety of sizes to create a more natural and visually appealing wall. Larger stones should be used for the base and structural support, while smaller stones can fill gaps and add detail.
Shape is also important; a mix of flat, round, and angular stones will contribute to a more interesting and stable wall. Color consistency can be a matter of personal preference, but ensuring the stones complement each other is key to achieving a cohesive look.
Sourcing fieldstones can be done through local quarries, landscaping suppliers, or even directly from your own property if you have them available. Consider the cost of transportation when sourcing stones from distant locations, as it can significantly impact the overall project budget.
Before you begin sourcing, determine the approximate quantity of stones you’ll need for your project. Estimate the dimensions of your wall (length, height, and width) and calculate the volume of stone required. It’s always a good idea to order slightly more than you think you’ll need to account for breakage, waste, and unexpected design changes.
When visiting quarries or suppliers, take the time to carefully inspect the stones before making your selection. Look for stones that are free from cracks, fractures, or other signs of damage. Pay attention to the overall quality and durability of the stones, ensuring they will withstand the elements and provide long-lasting support for your wall.
Consider the environmental impact of your sourcing decisions. Opting for locally sourced stones can reduce transportation costs and minimize your carbon footprint. If you’re sourcing stones from your own property, be mindful of the impact on the surrounding ecosystem and avoid disturbing sensitive habitats or vegetation.
Don’t be afraid to negotiate with suppliers to get the best possible price on your stones. Many quarries and landscaping companies are willing to offer discounts for bulk orders or repeat customers. By doing your research and shopping around, you can save money on your materials and stay within your project budget.
Preparing the Foundation for Your Fieldstone Wall
A solid foundation is essential for the stability and longevity of any fieldstone wall, acting as the backbone that supports the entire structure. Proper preparation of the foundation ensures the wall remains level, prevents shifting, and withstands the test of time.
The first step in preparing the foundation is to mark out the desired location of the wall using stakes and string. Then, excavate a trench along the marked line, ensuring it is wide enough to accommodate the base of the wall and deep enough to reach below the frost line in your area.
| Foundation Type | Description | Ideal For |
|---|---|---|
| Gravel Base | A layer of compacted gravel provides drainage and stability. | Areas with good soil drainage |
| Concrete Footing | A poured concrete base offers a solid, level surface. | Heavy walls or unstable soil |
| Dry-Laid Stone | Large, flat stones interlocked to create a stable base. | Smaller walls or naturalistic designs |
| Compacted Soil | Well-compacted soil provides a firm foundation. | Temporary walls or dry-stacked walls |
After excavating the trench, fill it with a base material such as gravel or crushed stone, compacting it thoroughly to create a level surface. For heavier walls or in areas with unstable soil, consider pouring a concrete footing to provide additional support.
The depth of your trench will depend on several factors, including the height of your wall, the type of soil you’re working with, and the climate in your region. As a general rule, the trench should be at least one-third the height of the finished wall and extend below the frost line to prevent heaving during freeze-thaw cycles. Consult with local building codes and regulations to ensure you’re meeting the minimum requirements for foundation depth.
Before backfilling the trench with gravel or crushed stone, consider adding a layer of geotextile fabric to prevent soil from migrating into the drainage layer. This fabric will act as a filter, allowing water to pass through while keeping the soil particles separate. This will help maintain the long-term effectiveness of your drainage system and prevent clogging.
Compacting the base material is crucial for creating a stable and level foundation. Use a hand tamper or plate compactor to thoroughly compact the gravel or crushed stone in layers, ensuring each layer is properly compacted before adding the next. This will create a solid base that can support the weight of the wall and prevent settling over time.
For concrete footings, be sure to use a properly mixed concrete and reinforce it with rebar for added strength. The footing should be wide enough to accommodate the base of the wall and extend several inches beyond on each side. Allow the concrete to cure completely before beginning to lay the stones, following the manufacturer’s instructions for curing time and temperature.
Laying the Stones and Ensuring Stability
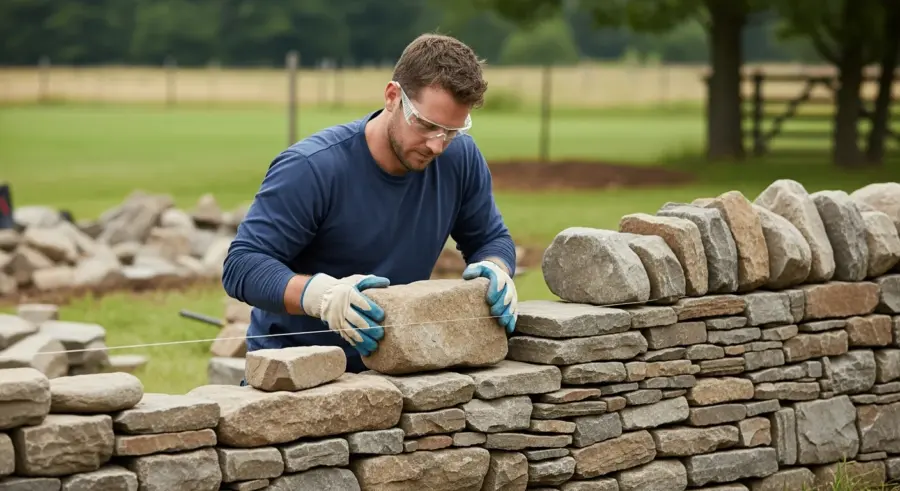
Laying the stones is where the artistry of fieldstone wall construction truly comes to life. This process involves carefully selecting and placing each stone to create a structurally sound and visually appealing wall.
Start by placing the largest stones at the base of the wall, ensuring they are firmly set into the foundation. These stones will serve as the primary support for the rest of the structure, so take your time to position them correctly.
As you build upwards, alternate the size and shape of the stones to create a varied and natural appearance. Overlapping the stones, similar to bricklaying, will enhance the wall’s stability by distributing the weight evenly.
Use smaller stones to fill in gaps and create a tight fit between the larger stones, ensuring minimal movement and maximum stability. Regularly check the wall’s level and plumb as you build, making adjustments as needed to maintain a straight and even structure.
When laying the stones, work in a systematic manner, building up the wall in courses or layers. This will help ensure the wall remains level and stable as you progress. Use a level and plumb bob to regularly check your work and make adjustments as needed.
Pay attention to the orientation of the stones as you lay them. The flattest, most stable side of each stone should be facing outwards, creating a smooth and even surface. Avoid using stones that are too thin or fragile, as they may be prone to cracking or breaking under pressure.
As you build upwards, consider incorporating tie stones or through stones that extend deep into the wall, connecting the front and back faces. These stones will help to bind the wall together and prevent it from separating over time. Tie stones should be placed at regular intervals, especially in taller walls.
If you’re building a retaining wall, be sure to angle the wall slightly backwards, towards the soil it’s retaining. This batter will help to increase the wall’s stability and prevent it from leaning forward under the pressure of the soil. The amount of batter will depend on the height of the wall and the type of soil it’s retaining.
Mortaring or Dry-Stacking Techniques
Deciding whether to mortar or dry-stack your fieldstone wall is a crucial decision that affects both its appearance and structural integrity. Mortaring involves using a cement-based mixture to bind the stones together, creating a solid, permanent structure.
Dry-stacking, on the other hand, relies on the weight and interlocking of the stones themselves to create stability, without the use of any binding agent. Both techniques have their own advantages and considerations.
- Mortared walls are more stable and durable
- Mortared walls require less precise stone fitting
- Dry-stacked walls offer a more natural appearance
- Dry-stacked walls allow for better drainage
- Dry-stacked walls are easier to repair and modify
If you choose to mortar, ensure the mortar mix is appropriate for stonework, typically a type S or N mortar, and apply it generously between the stones, filling all gaps and voids. For dry-stacking, focus on carefully selecting and fitting the stones together, ensuring they are tightly interlocked and stable.
When mortaring, it’s important to use the correct type of mortar for your specific climate and stone type. Type S mortar is generally recommended for walls that are exposed to harsh weather conditions or heavy loads, while Type N mortar is suitable for less demanding applications. Consult with a masonry expert or your local building supply store to determine the best mortar for your project.
Before applying the mortar, thoroughly clean the stones to remove any dirt, dust, or debris. This will help the mortar adhere properly and create a strong bond. You can use a wire brush or a pressure washer to clean the stones, but be careful not to damage the surface.
When applying the mortar, use a trowel to carefully fill the joints between the stones, ensuring there are no gaps or voids. The mortar should be slightly recessed from the surface of the stones, creating a neat and professional finish. Use a pointing tool to smooth and shape the mortar joints, creating a consistent and aesthetically pleasing appearance.
For dry-stacking, the key to success is careful stone selection and precise placement. Choose stones that have flat, stable surfaces and fit together snugly. Use smaller stones to wedge between the larger stones, creating a tight and interlocking structure. Regularly check the wall’s stability as you build, making adjustments as needed to ensure it remains solid and secure.
Adding Landscape Design Elements
Integrating landscape design elements around your fieldstone wall can greatly enhance its visual appeal and create a cohesive outdoor space. The wall itself serves as a natural backdrop, providing opportunities to incorporate various plants, lighting, and other decorative features.
Consider planting climbing vines such as ivy or clematis along the wall to soften its appearance and add a touch of greenery. Perennial flowers and shrubs can be planted at the base of the wall to create a colorful and inviting border.
Strategically placed lighting can highlight the texture and character of the fieldstones, creating a warm and inviting ambiance at night. Incorporate stone pathways or patios that complement the wall’s design, creating a seamless transition between the built and natural elements.
Water features such as small fountains or ponds can also be integrated near the wall, adding a sense of tranquility and enhancing the overall aesthetic appeal. By carefully selecting and arranging these landscape design elements, you can transform your fieldstone wall into a stunning focal point of your outdoor space.
Think about the overall style and theme you want to create in your landscape. A rustic, naturalistic design might incorporate wildflowers, ferns, and native shrubs, while a more formal garden could feature manicured hedges, rose bushes, and symmetrical planting arrangements. Choose plants that complement the color and texture of the fieldstones, creating a harmonious and balanced composition.
Lighting can play a crucial role in enhancing the beauty of your fieldstone wall at night. Consider using a combination of uplighting, downlighting, and path lighting to create depth and dimension. Uplighting can highlight the texture of the stones and create dramatic shadows, while downlighting can illuminate pathways and seating areas. Path lighting can guide visitors through your garden and create a sense of safety and security.
Incorporate seating areas near your fieldstone wall to create a relaxing and inviting space for outdoor gatherings. A stone bench or a set of Adirondack chairs can provide a comfortable place to sit and enjoy the beauty of your landscape. Consider adding a fire pit or outdoor fireplace to create a cozy and inviting atmosphere on cool evenings.
Don’t forget to consider the practical aspects of your landscape design. Ensure there is adequate drainage to prevent water from pooling around the wall. Choose plants that are well-suited to your climate and soil conditions. Regularly maintain your landscape to keep it looking its best, pruning plants, weeding flower beds, and cleaning pathways.
Addressing Drainage Issues
Proper drainage is crucial for the longevity and stability of a fieldstone wall, preventing water damage and erosion that can compromise its structural integrity. Water accumulation behind the wall can lead to hydrostatic pressure, causing the wall to bulge, crack, or even collapse over time.
To address drainage issues, start by ensuring the foundation is well-draining, using a gravel or crushed stone base that allows water to flow freely. Install a perforated drain pipe behind the wall at the base, sloping it away from the structure to direct water away from the foundation.
Backfill behind the wall with a layer of gravel or free-draining soil to further facilitate water movement and prevent soil saturation. Consider incorporating weep holes into the wall at regular intervals, allowing water to escape and reducing pressure buildup.
Grade the area around the wall to slope away from the structure, directing surface water away from the foundation. Regularly inspect the wall for signs of water damage, such as staining or bulging, and address any issues promptly to prevent further deterioration.
When installing the perforated drain pipe, be sure to wrap it in filter fabric to prevent soil from clogging the perforations. This will help ensure the drain pipe remains effective over time. The drain pipe should be sloped at a minimum of 1% to allow water to flow freely away from the wall.
The size and spacing of weep holes will depend on the height of the wall and the amount of rainfall in your area. As a general rule, weep holes should be at least 2 inches in diameter and spaced no more than 8 feet apart. The weep holes should be located at the base of the wall and at regular intervals up the wall, if necessary.
Consider installing a French drain behind the wall to further enhance drainage. A French drain is a trench filled with gravel or crushed stone that intercepts groundwater and directs it away from the wall. The trench should be lined with filter fabric to prevent soil from clogging the gravel.
If you’re building a retaining wall, be sure to install a proper drainage system before backfilling the wall with soil. This will help prevent hydrostatic pressure from building up behind the wall and causing it to fail. A well-designed drainage system is essential for the long-term stability of any retaining wall.
Maintaining Your Fieldstone Wall
Proper maintenance is essential to preserve the beauty and structural integrity of your fieldstone wall for years to come. Regular inspections and timely repairs can prevent minor issues from escalating into major problems, ensuring the wall remains a stunning feature of your property.
Inspect the wall at least once a year, looking for signs of cracking, bulging, or shifting stones. Check for any vegetation growth that could damage the wall, such as roots or vines, and remove them carefully to prevent further issues.
For mortared walls, inspect the mortar joints for any signs of deterioration, such as crumbling or cracking, and repair them as needed using a compatible mortar mix. For dry-stacked walls, check for any loose or unstable stones and reposition them to ensure the wall remains stable.
Clean the wall periodically to remove dirt, moss, or algae, using a soft brush and mild detergent. Avoid using high-pressure washers, as they can damage the stones or mortar joints, potentially leading to structural problems.
If you notice any cracks in the stones themselves, consult with a stone mason or restoration specialist to determine the best course of action. Small cracks can sometimes be repaired with epoxy or other patching compounds, but larger cracks may require the stone to be replaced.
For mortared walls, repointing the mortar joints is an important part of routine maintenance. Repointing involves removing the old, deteriorated mortar and replacing it with fresh mortar. This will help to prevent water from seeping into the wall and causing further damage.
If you have climbing vines growing on your fieldstone wall, be sure to prune them regularly to prevent them from becoming too heavy or invasive. Some vines can damage the stones or mortar joints, so it’s important to keep them under control.
Consider applying a sealant to your fieldstone wall to protect it from the elements and prevent staining. A sealant can help to repel water, dirt, and other contaminants, keeping your wall looking its best for longer. Be sure to choose a sealant that is specifically designed for use on natural stone.
Conclusion
Building a fieldstone wall is a challenging but rewarding project that can add significant value and beauty to your property. By understanding the characteristics of fieldstones, preparing a solid foundation, and mastering walling techniques, you can create a stunning and durable structure that will last for generations.
Whether you choose to mortar or dry-stack your wall, remember to prioritize stability, drainage, and aesthetic appeal. With proper maintenance and care, your fieldstone wall will become a timeless expression of natural beauty and craftsmanship, enhancing your landscape and providing years of enjoyment.