Sandstone is a beautiful and versatile material, perfect for carving intricate designs and sculptures. Its relatively soft nature makes it an excellent choice for beginners eager to explore the world of stone carving. This guide will walk you through the essential tools and techniques needed to start your own sandstone carving projects.
From understanding the properties of sandstone to mastering basic carving methods, you’ll gain the knowledge and confidence to create stunning sandstone art. So grab your tools, and let’s begin your creative adventure into the world of sandstone carving techniques!
Sandstone carving is not only a rewarding hobby but also a fantastic way to connect with a traditional craft. With the right guidance and a bit of practice, you’ll be amazed at what you can achieve. Get ready to transform ordinary stones into extraordinary works of art using simple stone carving tools and methods.
Understanding Sandstone as a Carving Material
Sandstone is a sedimentary rock composed mainly of sand-sized minerals or rock grains. The composition of sandstone gives it unique properties that make it suitable for carving. Its softness compared to other stones like granite or marble makes it easier to work with, especially for beginners.
However, this softness also means that sandstone is more susceptible to weathering and erosion. Different types of sandstone vary in color, texture, and hardness, influencing the carving process and the final appearance of your sandstone art.
For example, some sandstones have a fine, even grain, making them ideal for detailed work. Others may have a coarser texture that lends itself to more rustic, sculptural pieces. Understanding these variations is essential for choosing the right stone for your project and adapting your sandstone carving techniques accordingly.
When selecting sandstone, consider its porosity, which affects how well it absorbs water and, consequently, how it withstands freeze-thaw cycles. A less porous stone will generally be more durable, but it may also be slightly harder to carve. Always inspect the stone for any cracks or weaknesses before you begin sculpting sandstone.
The geological formation process of sandstone also plays a crucial role in its carving characteristics. Sandstone is formed over millions of years as layers of sand are compressed and cemented together. This layering can sometimes create visible bedding planes in the stone, which can be either an advantage or a disadvantage depending on your design.
Understanding these bedding planes can help you to carve with the grain of the stone, making it easier to remove material and create smooth surfaces. However, if the bedding planes are too pronounced, they can also cause the stone to split or fracture along these lines. Therefore, it’s important to carefully examine the stone’s structure before you start carving and to adjust your techniques accordingly.
Another factor to consider is the presence of any inclusions or impurities in the sandstone. These can range from small pebbles to veins of different minerals, and they can affect the stone’s hardness and texture. While some inclusions can add character and visual interest to your carving, others can be problematic and make the stone more difficult to work with.
Before you begin carving, it’s a good idea to test a small area of the stone to see how it responds to your tools. This will help you to identify any potential problems and to adjust your techniques as needed. Remember that every piece of sandstone is unique, and it’s important to adapt your approach to suit the specific characteristics of the stone you’re working with.
Essential Tools for Sandstone Carving
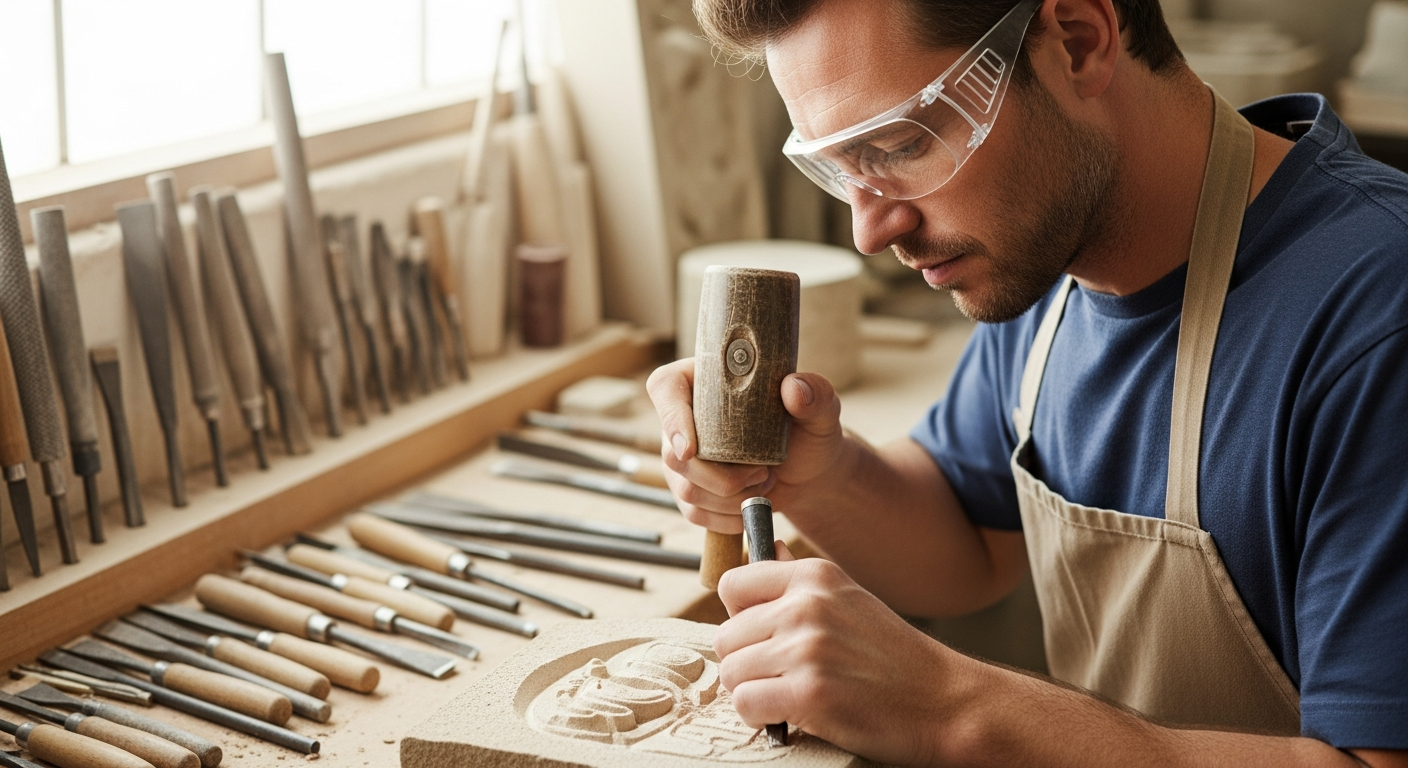
Having the right tools is crucial for successful sandstone carving. The basic stone carving tools include a variety of chisels, mallets, and rasps, each serving a specific purpose. Investing in quality stone carving tools will not only make the process easier but also ensure better results and longevity of your equipment.
For roughing out the initial shape, you’ll need heavier chisels and a mallet. For finer details and smoothing surfaces, smaller chisels, rasps, and rifflers are essential. Safety gear such as safety glasses and gloves are also vital to protect yourself during the carving process.
A pointed chisel is used for removing large amounts of stone, while a flat chisel is ideal for creating flat surfaces and sharp edges. Tooth chisels are useful for texturing and creating a more even surface. You’ll also want a good quality mallet, preferably made of wood or polyurethane, to strike the chisels without damaging them.
Rasps and rifflers come in various shapes and sizes and are used for refining the surface and removing small imperfections. A Surform tool can also be helpful for shaping the stone quickly. Don’t forget measuring tools like calipers and rulers for ensuring accuracy in your sculpting sandstone.
Beyond the basic tools, consider investing in specialized chisels for specific tasks. For example, a bullnose chisel is excellent for creating rounded edges, while a pitching tool is useful for splitting large pieces of stone. A variety of rasps and rifflers with different shapes and coarseness levels will allow you to achieve a wider range of textures and finishes.
Power tools such as angle grinders and rotary tools can also be helpful for sandstone carving, especially for larger projects or for creating complex shapes. However, these tools require practice and caution to use safely and effectively. Always wear appropriate safety gear when using power tools, including safety glasses, a dust mask, and hearing protection.
In addition to carving tools, you’ll also need a good workbench or carving stand to support your stone while you work. The workbench should be sturdy and stable, and it should be at a comfortable height for you to work. You may also want to use clamps or other devices to secure the stone to the workbench and prevent it from moving around while you carve.
Finally, don’t forget about maintenance tools for keeping your carving tools in good condition. A sharpening stone or grinding wheel is essential for keeping your chisels sharp, and a wire brush is useful for cleaning rasps and rifflers. Regular maintenance will help to prolong the life of your tools and ensure that they perform at their best.
Basic Carving Techniques for Sandstone
Mastering basic carving techniques is essential for creating beautiful sandstone art. The first step is always to have a clear plan or design in mind. Sketch your design onto the sandstone using a pencil or marker to guide your carving.
Start by roughing out the main shapes using a pointed chisel and mallet, removing excess material to reveal the basic form. Always work in a controlled manner, removing small amounts of stone at a time to avoid mistakes and prevent the stone from cracking.
| Technique | Tool | Description |
|---|---|---|
| Roughing Out | Pointed Chisel, Mallet | Removing large amounts of stone to establish the basic form. |
| Shaping | Flat Chisel, Tooth Chisel | Creating flat surfaces, sharp edges, and textures. |
| Refining | Rasps, Rifflers | Smoothing surfaces and removing small imperfections. |
| Detailing | Small Chisels, Rifflers | Adding fine details and intricate designs. |
When roughing out the shape, hold the chisel at a slight angle to the stone and strike it firmly with the mallet. Avoid hitting the chisel too hard, as this can cause the stone to crack or shatter. Work slowly and methodically, removing small amounts of material at a time.
Once you’ve roughed out the basic shape, you can begin to refine the form using flat chisels and tooth chisels. Flat chisels are ideal for creating flat surfaces and sharp edges, while tooth chisels are useful for texturing and creating a more even surface. Use a rasp or riffler to smooth out any imperfections and create a polished finish.
For creating curved surfaces, use a bullnose chisel or a rounded rasp. To create intricate details, use small chisels and rifflers with fine tips. Remember to keep your tools sharp and to work slowly and carefully to avoid mistakes.
Another important technique is undercutting, which involves carving away material underneath an overhanging surface. This can be used to create dramatic shadows and to add depth and dimension to your carving. Undercutting requires patience and skill, but it can greatly enhance the visual impact of your work. Always remember to keep your safety glasses on and be mindful of the dust produced during the carving process.
Creating Simple Designs in Sandstone
When starting out with sandstone carving, it’s best to begin with simple designs to develop your skills and confidence. Geometric shapes, basic patterns, and simple relief carvings are excellent projects for beginners. These projects allow you to practice your carving techniques without the pressure of creating complex, representational sculptures.
Consider carving a simple geometric pattern, such as a series of triangles or squares, into a flat piece of sandstone. Another great project is to create a small relief carving of a leaf or flower, which involves carving away the background to make the design stand out. These simple projects will teach you how to control your tools and understand how sandstone responds to different carving techniques.
Start by sketching your chosen design onto the sandstone. Use a pointed chisel to outline the design, then carefully remove the surrounding material with a flat chisel. Use rasps and rifflers to smooth the surfaces and refine the details of your design.
Remember to take your time and focus on precision. Even simple designs can look stunning with careful execution. As you gain experience, you can gradually move on to more complex designs and techniques in your sculpting sandstone journey.
Before you even touch the stone, spend some time planning your design on paper. Experiment with different shapes and patterns, and consider how they will translate into three dimensions. Think about the overall composition of your carving and how the different elements will interact with each other.
Once you have a design that you’re happy with, transfer it onto the sandstone using a pencil or marker. Be sure to make the lines clear and easy to follow, as they will serve as your guide throughout the carving process. If you’re working with a complex design, you may want to use a stencil or template to ensure accuracy.
When carving your design, start with the larger, more general shapes and then gradually work your way down to the smaller, more detailed elements. This will help you to maintain a sense of proportion and balance throughout the carving process. Don’t be afraid to make adjustments to your design as you go along, as you may discover new possibilities and opportunities as you work with the stone.
Remember that practice makes perfect, so don’t get discouraged if your first few carvings aren’t exactly what you had in mind. The more you practice, the better you’ll become at controlling your tools and understanding the nuances of sandstone carving. With patience and perseverance, you’ll be creating beautiful and intricate designs in no time.
Safety Precautions for Stone Carving
Safety should always be a top priority when working with stone carving tools. Stone carving can generate dust and flying debris, which can be harmful to your eyes and lungs. Always wear safety glasses to protect your eyes from flying chips of stone.
A dust mask or respirator is essential to prevent inhaling stone dust, which can cause respiratory problems over time. Work in a well-ventilated area to minimize dust exposure. Gloves will protect your hands from cuts and abrasions, as well as reduce the impact of vibrations from the tools.
- Wear safety glasses
- Use a dust mask or respirator
- Work in a well-ventilated area
- Wear gloves
- Keep your tools sharp
In addition to eye and respiratory protection, it’s also important to protect your hearing when using power tools. Wear earplugs or earmuffs to reduce the risk of hearing damage. Be mindful of the noise levels in your work area and take breaks as needed to give your ears a rest.
When using chisels and mallets, always strike the chisel head squarely and avoid glancing blows. A glancing blow can cause the chisel to slip and potentially injure your hand or arm. Keep your hands and fingers clear of the cutting edge of the chisel.
If you’re working with large or heavy pieces of stone, use proper lifting techniques to avoid back injuries. Lift with your legs, not your back, and keep the stone close to your body. If the stone is too heavy to lift safely on your own, ask for assistance.
Keep your work area clean and organized to prevent accidents. Remove any clutter or obstacles that could cause you to trip or fall. Clean up any spills immediately to prevent slipping. By following these safety precautions, you can minimize the risk of injury and enjoy your sandstone carving projects with peace of mind.
Finishing and Protecting Your Sandstone Carvings
Once you’ve completed your sandstone carving, finishing and protecting it is essential to enhance its appearance and ensure its longevity. Start by thoroughly cleaning the carving to remove any dust or debris. Use a soft brush and water to gently scrub the surface, being careful not to damage any delicate details.
Allow the stone to dry completely before applying any sealants or protective coatings. Applying a stone sealant can help protect the sandstone from weathering, staining, and erosion. Choose a sealant specifically designed for sandstone and follow the manufacturer’s instructions carefully.
Some sealants may alter the color or texture of the stone, so test a small, inconspicuous area first to ensure you like the result. For outdoor carvings, consider applying a water-repellent sealant to protect against freeze-thaw damage. Regularly inspect your carvings for any signs of wear or damage, and reapply sealant as needed to maintain their protection.
Another finishing technique is to apply a wax coating to enhance the stone’s natural color and provide a subtle sheen. Use a soft cloth to apply the wax evenly, then buff it to a shine. This technique is best suited for indoor carvings, as wax coatings may not hold up well to outdoor conditions. Proper finishing and protection will keep your sandstone art looking beautiful for years to come, so take the time to do it right.
In addition to sealants and waxes, you can also use stains or dyes to alter the color of your sandstone carving. This can be a great way to add visual interest or to match the carving to a particular decor. However, it’s important to choose stains or dyes that are specifically designed for use on stone, as other products may damage the surface or fade over time.
Before applying any stain or dye, be sure to thoroughly clean the carving and remove any existing sealants or coatings. Apply the stain or dye evenly, following the manufacturer’s instructions carefully. Allow the stain or dye to dry completely before applying a sealant or wax to protect the finish.
For outdoor carvings, consider using a UV-resistant sealant to protect the stone from fading and discoloration caused by sunlight. UV-resistant sealants will help to keep your carving looking its best for years to come. Regularly clean your outdoor carvings to remove any dirt or debris that could damage the surface.
By taking the time to properly finish and protect your sandstone carvings, you can ensure that they remain beautiful and durable for many years. Whether you choose to use sealants, waxes, stains, or dyes, be sure to follow the manufacturer’s instructions carefully and to test the products on a small, inconspicuous area first. With a little care and attention, your sandstone carvings will become treasured heirlooms that can be enjoyed for generations to come.
Advanced Sandstone Carving Techniques
As you become more comfortable with the basics of sandstone carving techniques, you might want to explore advanced techniques to elevate your craft. One such technique is relief carving, where you carve a design into a flat surface, creating a three-dimensional effect. This requires careful planning and precise execution to achieve the desired depth and detail.
Another advanced technique is carving in the round, which involves creating a fully three-dimensional sculpture that can be viewed from all angles. This requires a strong understanding of form, proportion, and balance. You’ll need to constantly rotate the stone as you carve, ensuring that the sculpture looks good from every perspective.
Consider experimenting with different textures and finishes to add visual interest to your carvings. Use a variety of chisels, rasps, and rifflers to create different surface effects, such as smooth, polished areas, rough, textured areas, and intricate patterns. You can also use specialized tools, such as pneumatic hammers and grinders, to speed up the carving process and achieve more complex shapes.
However, these tools require practice and skill to use safely and effectively. Don’t be afraid to experiment and push your boundaries, but always prioritize safety and work within your comfort zone. With dedication and perseverance, you can master these advanced techniques and create truly stunning sandstone art.
Another advanced technique to consider is incorporating lettering or inscriptions into your sandstone carvings. This can add a personal touch or convey a meaningful message. Lettering requires careful planning and precise execution to ensure that the letters are legible and well-proportioned.
You can use a variety of tools to carve lettering, including small chisels, rifflers, and rotary tools. Practice carving letters on scrap pieces of sandstone before attempting to incorporate them into your finished carvings. Pay attention to the spacing and alignment of the letters to create a visually appealing and easy-to-read inscription.
Another advanced technique is creating intricate patterns or designs using a technique called “pointillism.” This involves creating an image or pattern using small dots or points. Pointillism can be used to create a wide range of effects, from subtle shading to bold, graphic designs.
To create pointillist carvings, use a small, pointed chisel or rotary tool to create a series of dots on the surface of the sandstone. Vary the size and spacing of the dots to create different shades and textures. Pointillism requires patience and precision, but it can produce stunning and unique results. As you progress, consider combining different techniques to create truly unique and expressive sandstone carvings.
Choosing the Right Sandstone for Your Project
Selecting the right type of sandstone is crucial for the success of your carving project. Different sandstones have different properties, such as hardness, porosity, and color, which can affect the carving process and the final result. Consider the size and complexity of your project when choosing your stone.
For beginners, a softer, fine-grained sandstone is generally easier to work with. These stones are less likely to chip or crack, and they allow for more precise detailing. As you gain experience, you can experiment with harder, coarser-grained sandstones, which may offer more durability and unique textures.
Pay attention to the color of the sandstone, as this will significantly impact the appearance of your finished carving. Sandstones come in a wide range of colors, from light beige to dark red, depending on the minerals present in the stone. Consider how the color will complement your design and the overall aesthetic you’re trying to achieve.
Also, inspect the stone for any flaws or weaknesses before you begin carving. Avoid stones with large cracks, voids, or inconsistencies in texture, as these can make the carving process more difficult and compromise the structural integrity of your piece. Choosing the right sandstone is an investment in your art, so take the time to select the perfect stone for your vision.
Consider the intended location of your finished carving when selecting the type of sandstone. If the carving will be displayed outdoors, choose a sandstone that is resistant to weathering and erosion. A less porous sandstone will generally be more durable and withstand freeze-thaw cycles better than a more porous stone.
If the carving will be displayed indoors, you have more flexibility in your choice of sandstone. You can choose a stone based on its color, texture, and aesthetic appeal. However, it’s still important to consider the hardness and durability of the stone, especially if the carving will be handled frequently.
When purchasing sandstone, be sure to buy from a reputable supplier who can provide you with information about the stone’s origin, composition, and properties. Ask the supplier about the stone’s hardness, porosity, and resistance to weathering. Inspect the stone carefully before you buy it to ensure that it is free from flaws and weaknesses.
If possible, try to obtain a sample of the sandstone before you purchase a large quantity. This will allow you to test the stone’s carving properties and to see how it responds to your tools. By taking the time to choose the right sandstone for your project, you can ensure that your carving will be both beautiful and durable.
Maintaining Your Stone Carving Tools
Proper maintenance of your stone carving tools is essential for ensuring their longevity and optimal performance. Sharp tools are safer and more efficient, so regularly sharpen your chisels and rasps. Use a sharpening stone or grinding wheel to maintain the cutting edges of your chisels, following the manufacturer’s instructions carefully.
Keep your tools clean and dry to prevent rust and corrosion. After each use, wipe down your tools with a clean cloth to remove any stone dust or moisture. Store your tools in a dry, protected place, such as a tool chest or cabinet, to prevent damage. Regularly inspect your tools for any signs of wear or damage, and replace them as needed.
Wooden mallets can crack or splinter over time, so replace them when they become damaged. Rasps and rifflers can become clogged with stone dust, so clean them periodically with a wire brush. By taking good care of your stone carving tools, you’ll ensure that they remain in top condition for years to come.
A well-maintained set of tools will not only make your carving projects easier and more enjoyable but also help you achieve better results. Remember, your tools are an investment in your craft, so treat them with care and respect. With proper maintenance, your stone carving tools will serve you well for many years, allowing you to create countless beautiful works of art.
When sharpening your chisels, use a sharpening stone that is appropriate for the type of steel used in the chisel. Different sharpening stones have different grits, so choose a grit that is suitable for the level of sharpness you want to achieve. Start with a coarser grit to remove any nicks or imperfections from the cutting edge, then gradually move to finer grits to refine the edge.
When using a grinding wheel, be careful not to overheat the chisel, as this can damage the steel. Keep the chisel moving constantly and dip it in water frequently to keep it cool. Wear safety glasses when using a grinding wheel to protect your eyes from flying sparks.
To prevent rust and corrosion, apply a thin coat of oil to your tools after cleaning them. Use a light oil, such as mineral oil or WD-40, and wipe off any excess oil with a clean cloth. Store your tools in a tool chest or cabinet that is lined with a rust-inhibiting material.
Regularly inspect your tools for any signs of wear or damage, such as cracks, chips, or loose handles. Replace any damaged tools immediately to prevent accidents. By taking good care of your stone carving tools, you can ensure that they remain safe, efficient, and reliable for many years to come.
Conclusion
Sandstone carving is a rewarding and creative endeavor that allows you to transform ordinary stones into stunning works of art. By understanding the properties of sandstone, mastering basic carving techniques, and prioritizing safety, you can embark on a fulfilling journey of artistic expression.
Remember to start with simple designs, gradually progress to more complex projects, and always take good care of your tools. With practice and dedication, you’ll develop your skills and create beautiful sandstone carvings that you can be proud of. So, grab your tools, find a suitable piece of sandstone, and let your creativity flow!
The world of sandstone carving is vast and full of possibilities. As you continue to learn and grow as an artist, don’t be afraid to experiment with new techniques, styles, and materials. Join a local carving club or take a workshop to learn from experienced carvers and to connect with other artists.
Share your work with others and be open to feedback. The more you engage with the carving community, the more you’ll learn and the more you’ll grow as an artist. Sandstone carving is a journey, not a destination, so enjoy the process and embrace the challenges along the way. With passion, dedication, and a little bit of creativity, you can create truly amazing works of art that will inspire and delight for years to come.