Achieving a flawless color match in masonry projects can be a daunting task. The subtle nuances of mortar color significantly impact the overall aesthetic of brick, stone, or block structures.
Whether you’re restoring a historic building or adding a new feature to your home, understanding how to use color pigments in mortar is essential. This article will explore the various aspects of using color pigments in mortar, from selecting the right type to troubleshooting common issues.
We’ll examine different types of pigments, discuss matching techniques, and provide practical tips for mixing and testing. With the right knowledge and techniques, you can achieve the perfect color match and ensure your masonry work looks its best.
Understanding Mortar Pigments
Mortar pigments are finely ground materials added to mortar mixes to achieve a desired color. These pigments are crucial for matching existing mortar in restoration projects or creating a specific aesthetic in new construction.
The use of color pigments in mortar allows for a wide range of customization. By carefully selecting and mixing pigments, masons can create mortar that seamlessly blends with the surrounding materials.
The primary function of mortar pigments is to impart color without compromising the structural integrity of the mortar. High-quality pigments are colorfast, UV resistant, and chemically inert, ensuring the mortar’s appearance remains consistent over time.
Understanding the properties of different pigments and how they interact with mortar components is essential for achieving consistent and durable results. Factors such as pigment concentration, mortar mix design, and curing conditions all influence the final color and performance of the mortar.
Mortar pigments are not just about aesthetics; they also play a role in protecting the mortar from the elements. Certain pigments can enhance the mortar’s resistance to UV radiation, moisture, and chemical attack.
The selection of the right pigment depends on the specific requirements of the project. Considerations should include the desired color, the type of masonry units being used, and the environmental conditions to which the mortar will be exposed.
It’s also important to understand the chemical compatibility of the pigment with the other mortar ingredients. Some pigments may react negatively with certain types of cement or additives, leading to discoloration or weakening of the mortar.
Properly stored pigments will maintain their quality and color consistency over time. Pigments should be kept in a cool, dry place, away from direct sunlight and moisture.
Types of Color Pigments
There are several types of color pigments available for mortar, each with unique characteristics and applications. These pigments can be broadly classified into natural and synthetic categories, each offering distinct advantages and limitations.
The choice between natural and synthetic pigments often depends on the desired color, durability requirements, and project budget. Understanding the properties of each type of pigment is essential for making informed decisions and achieving optimal results.
Natural pigments are derived from mineral sources and have been used for centuries in masonry. These pigments typically consist of iron oxides and other naturally occurring compounds, offering earthy tones such as browns, reds, and yellows.
Synthetic pigments are manufactured chemically and offer a wider range of colors and greater consistency. Synthetic iron oxide pigments are particularly popular due to their stability, UV resistance, and vibrant colors.
Beyond natural and synthetic iron oxides, other types of pigments can be used in mortar. These include titanium dioxide for whitening, chromium oxide for green hues, and ultramarine blue for a vibrant blue color.
It’s crucial to select pigments specifically designed for use in cementitious materials. Pigments intended for other applications, such as paints or plastics, may not be compatible with mortar and could lead to undesirable results.
The particle size of the pigment also plays a crucial role in its performance. Finer particles tend to disperse more evenly and provide better color intensity.
When selecting pigments, consider their lightfastness, which is their ability to resist fading when exposed to sunlight. Pigments with poor lightfastness will fade over time, resulting in an uneven or undesirable appearance.
Comparing Natural and Synthetic Pigments
Natural and synthetic pigments each have their own advantages and disadvantages when it comes to using color pigments in mortar. Natural pigments are often favored for their historical accuracy and subtle, earthy tones, while synthetic pigments offer greater color consistency and a wider range of options.
The choice between the two depends on the specific requirements of the project and the desired aesthetic outcome. It is important to consider factors such as color stability, UV resistance, and potential environmental impact when selecting pigments for mortar.
| Pigment Type | Advantages | Disadvantages |
|---|---|---|
| Natural Pigments | Historically accurate, Earthy tones, Environmentally friendly | Limited color range, Potential for color variation, May be less UV resistant |
| Synthetic Pigments | Wide color range, Consistent color, High UV resistance | Can appear artificial, May not be environmentally friendly, Higher cost |
| Iron Oxide Pigments | Excellent UV resistance, Durable, Cost-effective | Limited color range compared to other synthetics, Can stain surrounding materials if not properly mixed |
| Carbon Black Pigments | Provides deep blacks and grays, Strong tinting strength, Relatively inexpensive | Can be difficult to disperse evenly, May affect mortar workability, Can stain surrounding materials |
Natural pigments, while environmentally friendly, can exhibit batch-to-batch variations in color. This is due to the natural variations in the mineral sources from which they are derived.
Synthetic pigments offer greater control over color consistency, ensuring a uniform appearance across large projects. They are also generally more resistant to fading and weathering.
The environmental impact of pigment production is another factor to consider. Natural pigments typically have a lower environmental footprint than synthetic pigments, which require energy-intensive manufacturing processes.
Ultimately, the best choice depends on the specific project requirements and priorities. Weighing the advantages and disadvantages of each type of pigment will help you make an informed decision.
Matching Existing Mortar Colors
One of the most challenging aspects of masonry restoration is matching the color of existing mortar. Over time, mortar can fade, discolor, or change due to weathering, environmental factors, and previous repairs.
Achieving a seamless match requires careful observation, testing, and a systematic approach to pigment selection and mixing. Using Color Pigments in Mortar requires careful consideration.
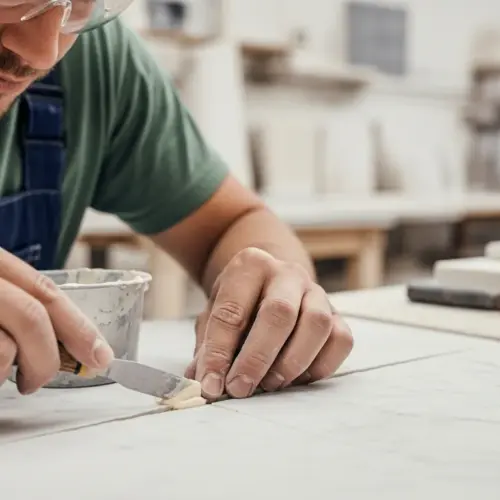
Begin by thoroughly cleaning a small area of the existing mortar to reveal its true color. Remove any surface dirt, algae, or staining that may distort the color assessment.
Next, compare the cleaned mortar to a color chart or a set of pigment samples. Take note of the dominant color and any subtle undertones or variations.
Consider the age and condition of the existing mortar when selecting pigments. Older mortar may have a softer, more muted appearance compared to newer mortar.
It’s often helpful to take a sample of the existing mortar to a masonry supply store for professional color matching. These experts can analyze the sample and recommend a blend of pigments to achieve the desired color.
Digital colorimeters can be used to precisely measure the color of the existing mortar. These devices provide numerical data that can be used to formulate a matching pigment blend.
Consider the texture of the existing mortar when selecting pigments. A coarser texture may require a slightly different pigment blend to achieve a visual match.
Document the pigment blend used for future reference. This will ensure consistency if additional mortar is needed later.
Remember that perfect color matching can be difficult to achieve. Aim for a close match that blends seamlessly with the surrounding mortar.
Mixing Pigments into Mortar
Properly mixing pigments into mortar is crucial for achieving a uniform and consistent color. Inadequate mixing can result in streaks, blotches, or uneven color distribution, detracting from the overall appearance of the masonry work.
The key to successful pigment mixing is to ensure the pigment is thoroughly dispersed throughout the mortar mix. This requires careful attention to the order of ingredients, mixing techniques, and equipment used.
Start by pre-blending the pigment with a small amount of dry sand or cement. This helps to break up any clumps and ensures the pigment is evenly distributed before adding it to the main mortar mix.
Add the pre-blended pigment to the dry mortar ingredients and mix thoroughly until the color is uniform. Use a mechanical mixer for larger batches to ensure consistent mixing.
Gradually add water to the dry mix, continuing to mix until the mortar reaches the desired consistency. Avoid adding too much water, as this can weaken the mortar and affect the color.
Allow the mortar to slake for a few minutes before using it. This allows the cement to fully hydrate and improves the workability of the mortar.
Use a consistent mixing time for each batch of mortar. This will help to ensure uniform color distribution.
Scrape the sides and bottom of the mixing container regularly to ensure all ingredients are fully incorporated.
Avoid overmixing the mortar, as this can cause air entrainment and weaken the mortar.
Always add the pigment to the dry ingredients before adding water. This will help to prevent clumping and ensure even dispersion.
Testing Pigment Color Before Application
Before applying the pigmented mortar to a large area, it is essential to test the color to ensure it matches the existing mortar or desired aesthetic. Color can vary depending on drying conditions.
Testing the color beforehand can save time, money, and frustration by preventing costly mistakes. This is especially important when using color pigments in mortar, as the final color can be influenced by several factors.
- Prepare a small sample batch of the pigmented mortar
- Apply the mortar to an inconspicuous area of the masonry
- Allow the mortar to cure for at least 24 hours
- Compare the cured mortar to the existing mortar under different lighting conditions
- Adjust the pigment mixture as needed to achieve a perfect match
Create multiple test samples with slight variations in pigment concentration. This will help you to fine-tune the color to achieve the perfect match.
Apply the test samples to both vertical and horizontal surfaces. Color can appear different depending on the orientation of the surface.
Photograph the test samples under different lighting conditions. This will help you to compare the colors accurately.
Keep a record of the pigment blend used for each test sample. This will help you to replicate the desired color in future batches.
Factors Affecting Mortar Color
Several factors can influence the final color of pigmented mortar, making it essential to control these variables for consistent results. The type of cement used in the mix can have a significant impact on the final color.
Different types of sand can also affect the mortar color. The moisture content of the mortar mix can also play a role, as excess water can dilute the pigment concentration and result in a lighter color.
Curing conditions, such as temperature and humidity, can affect the rate of hydration and the final color of the mortar. Direct sunlight can cause the mortar to dry too quickly, resulting in a lighter color, while high humidity can slow the drying process and produce a darker color.
Efflorescence, a white, powdery deposit that can form on the surface of masonry, can also affect the perceived color of the mortar. Efflorescence is caused by soluble salts migrating to the surface of the mortar and can be minimized by using high-quality materials and proper construction techniques.
The brand and source of the pigment can also influence the final color. Different manufacturers may use different formulations, resulting in slight color variations.
The age of the cement can also affect the mortar color. Cement can lighten over time, resulting in a lighter mortar color.
The presence of admixtures, such as air-entraining agents or water reducers, can also affect the mortar color. These admixtures can alter the hydration process and affect the final color of the mortar.
Always use the same type of cement, sand, pigment, and admixtures for all batches of mortar. This will help to ensure consistent color.
Troubleshooting Pigment Issues
Despite careful planning and execution, issues can sometimes arise when using pigments in mortar. Understanding these potential problems and how to address them is essential for achieving satisfactory results.
One common issue is uneven color distribution, which can result from inadequate mixing or improper pigment dispersion. Color fading or discoloration can occur due to UV exposure or chemical reactions within the mortar.
If the mortar color is too light, add more pigment to the mix, being careful to maintain a consistent ratio. If the mortar color is too dark, add more white cement or sand to lighten the mix.
To prevent color fading, use high-quality, UV-resistant pigments and protect the mortar from direct sunlight during curing. To address efflorescence, clean the affected area with a mild acid solution and apply a sealant to prevent future salt migration.
If the pigment is clumping, try pre-blending it with a small amount of dry sand or cement before adding it to the main mix. This will help to break up the clumps and ensure even dispersion.
If the mortar is cracking, it may be due to excessive pigment concentration. Reduce the amount of pigment in the mix and ensure proper curing.
If the mortar is staining the surrounding masonry, it may be due to the use of an incompatible pigment. Switch to a pigment specifically designed for use in cementitious materials.
If the mortar is efflorescing, ensure proper drainage and ventilation to prevent moisture buildup. Apply a sealant to protect the mortar from water penetration.
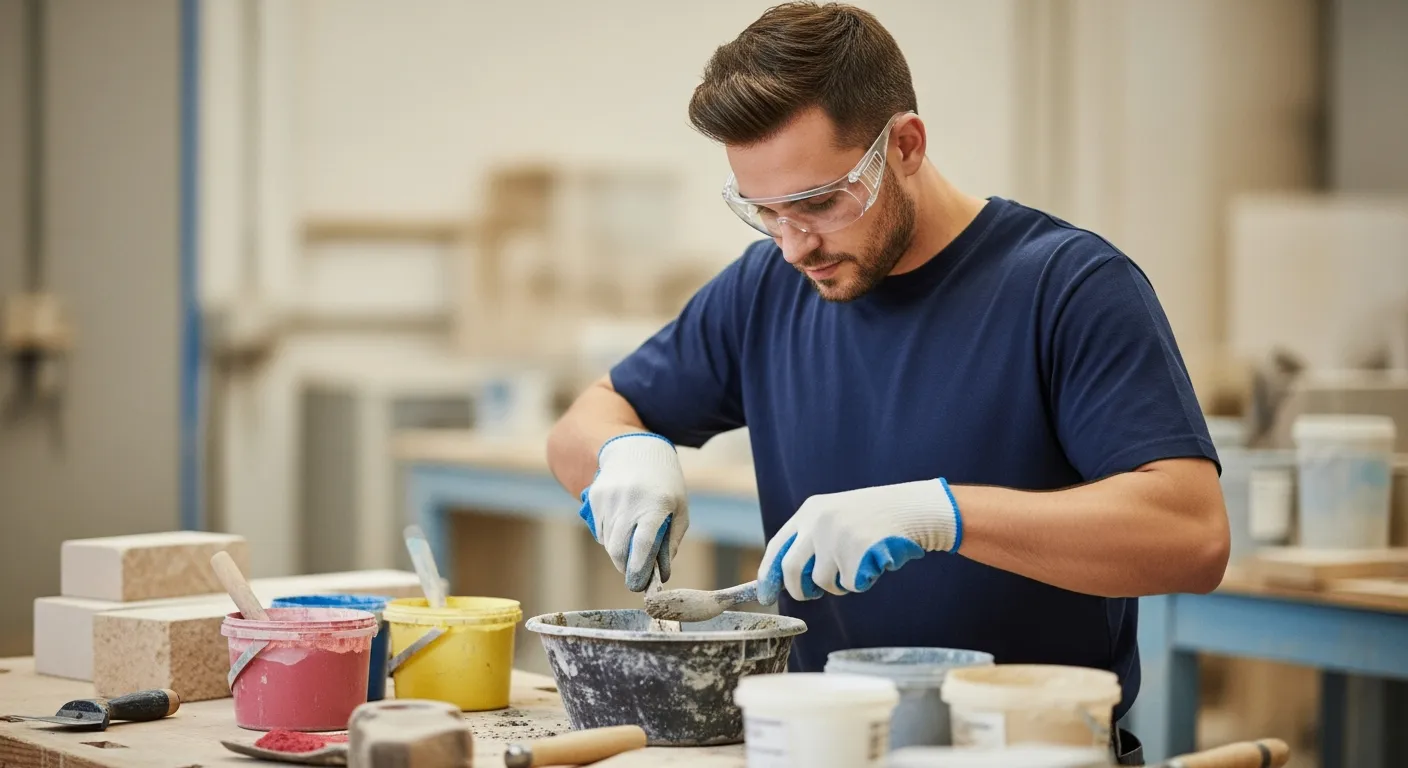
Safety Precautions When Handling Pigments
When working with mortar pigments, it is important to take necessary safety precautions to protect yourself from potential health hazards. Many pigments are fine powders that can be easily inhaled, causing respiratory irritation or other health problems.
Always wear a dust mask or respirator when handling pigments to prevent inhalation. Avoid getting pigments on your skin or in your eyes, as they can cause irritation or allergic reactions.
Wear gloves and eye protection when mixing pigments into mortar. Work in a well-ventilated area to minimize exposure to airborne particles.
Wash your hands thoroughly after handling pigments and before eating, drinking, or smoking. Store pigments in a dry, well-labeled container away from children and pets.
Refer to the pigment’s safety data sheet (SDS) for specific hazard information and handling instructions. Some pigments may contain hazardous materials that require additional precautions.
Avoid creating excessive dust when handling pigments. Use a scoop or other tool to transfer pigments instead of pouring them directly from the container.
Clean up any spills immediately using a vacuum cleaner with a HEPA filter or a wet mop. Avoid sweeping, as this can create airborne dust.
Dispose of pigment waste properly in accordance with local regulations. Do not pour pigment waste down the drain or into the environment.
Conclusion
Using color pigments in mortar is an art and a science, requiring careful attention to detail and a thorough understanding of materials and techniques. By selecting the right pigments, mixing them properly, and testing the color before application, you can achieve a perfect match and enhance the beauty and durability of your masonry work.
Whether you’re restoring a historic building or creating a new masterpiece, mastering the use of color pigments in mortar is an invaluable skill. With the knowledge and tips provided in this article, you’re well-equipped to tackle any masonry project with confidence and achieve stunning results.
The longevity and visual appeal of masonry structures are greatly enhanced by attention to mortar color. A well-matched mortar color can make a significant difference in the overall appearance and value of the project.
Continue to experiment and refine your techniques to achieve the best possible results when using color pigments in mortar. With practice and patience, you can become a master of mortar color matching.