Creating a stone birdbath is a rewarding project that adds charm and functionality to your garden. Not only does it provide a water source for birds, but it also enhances the aesthetic appeal of your outdoor space.
This Stone Birdbath Project guide will walk you through the steps of building your own stone birdbath, perfect as a stone birdbath diy activity. You’ll learn how to select materials, construct a sturdy base, and create a beautiful basin for your feathered friends to enjoy.
Whether you’re an experienced stone mason or a beginner looking for a fun project, this guide will provide you with the knowledge and confidence to complete your own garden birdbath. Let’s get started on this exciting stone birdbath diy adventure!
Planning Your Stone Birdbath Design
Before you begin, it’s important to plan the design of your stone birdbath. Consider the size and shape of the birdbath, as well as the type of stone you want to use.
A larger birdbath will attract more birds, but it will also require more materials and effort to build. Think about the overall style you want to achieve, such as rustic, modern, or traditional, and how it will complement your garden.
Sketch out a few different designs to help you visualize the final product. Decide on the height of the birdbath, ensuring it’s tall enough to deter predators but low enough for birds to access the water easily.
Also, think about the placement of the birdbath in your garden; a spot that offers both sunlight and shade is ideal. This planning stage is crucial for a successful and satisfying stone birdbath project.
Consider the depth of the basin as well. A shallow basin is safer for smaller birds and fledglings, preventing them from drowning. You might even consider incorporating multiple levels or depths within the basin to cater to different bird species.
Think about the surrounding landscape as well. Will the birdbath be a focal point, or will it blend seamlessly into the existing garden design? Consider the colors and textures of the surrounding plants and how they will complement the stone birdbath.
Durability is another important factor to consider during the design phase. Choosing weather-resistant stones and ensuring a solid foundation will help your birdbath withstand the elements for years to come. Proper drainage is also essential to prevent water from pooling and causing damage.
Don’t forget to factor in accessibility for cleaning and maintenance. A birdbath that is easy to clean will be more likely to stay in good condition and continue to attract birds. Consider a design that allows you to easily remove debris and scrub the basin.
Gathering Your Materials
The success of your stone birdbath project hinges on selecting the right materials. You’ll need a variety of stones for the base and basin, as well as mortar to hold them together.
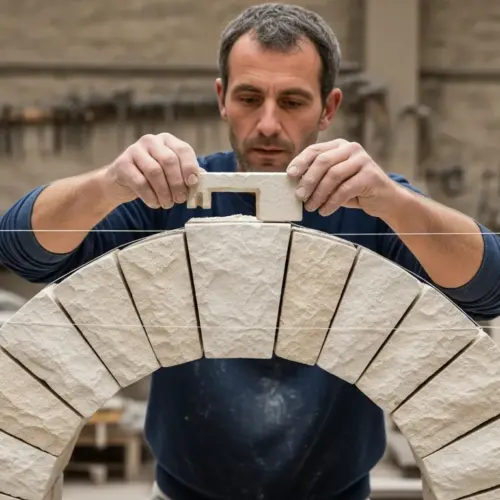
For the base, choose flat, stable stones that can be stacked to create a sturdy foundation. For the basin, you can use a large, shallow stone or create one using smaller stones and mortar.
In addition to the stones and mortar, you’ll need a few essential tools. These include a trowel, a level, a rubber mallet, a bucket for mixing mortar, and safety glasses.
Consider purchasing a stone sealant to protect the birdbath from the elements and prevent water damage. Make sure you have all the necessary materials and tools before starting construction to ensure a smooth and efficient process.
When selecting stones, consider the color and texture. Different types of stone will create different aesthetic effects, so choose stones that complement your garden’s overall style. You can often find suitable stones at local quarries, landscaping supply stores, or even along riverbeds (check local regulations first).
The type of mortar you choose is also important. Opt for a mortar mix that is specifically designed for outdoor use and is resistant to cracking and weathering. Pre-mixed mortar is convenient, but you can also mix your own using cement, sand, and water.
Don’t underestimate the importance of having the right tools. A good trowel will make it easier to apply and smooth the mortar, while a level will ensure that your birdbath is stable and balanced. A rubber mallet is essential for gently tapping stones into place without damaging them.
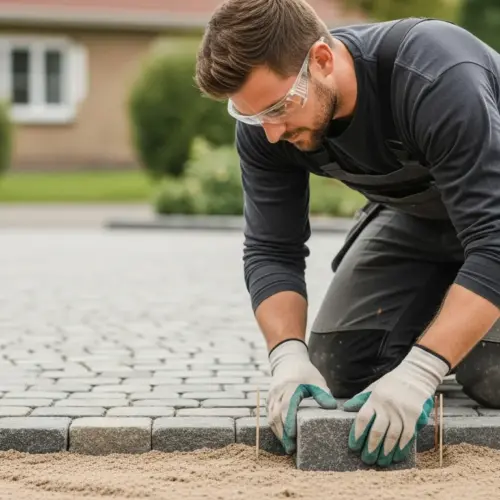
Consider the safety equipment you’ll need as well. Safety glasses are essential for protecting your eyes from dust and debris, and gloves will protect your hands from the abrasive nature of mortar. A dust mask is also a good idea when mixing dry mortar.
Essential Tools and Materials
Having the right tools and materials readily available is key to a smooth stone birdbath diy experience. A well-prepared workspace will make the construction process much more enjoyable.
Let’s take a closer look at the essential items you’ll need for this stone birdbath project.
| Tool/Material | Description | Purpose |
|---|---|---|
| Stones | Flat, stable stones for the base; shallow stone or smaller stones for the basin | Provide the structure and aesthetic appeal of the birdbath |
| Mortar | A mixture of cement, sand, and water | Binds the stones together and creates a solid structure |
| Trowel | A small hand tool with a flat, pointed blade | Applies and smooths mortar between stones |
| Level | A tool used to ensure surfaces are perfectly horizontal or vertical | Ensures the birdbath is stable and the basin is level |
| Rubber Mallet | A hammer with a rubber head | Gently taps stones into place without damaging them |
| Bucket | A container for mixing mortar | Mixes mortar to the correct consistency |
| Safety Glasses | Protective eyewear | Protects eyes from dust and debris |
| Stone Sealant | A liquid applied to the stone surface | Protects the birdbath from water damage and weathering |
In addition to the items listed in the table, consider having a wire brush on hand for cleaning the stones and removing excess mortar. A chisel and hammer can be useful for shaping stones if needed.
Measuring tools, such as a tape measure and ruler, will help you ensure that your birdbath is the correct size and shape. A pencil or marker can be used for marking stones before cutting or shaping them.
A wheelbarrow or garden cart can be helpful for transporting heavy stones and materials around your yard. Consider having a water source nearby for mixing mortar and cleaning tools.
Finally, don’t forget to have a comfortable workspace. A sturdy table or workbench will provide a stable surface for working on your birdbath. Ensure you have adequate lighting, especially if you’re working indoors or in a shaded area.
Constructing the Base
The base of your stone birdbath provides the necessary support and stability for the basin. Start by selecting a level area in your garden where you want to place the birdbath.
Clear away any grass or debris from the area and lay down a base layer of gravel for drainage. Next, mix your mortar according to the manufacturer’s instructions, ensuring it has a thick, pasty consistency.
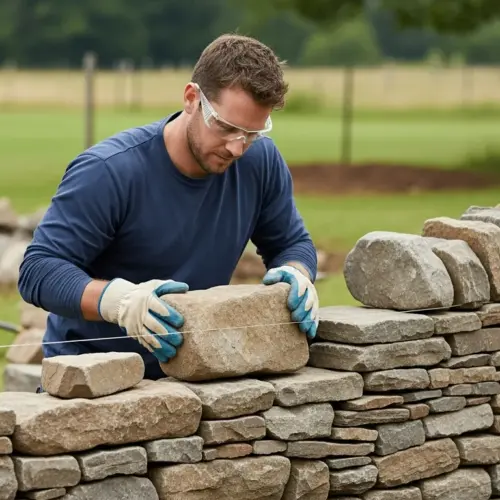
Begin laying the first layer of stones, using the largest and flattest stones as your foundation. Apply a generous amount of mortar between each stone, ensuring they are securely bonded together.
Use a level to check that each layer is perfectly horizontal, and make adjustments as needed with a rubber mallet. Continue stacking the stones, layer by layer, until you reach the desired height for your birdbath base; a sturdy base ensures the longevity of your stone birdbath project.
Consider using a staggered pattern when stacking the stones to increase stability. This will help distribute the weight evenly and prevent the base from collapsing. Make sure each stone is firmly seated in the mortar before adding the next layer.
As you build the base, periodically check the overall appearance to ensure it is aesthetically pleasing. You can adjust the placement of stones to create a more natural or symmetrical look. Remember that the base will be visible, so take the time to make it look attractive.
Allow the mortar to cure completely between layers to ensure a strong bond. This may take several hours or even a day, depending on the type of mortar you are using. Be patient and avoid rushing the process, as a weak base can compromise the entire birdbath.
If you are building a tall base, consider adding internal support for extra stability. You can use metal rods or pipes embedded in the mortar to reinforce the structure. This is especially important in areas that are prone to strong winds or earthquakes.
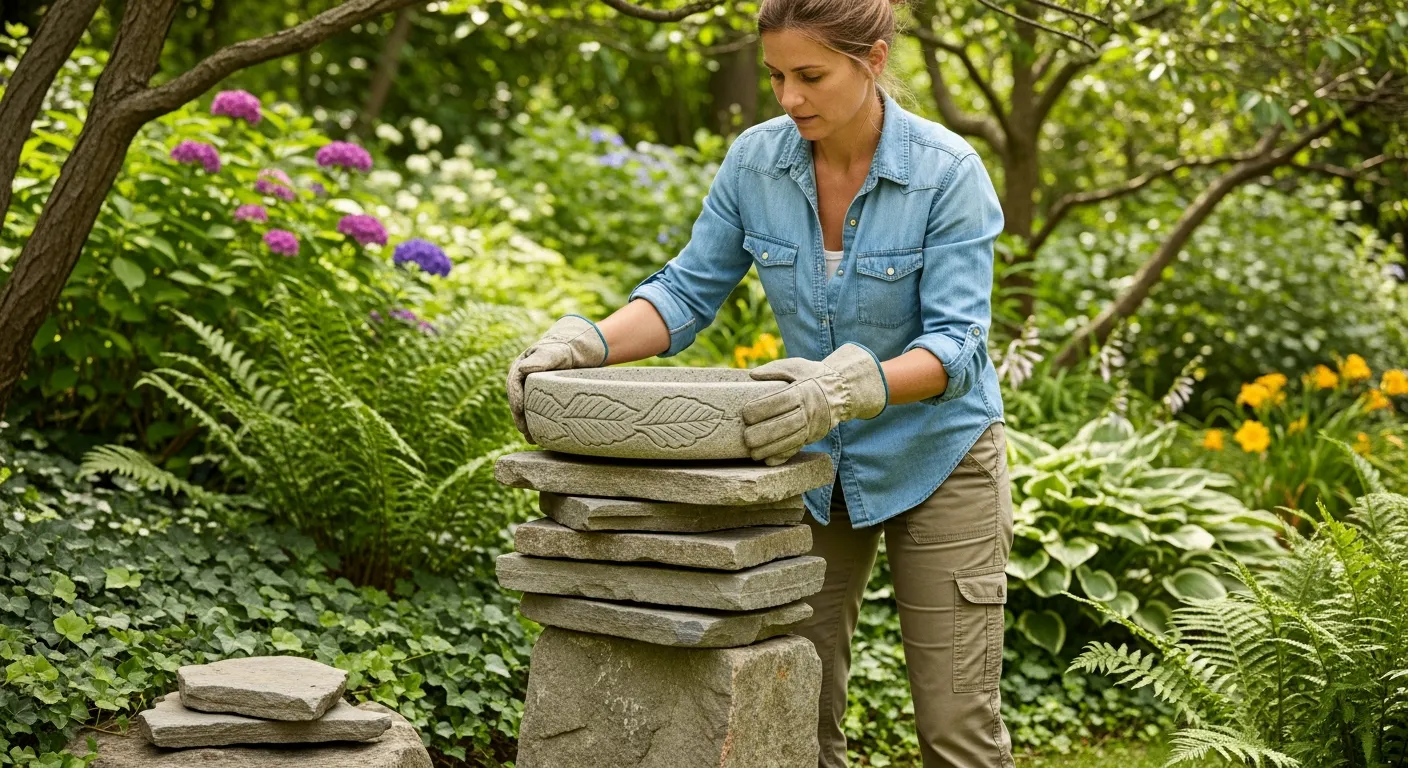
Creating the Basin
The basin is the heart of your stone birdbath, providing a place for birds to drink and bathe. You have two main options for creating the basin: using a single large stone or constructing one from smaller stones.
If you’re using a single stone, make sure it has a shallow, natural depression that can hold water. If you’re building the basin from smaller stones, start by creating a circular or oval shape on top of the base using mortar.
Carefully arrange the stones, angling them slightly inward to create a bowl-like shape. Apply mortar between each stone, ensuring a watertight seal.
Allow the mortar to cure completely before filling the basin with water, typically 24-48 hours. A well-constructed basin is essential for attracting birds and providing them with a safe and inviting water source; this step is crucial in your stone birdbath project.
When using smaller stones to create the basin, consider using a variety of sizes and shapes to create a more natural look. Avoid using stones that are too smooth, as they can be slippery for birds.
Pay close attention to the angle of the stones as you build the basin. The inward slope should be gentle enough to allow birds to easily enter and exit the water, but steep enough to prevent the water from splashing out. A consistent slope will also help maintain a uniform water level.
Ensure that the mortar is applied evenly and thoroughly between the stones to create a watertight seal. Use a trowel to smooth the mortar and remove any excess. Consider adding a layer of stone sealant to the inside of the basin for extra protection against leaks.
Before filling the basin with water, test it for leaks by pouring a small amount of water into it and observing for any signs of seepage. If you detect any leaks, repair them immediately with mortar or sealant. A leak-free basin is essential for conserving water and preventing damage to the base.
Assembling the Birdbath
Once the base and basin are complete, it’s time to assemble your stone birdbath. Carefully position the basin on top of the base, ensuring it’s centered and stable.
Apply a layer of mortar between the base and the basin to create a secure bond. Use a level to check that the basin is perfectly horizontal, and make any necessary adjustments.
Allow the mortar to cure completely before adding water to the basin. This will ensure that the birdbath is structurally sound and ready for use.
Consider adding some small pebbles or stones to the bottom of the basin to provide birds with a secure footing. Assembling the birdbath carefully ensures it will be a beautiful and functional addition to your garden.
Before setting the basin onto the base, ensure that both surfaces are clean and free of any loose debris. This will help the mortar adhere properly and create a strong bond. Use a wire brush to scrub away any dirt or algae.
When applying the mortar, use a generous amount to fill any gaps or irregularities between the base and the basin. This will help distribute the weight evenly and prevent stress fractures. Smooth the mortar with a trowel to create a clean and professional finish.
After the mortar has cured, carefully inspect the joint between the base and the basin for any cracks or weaknesses. If you find any, repair them immediately with mortar or sealant. A strong and secure joint is essential for preventing the birdbath from tipping over.
Consider adding some decorative elements to the base or basin to enhance the aesthetic appeal of the birdbath. You can use small stones, shells, or other natural materials to create a unique and personalized design. Just make sure that any additions are safe for birds and do not interfere with their ability to access the water.
Finishing and Sealing
To protect your stone birdbath from the elements and extend its lifespan, it’s important to finish and seal it properly. Start by cleaning the entire birdbath with a brush and water to remove any dirt or debris.
Allow the birdbath to dry completely before applying a stone sealant. Choose a sealant that is specifically designed for outdoor use and is safe for birds.
Apply the sealant according to the manufacturer’s instructions, typically using a brush or sprayer. Make sure to cover all surfaces of the birdbath, including the base and basin.
Allow the sealant to dry completely before filling the birdbath with water. Regular cleaning and resealing will help keep your birdbath looking beautiful and functioning properly for years to come; this is an important step in maintaining your stone birdbath project.
Before applying the sealant, consider using a wire brush to remove any loose mortar or stone fragments. This will help the sealant adhere properly and create a more durable finish. Pay special attention to the joints between the stones, as these are the most vulnerable to water damage.
When choosing a sealant, opt for a product that is breathable and allows moisture to escape from the stone. This will help prevent the formation of mold and mildew. Avoid using sealants that contain harsh chemicals or solvents, as these can be harmful to birds.
Apply the sealant in thin, even coats to ensure that it penetrates the stone properly. Avoid applying too much sealant at once, as this can create a sticky or glossy finish. Allow each coat to dry completely before applying the next.
Consider applying a second coat of sealant for extra protection, especially in areas that are exposed to harsh weather conditions. Regular resealing, typically every one to two years, will help maintain the birdbath’s appearance and prevent water damage. A well-sealed birdbath will last for many years and provide a safe and inviting water source for birds.
Tips for Attracting Birds
Now that your stone birdbath is complete, it’s time to attract some feathered visitors. Place the birdbath in a location that is easily visible to birds and offers both sunlight and shade.
Keep the water clean and fresh by changing it regularly, especially during hot weather. Consider adding a small solar-powered fountain or dripper to create movement in the water, which can be very attractive to birds.
Planting native trees and shrubs around the birdbath can provide additional shelter and food sources for birds. Avoid using pesticides or herbicides near the birdbath, as these can be harmful to birds.
With a little care and attention, your stone birdbath will become a popular spot for birds in your garden, providing you with hours of enjoyment. Creating an inviting environment is key to attracting a variety of bird species to your garden birdbath.
Consider the height of the birdbath when choosing a location. A birdbath that is too low to the ground may be vulnerable to predators, while a birdbath that is too high may be difficult for birds to access. Aim for a height that is comfortable for a variety of bird species.
Provide a variety of perching spots around the birdbath, such as branches, rocks, or small shrubs. This will give birds a place to preen and dry their feathers after bathing. Avoid placing the birdbath too close to windows, as birds may accidentally fly into them.
Keep the area around the birdbath clean and free of debris. This will help prevent the spread of disease and create a more inviting environment for birds. Remove any fallen leaves, twigs, or other organic matter on a regular basis.
Consider adding a bird feeder near the birdbath to attract even more birds to your garden. Choose a feeder that is designed for the type of birds you want to attract. A well-maintained bird feeder and birdbath can create a thriving ecosystem in your backyard.
Maintaining Your Birdbath
Regular maintenance is essential to keep your stone birdbath clean and safe for birds. Clean the birdbath at least once a week to remove algae, debris, and bird droppings.
Use a stiff brush and water to scrub the surfaces of the birdbath, and rinse thoroughly. Avoid using soap or harsh chemicals, as these can be harmful to birds.
During the winter months, take steps to prevent the water from freezing, which can damage the stone. You can use a birdbath heater or simply empty the birdbath and cover it to protect it from the elements.
Inspect the birdbath regularly for cracks or damage, and make repairs as needed. With proper care and maintenance, your stone birdbath will provide years of enjoyment for you and your feathered friends.
In addition to weekly cleaning, consider giving your birdbath a more thorough cleaning every few months. This will help remove any stubborn algae or mineral deposits. You can use a mixture of vinegar and water to loosen the deposits, then scrub them away with a brush.
If you live in an area with hard water, you may need to clean your birdbath more frequently to prevent mineral buildup. Consider using filtered water to fill the birdbath to reduce the amount of mineral deposits. A simple water filter can make a big difference in the long-term maintenance of your birdbath.
During the fall months, be sure to remove any fallen leaves from the birdbath on a regular basis. Decaying leaves can contaminate the water and create a breeding ground for bacteria. A clean birdbath is essential for the health and well-being of birds.
Consider using a birdbath cover to protect the birdbath from the elements when it is not in use. This will help prevent algae growth and reduce the need for frequent cleaning. A well-maintained birdbath will not only attract more birds but also enhance the beauty of your garden.
Troubleshooting Common Issues
Even with careful planning and construction, you may encounter some issues with your stone birdbath. One common problem is algae growth, which can make the water murky and unattractive to birds.
To prevent algae growth, clean the birdbath regularly and consider adding a small amount of apple cider vinegar to the water. Another issue is leaks, which can occur if the mortar is not properly sealed.
If you notice leaks, apply a fresh layer of mortar to the affected area and allow it to cure completely. Cracks in the stone can also be a problem, especially during freezing weather.
To repair cracks, use a stone repair epoxy and follow the manufacturer’s instructions. Addressing these issues promptly will help keep your stone birdbath in good condition.
If you’re struggling with persistent algae growth, consider moving the birdbath to a location that receives less direct sunlight. Algae thrive in warm, sunny conditions, so reducing the amount of sunlight can help slow down their growth. You can also try using a commercial birdbath cleaner, but be sure to choose a product that is safe for birds.
If you’re having trouble with leaks, make sure that the mortar is properly mixed and applied. The mortar should be thick and pasty, and it should be pressed firmly into the joints between the stones. Allow the mortar to cure completely before filling the birdbath with water.
If you notice that the stones are shifting or becoming loose, it may be necessary to disassemble the birdbath and rebuild it. This is a more time-consuming process, but it is essential for ensuring the safety and stability of the birdbath. Use fresh mortar and be sure to follow the construction steps carefully.
Consider adding a small pump to circulate the water in the birdbath. This will help prevent algae growth and keep the water fresh and clean. A circulating pump can also create a more inviting environment for birds, as they are attracted to the sound of moving water.
Enhancements and Customizations
Once you’ve mastered the basics of building a stone birdbath, you can start experimenting with enhancements and customizations. Consider adding decorative stones or pebbles to the basin to create a more natural look.
You can also incorporate plants into the design, such as succulents or small flowering plants. Another option is to add a small solar-powered light to illuminate the birdbath at night.
Get creative with the shape and size of the birdbath, and try using different types of stone to create unique textures and patterns. You could even add a small waterfall or fountain to the birdbath to create a more dynamic water feature.
The possibilities are endless, so let your imagination run wild and create a stone birdbath that reflects your personal style; customizing your stone birdbath project allows you to create a truly unique garden feature.
Consider incorporating mosaic tiles into the design of the basin for a colorful and artistic touch. You can use small glass or ceramic tiles to create intricate patterns or designs. Just be sure to use tiles that are weather-resistant and safe for birds.
Add a small, shallow dish of water near the birdbath for insects and other small creatures. This will help create a more diverse ecosystem in your garden. You can use a terracotta saucer or a shallow stone dish for this purpose.
Consider adding a perch to the birdbath for birds to preen and dry their feathers. You can use a small branch or a smooth stone for this purpose. The perch should be placed near the edge of the basin, but not directly in the water.
Get creative with the base of the birdbath by incorporating natural elements such as driftwood or tree roots. This will help create a more rustic and organic look. Just be sure to use materials that are durable and weather-resistant.
Safety Considerations
Safety should always be a top priority when working on any DIY project, including building a stone birdbath. Wear safety glasses to protect your eyes from dust and debris when cutting or shaping stones.
Use gloves to protect your hands from mortar and sharp edges. When mixing mortar, follow the manufacturer’s instructions carefully and avoid inhaling the dust.
Be careful when lifting heavy stones, and ask for help if needed. Ensure that the birdbath is placed on a stable surface to prevent it from tipping over.
Keep children and pets away from the construction area to prevent accidents. By following these safety precautions, you can ensure a safe and enjoyable birdbath building experience.
When cutting or shaping stones, use appropriate power tools and follow the manufacturer’s safety instructions. Wear hearing protection to prevent damage to your ears. Always work in a well-ventilated area to avoid inhaling dust or fumes.
When mixing mortar, wear a dust mask to prevent inhaling harmful particles. Avoid getting mortar on your skin, as it can cause irritation. If mortar does get on your skin, wash it off immediately with soap and water.
When lifting heavy stones, use proper lifting techniques to avoid back injuries. Bend your knees and keep your back straight. Avoid twisting or jerking motions. If you are unsure about how to lift a heavy object safely, ask for help.
Be aware of the potential hazards of working outdoors, such as sun exposure, heat stroke, and insect bites. Wear sunscreen, a hat, and insect repellent. Stay hydrated by drinking plenty of water. Take breaks in the shade to avoid overheating.
Conclusion
Building a stone birdbath is a fulfilling project that brings nature closer to your home. It not only provides a valuable water source for birds but also adds a touch of elegance to your garden.
By following these steps and tips, you can create a beautiful and functional birdbath that will be enjoyed by both you and your feathered friends for years to come. Enjoy your new garden birdbath!
Remember that the key to a successful stone birdbath project is careful planning, attention to detail, and a commitment to safety. With a little effort and creativity, you can create a stunning and inviting water feature that will attract birds to your garden for years to come. Happy birdbath building!
Building a stone birdbath is also an excellent way to connect with nature and appreciate the beauty of the natural world. As you work with the stones and create a haven for birds, you’ll develop a deeper appreciation for the delicate balance of the ecosystem. Your garden birdbath will become a symbol of your commitment to protecting and preserving the environment.
Consider sharing your stone birdbath project with others by posting photos and tips online or inviting friends and family to admire your creation. You may inspire others to build their own birdbaths and create a more bird-friendly environment in their communities. Together, we can make a difference in the lives of birds and other wildlife.