Creating a beautiful stone garden path is a rewarding project that enhances your outdoor space. It adds character, provides a functional walkway, and increases your property’s curb appeal. This guide will walk you through the entire process of garden path construction, ensuring a durable and aesthetically pleasing result.
We’ll cover everything from planning your path design to selecting the right materials and maintaining your finished creation. Whether you’re aiming for a rustic flagstone path or a simple gravel path, understanding the fundamentals of garden path construction is key.
Let’s get started on transforming your garden with a stunning stone pathway. With careful planning and the right techniques, you can create a garden path that not only looks great but also stands the test of time.
Planning Your Garden Path Design and Layout
The first step in garden path construction is careful planning. Consider the path’s purpose, its location within your garden, and the overall aesthetic you want to achieve.
Think about the flow of traffic and how the path will connect different areas of your yard. A well-planned path should be both functional and visually appealing, complementing the surrounding landscape.
Start by sketching out your garden layout and marking the intended path. Use a garden hose or rope to visualize the path’s curves and width, adjusting as needed to find the most natural and practical route.
Consider the style of your home and garden when deciding on the path’s design. A formal garden might suit a straight, symmetrical path, while a more informal setting could benefit from a winding, natural-looking flagstone path.
Consider the length of the path and how it will integrate with existing features like trees, shrubs, and flower beds. A longer path might require more planning to ensure it remains interesting and visually appealing throughout its entire length.
Think about the width of the path and how many people will typically be using it at the same time. A wider path is more comfortable for two people to walk side-by-side, while a narrower path can be more intimate and space-saving.
Pay attention to the slope of the ground and how it might affect the path’s design. If the ground is sloped, you may need to incorporate steps or ramps to make the path safe and accessible.
Don’t forget to factor in any underground utilities or obstacles that might be present in the path area. Contact your local utility companies to locate and mark any buried lines before you begin digging.
Preparing the Ground for Your Stone Path
Proper ground preparation is essential for a stable and long-lasting garden path. This step ensures that your path won’t sink, shift, or become uneven over time.
Begin by removing any existing vegetation, including grass, weeds, and roots, from the path area. Use a spade or shovel to clear the topsoil, creating a level surface for your path’s foundation.
Next, excavate the path to a depth of at least 6-8 inches. This depth allows for a proper base layer of gravel or crushed stone, which provides drainage and stability.
Compact the soil at the bottom of the excavated area using a hand tamper or plate compactor. This compaction creates a solid foundation that prevents settling and ensures the path remains level.
Take your time and ensure that the excavation is done evenly and accurately. Uneven excavation can lead to problems later on, such as uneven settling and drainage issues.
Consider using a level to check the depth of the excavation at various points along the path. This will help you ensure that the base layer will be uniform and level.
If you encounter any large rocks or roots during excavation, remove them completely. These obstacles can interfere with the base layer and cause the path to become uneven.
Dispose of the excavated soil and vegetation properly. You can use it to fill other areas of your garden or compost it for future use.
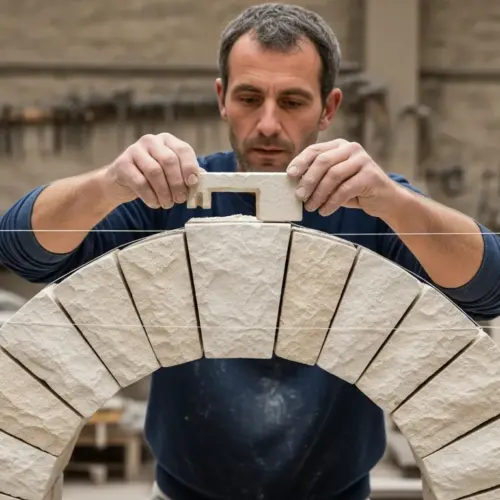
Choosing the Right Stone Materials
Selecting the right stone materials is crucial for both the aesthetic and functional aspects of your garden path. The type of stone you choose will influence the path’s appearance, durability, and maintenance requirements.
Consider factors like the stone’s color, texture, size, and resistance to weathering. Common options include flagstone, gravel, pavers, and stepping stones, each offering a unique look and feel.
| Stone Type | Pros | Cons |
|---|---|---|
| Flagstone | Natural look, durable, variety of colors | Can be expensive, requires skill to lay |
| Gravel | Affordable, easy to install, good drainage | Can shift and spread, requires occasional raking |
| Pavers | Uniform size and shape, easy to install, variety of styles | Can look less natural, may require a compacted base |
| Stepping Stones | Simple to install, create a casual look, can be spaced apart | May not be suitable for high-traffic areas, can be uneven |
Think about the overall style of your garden and choose stone materials that complement it. A rustic garden might benefit from natural-looking flagstone or gravel, while a more formal garden could suit pavers or cut stone.
Consider the cost of the stone materials and your budget. Some types of stone, like flagstone, can be quite expensive, while others, like gravel, are more affordable.
Think about the maintenance requirements of the different stone materials. Some stones, like gravel, require more frequent maintenance, such as raking and replenishing, while others, like pavers, are relatively low-maintenance.
Visit a local stone yard or garden center to see and feel the different stone materials in person. This will help you get a better sense of their color, texture, and overall appearance.
Creating a Stable Base Layer
A well-constructed base layer is essential for preventing your garden path from shifting or sinking over time. This layer provides a stable foundation and promotes proper drainage.
Spread a layer of gravel or crushed stone, typically 4-6 inches thick, over the compacted soil. Use a rake to distribute the gravel evenly and ensure a consistent depth across the entire path area.
Compact the gravel layer using a hand tamper or plate compactor. This compaction creates a solid base that will support the stone pavers or gravel surface.
For added stability, consider adding a layer of landscape fabric between the soil and the gravel. The fabric prevents soil from mixing with the gravel, which can compromise drainage and stability over time.
Ensure the gravel or crushed stone you use for the base layer is of good quality and well-graded. This means it should contain a mix of different sized particles to ensure proper compaction and drainage.
When compacting the gravel layer, work in overlapping passes to ensure complete and uniform compaction. This will help prevent any weak spots in the base layer that could lead to settling.
If you’re using landscape fabric, make sure it overlaps at the seams to prevent soil from seeping through. Secure the edges of the fabric with landscape staples to keep it in place.
Consider adding a layer of sand on top of the compacted gravel layer. This provides a smooth and level surface for laying pavers or flagstone.
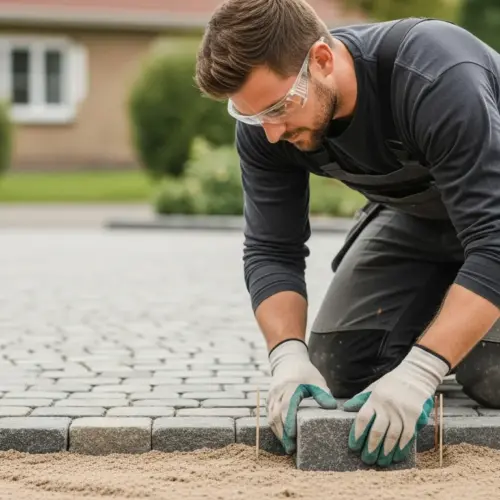
Laying the Stone Pavers or Gravel
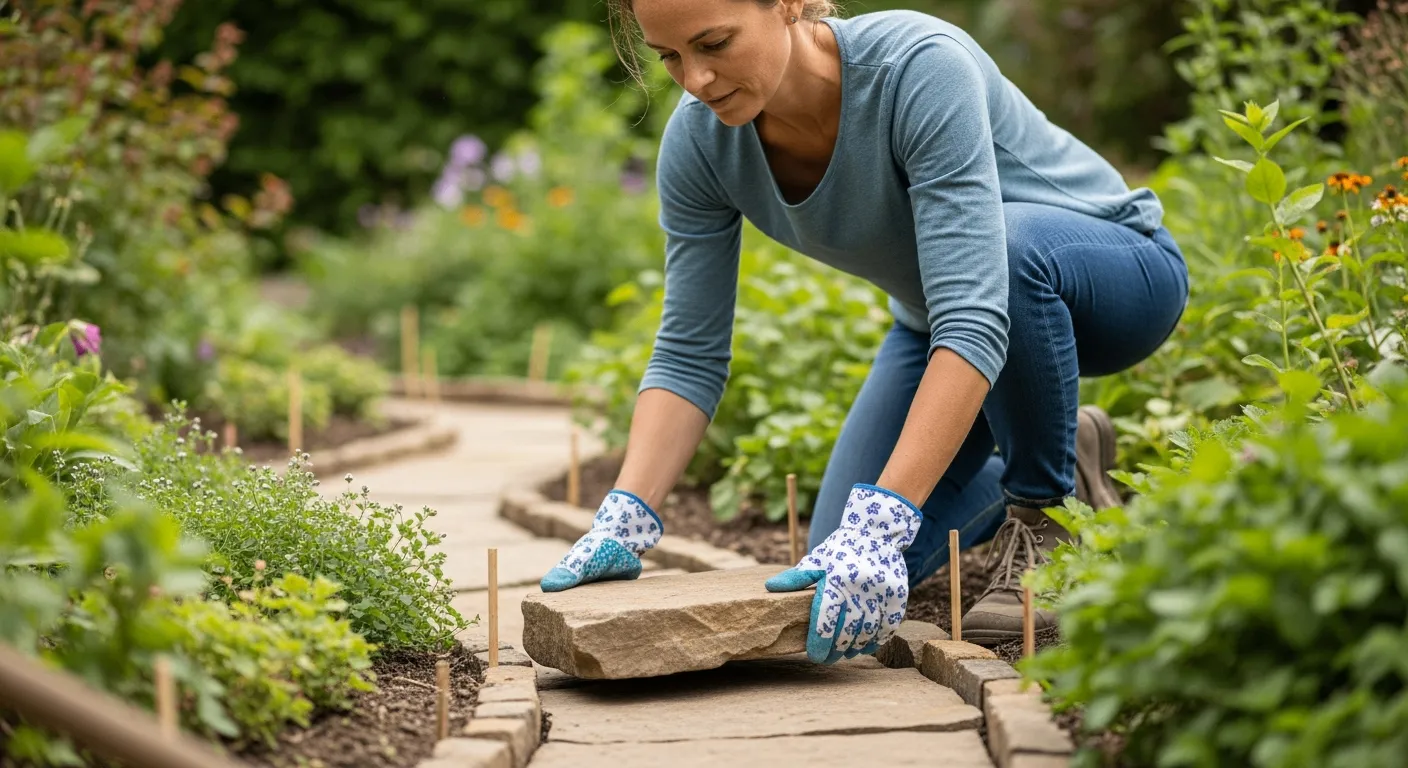
With the base layer prepared, it’s time to lay your chosen stone materials. Whether you’re working with flagstone, gravel, or pavers, careful placement is key to achieving a beautiful and functional garden path.
For flagstone or pavers, start by arranging the stones in a visually appealing pattern. Leave consistent gaps between the stones for sand or gravel infill, which helps stabilize them and prevent movement.
Use a rubber mallet to gently tap each stone into place, ensuring it’s level with the surrounding stones. Check the level frequently with a spirit level and adjust as needed to create a smooth, even surface.
For a gravel path, simply spread the gravel evenly over the base layer, using a rake to achieve a uniform depth. A depth of 2-3 inches is usually sufficient for a comfortable walking surface.
When laying flagstone, try to fit the stones together as closely as possible while still maintaining a natural look. You may need to cut or shape some of the stones to achieve the desired fit.
If you’re using pavers, follow the manufacturer’s instructions for laying them in a specific pattern. Some paver patterns require special tools or techniques.
For gravel paths, consider using a stabilizer product to prevent the gravel from shifting and spreading. These products typically consist of interlocking grids that hold the gravel in place.
Take your time and be patient when laying the stones. A well-laid path will last for many years and add significant value to your garden.
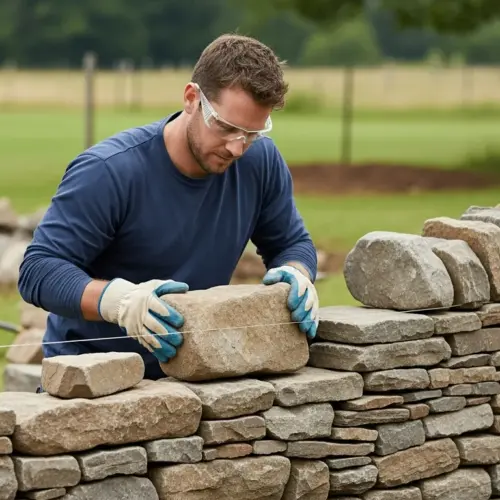
Adding Borders and Edging for Stability
Borders and edging not only enhance the appearance of your garden path but also provide crucial stability. They help contain the path materials and prevent them from spreading into the surrounding garden beds.
There are many options for edging, including brick, stone, wood, and plastic edging products. Choose a material that complements the style of your path and garden.
- Brick edging offers a classic, timeless look
- Stone edging provides a natural, rustic feel
- Wood edging is affordable and easy to install
- Plastic edging is durable and low-maintenance
- Metal edging creates a clean, modern line
Consider the height of the edging and how it will relate to the surrounding garden beds. The edging should be tall enough to contain the path materials but not so tall that it becomes visually obtrusive.
When installing edging, make sure it’s securely anchored in the ground. This will prevent it from shifting or moving over time.
For brick or stone edging, use a mortar mix to bond the pieces together. This will create a strong and durable border that will last for many years.
If you’re using wood edging, treat it with a wood preservative to protect it from rot and decay. This will extend the life of the edging and keep it looking its best.
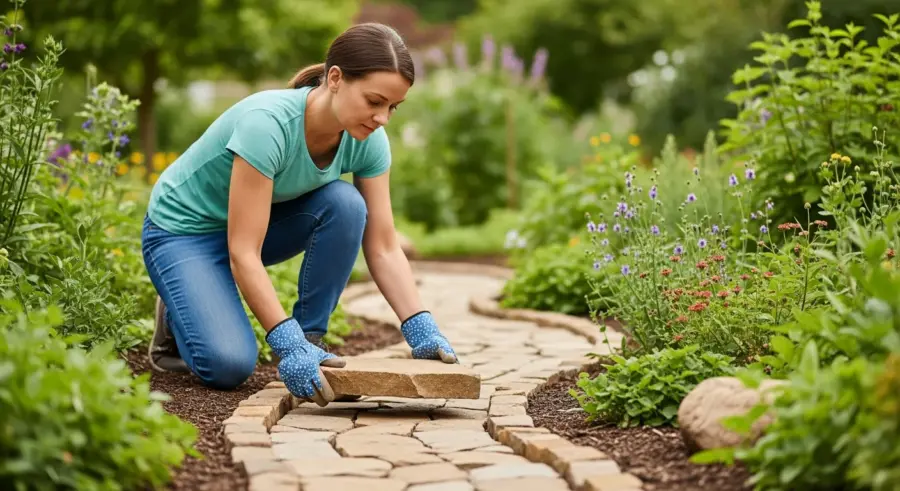
Finishing Touches and Infill
Once the stones are laid and the edging is in place, it’s time to add the finishing touches. These details can significantly enhance the look and stability of your garden path construction.
For flagstone or paver paths, fill the gaps between the stones with sand or fine gravel. Sweep the infill material into the gaps and compact it using a brush or broom, ensuring it’s level with the stone surfaces.
Water the path lightly to help settle the infill material and further stabilize the stones. Add more infill as needed to fill any gaps that appear after watering.
Consider adding decorative elements along the path, such as plants, lighting, or small sculptures. These additions can personalize your garden path and create a welcoming atmosphere.
Choose an infill material that complements the color and texture of the stones. Sand provides a smooth and uniform look, while gravel adds a more rustic and textured feel.
When adding decorative elements, consider the scale of the path and the surrounding garden. Avoid using items that are too large or overpowering.
Lighting can be a great way to enhance the beauty of your garden path at night. Consider using solar-powered lights or low-voltage landscape lighting.
Add plants along the edges of the path to soften the look and create a more natural feel. Choose plants that are appropriate for the amount of sunlight and moisture in the area.
Maintaining Your Stone Garden Path
Regular maintenance is essential for keeping your stone garden path in top condition. With proper care, your path will continue to enhance your garden for years to come.
Sweep the path regularly to remove leaves, dirt, and debris. This prevents the buildup of organic matter that can lead to weed growth and slippery surfaces.
Check for and remove any weeds that sprout between the stones or along the edges of the path. Use a weeding tool or herbicide to eliminate weeds and prevent them from spreading.
Periodically inspect the path for loose stones or uneven surfaces. Replace or re-level any stones that have shifted, ensuring the path remains safe and stable.
Consider using a pressure washer to clean the path and remove any stubborn stains or algae growth. Be careful not to damage the stones or edging with excessive pressure.
Replenish the infill material between the stones as needed. Over time, the infill can erode or settle, leaving gaps that can become tripping hazards.
Inspect the edging regularly and repair any damage or deterioration. This will help maintain the stability and appearance of the path.
Apply a sealant to the stones to protect them from staining and weathering. This is especially important for porous stones like flagstone.
Seasonal Adjustments for Your Path
Different seasons bring different maintenance needs for your garden path. Understanding these seasonal adjustments will help you keep your path in good condition year-round.
In the fall, focus on removing fallen leaves and debris to prevent slippery conditions and potential staining. A leaf blower or rake can be helpful for clearing large amounts of leaves quickly.
During the winter, be mindful of ice and snow accumulation on the path. Use a de-icing salt or sand to provide traction and prevent falls, but avoid using harsh chemicals that can damage the stone.
In the spring, check for any damage caused by winter weather and address it promptly. This might include replacing loose stones, repairing edging, or replenishing infill material.
In areas with heavy snowfall, consider using a snow shovel to clear the path regularly. This will prevent ice buildup and make it easier to walk on the path.
In the summer, monitor the path for weed growth and address it promptly. Weeds tend to thrive in warm weather and can quickly become a problem if left unchecked.
If you live in an area with frequent rainfall, make sure the path has adequate drainage to prevent water from pooling on the surface. This can lead to slippery conditions and potential damage to the path.
Consider adding seasonal decorations to the path to enhance its appearance. This could include potted plants, holiday lights, or other festive items.
Conclusion
Building a stone garden path is a fulfilling project that adds beauty and functionality to your outdoor space. By following these steps, you can create a durable and aesthetically pleasing path that enhances your garden for years to come.
Remember to plan carefully, prepare the ground thoroughly, and choose the right materials for your desired look and feel. With proper construction and regular maintenance, your garden path will be a source of pride and enjoyment.
Don’t be afraid to experiment with different designs and materials to create a path that is truly unique and reflects your personal style. The possibilities are endless!
Consider consulting with a landscape designer or contractor if you’re unsure about any aspect of the project. They can provide valuable advice and guidance to help you achieve your desired results.