
Conclusion
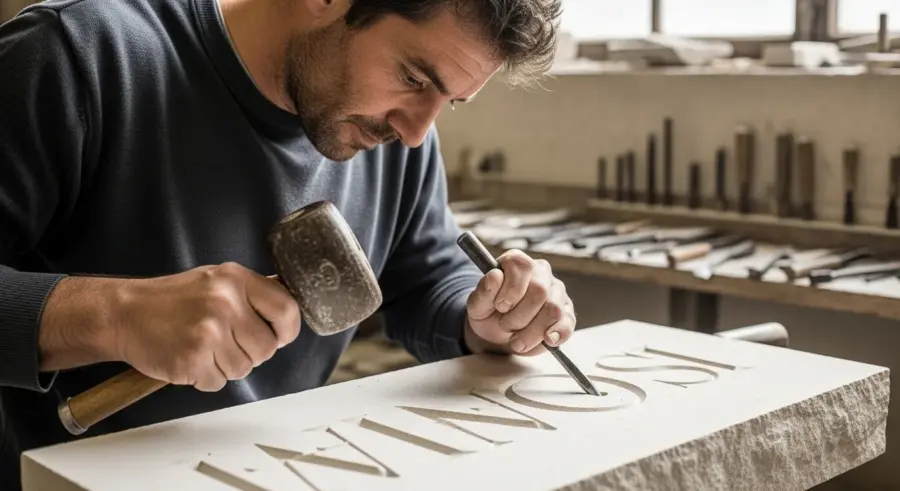
Stone lettering is a rewarding art form that allows you to create lasting tributes and artistic expressions. By understanding the techniques involved in choosing the right stone, using essential tools, designing effective layouts, and mastering carving and finishing techniques, you can create stunning inscriptions that will stand the test of time.
Whether you’re creating a memorial, a decorative plaque, or an architectural element, the principles of stone lettering remain the same. With practice, patience, and attention to detail, you can develop your skills and create beautiful, meaningful works of art that will be admired for generations to come, furthering the art of epigraphy.
Finishing and Polishing Your Stone Lettering
Once the carving is complete, the final step is to finish and polish the stone lettering to enhance its appearance and protect it from the elements. This may involve removing any remaining tool marks, smoothing the surface, and applying a sealant or protective coating.
Start by using a variety of abrasive tools to remove any rough edges or uneven surfaces. Sandpaper, abrasive pads, and polishing stones can be used to gradually smooth the stone, working from coarser grits to finer grits.
For a more polished look, you can use a polishing compound and a buffing wheel to bring out the natural luster of the stone. Apply the polishing compound to the stone surface and use the buffing wheel in a circular motion, being careful not to overheat the stone.
Once the polishing is complete, clean the stone thoroughly to remove any residual compound or dust. Finally, apply a sealant or protective coating to help protect the stone from moisture, dirt, and UV damage.
Before applying any finishing products, make sure the stone is completely dry. Moisture can interfere with the adhesion of sealants and coatings.
Choose a sealant or coating that is specifically designed for use on stone. These products will provide the best protection against the elements and will not damage the stone surface.
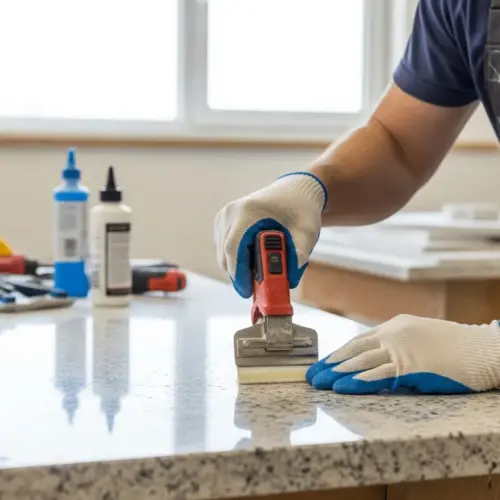
Apply the sealant or coating in thin, even layers, following the manufacturer’s instructions. Avoid applying too much product at once, as this can lead to drips and runs.
Allow the sealant or coating to dry completely before handling the finished piece. This will prevent fingerprints and smudges.
For outdoor installations, consider applying a water repellent to help protect the stone from moisture damage. Water repellents create a barrier that prevents water from penetrating the stone surface.
If you’re working with a porous stone like sandstone or limestone, you may need to apply multiple coats of sealant or coating to achieve adequate protection. Allow each coat to dry completely before applying the next.
Regularly clean your stone lettering with a mild soap and water solution to remove dirt and grime. Avoid using harsh chemicals or abrasive cleaners, as these can damage the stone surface.
Inspect your stone lettering regularly for any signs of damage, such as cracks, chips, or discoloration. Repair any damage promptly to prevent it from worsening.
With proper care and maintenance, your stone lettering will last for generations to come. The finishing and polishing process is an essential part of creating a beautiful and durable work of art.
Conclusion
Stone lettering is a rewarding art form that allows you to create lasting tributes and artistic expressions. By understanding the techniques involved in choosing the right stone, using essential tools, designing effective layouts, and mastering carving and finishing techniques, you can create stunning inscriptions that will stand the test of time.
Whether you’re creating a memorial, a decorative plaque, or an architectural element, the principles of stone lettering remain the same. With practice, patience, and attention to detail, you can develop your skills and create beautiful, meaningful works of art that will be admired for generations to come, furthering the art of epigraphy.
Finishing and Polishing Your Stone Lettering
Once the carving is complete, the final step is to finish and polish the stone lettering to enhance its appearance and protect it from the elements. This may involve removing any remaining tool marks, smoothing the surface, and applying a sealant or protective coating.
Start by using a variety of abrasive tools to remove any rough edges or uneven surfaces. Sandpaper, abrasive pads, and polishing stones can be used to gradually smooth the stone, working from coarser grits to finer grits.
For a more polished look, you can use a polishing compound and a buffing wheel to bring out the natural luster of the stone. Apply the polishing compound to the stone surface and use the buffing wheel in a circular motion, being careful not to overheat the stone.
Once the polishing is complete, clean the stone thoroughly to remove any residual compound or dust. Finally, apply a sealant or protective coating to help protect the stone from moisture, dirt, and UV damage.
Before applying any finishing products, make sure the stone is completely dry. Moisture can interfere with the adhesion of sealants and coatings.
Choose a sealant or coating that is specifically designed for use on stone. These products will provide the best protection against the elements and will not damage the stone surface.
Apply the sealant or coating in thin, even layers, following the manufacturer’s instructions. Avoid applying too much product at once, as this can lead to drips and runs.
Allow the sealant or coating to dry completely before handling the finished piece. This will prevent fingerprints and smudges.
For outdoor installations, consider applying a water repellent to help protect the stone from moisture damage. Water repellents create a barrier that prevents water from penetrating the stone surface.
If you’re working with a porous stone like sandstone or limestone, you may need to apply multiple coats of sealant or coating to achieve adequate protection. Allow each coat to dry completely before applying the next.
Regularly clean your stone lettering with a mild soap and water solution to remove dirt and grime. Avoid using harsh chemicals or abrasive cleaners, as these can damage the stone surface.
Inspect your stone lettering regularly for any signs of damage, such as cracks, chips, or discoloration. Repair any damage promptly to prevent it from worsening.
With proper care and maintenance, your stone lettering will last for generations to come. The finishing and polishing process is an essential part of creating a beautiful and durable work of art.
Conclusion
Stone lettering is a rewarding art form that allows you to create lasting tributes and artistic expressions. By understanding the techniques involved in choosing the right stone, using essential tools, designing effective layouts, and mastering carving and finishing techniques, you can create stunning inscriptions that will stand the test of time.
Whether you’re creating a memorial, a decorative plaque, or an architectural element, the principles of stone lettering remain the same. With practice, patience, and attention to detail, you can develop your skills and create beautiful, meaningful works of art that will be admired for generations to come, furthering the art of epigraphy.
Stone lettering is a timeless art form that combines craftsmanship with artistic expression. From ancient monuments to modern memorials, inscriptions carved in stone have served as enduring records of history, culture, and personal stories.
Understanding the techniques involved in stone lettering allows artisans to create beautiful and lasting works of art. This guide will explore the various aspects of stone lettering, including choosing the right stone, essential tools, design layout, carving techniques, and finishing touches.
Whether you’re a beginner looking to learn the basics or an experienced stone carver seeking to refine your skills, this comprehensive overview will provide valuable insights into the world of stone lettering. Let’s embark on a journey to discover the art and science behind creating stunning inscriptions in stone, also known as epigraphy.
Choosing the Right Stone for Lettering
Selecting the appropriate stone is the first and perhaps most important step in any stone lettering project. The type of stone significantly impacts the ease of carving, the longevity of the inscription, and the overall aesthetic appeal.
Different stones possess unique characteristics that make them suitable for various applications. Consider factors such as hardness, grain structure, color, and weather resistance when making your selection, as well as the stone’s ability to take fine detail in relief carving.
Granite is a popular choice due to its durability and resistance to weathering. It is an igneous rock composed mainly of quartz, feldspar, and mica, making it exceptionally hard and able to withstand harsh environmental conditions.
However, granite’s hardness also makes it more challenging to carve, requiring specialized tools and techniques. Marble, on the other hand, is a metamorphic rock known for its smooth texture and relative softness, making it easier to carve intricate designs and letterforms.
Sandstone offers a more textured and porous surface, lending a rustic charm to inscriptions. Its relative softness makes it easier to carve than granite, but it is also more susceptible to weathering and erosion over time.
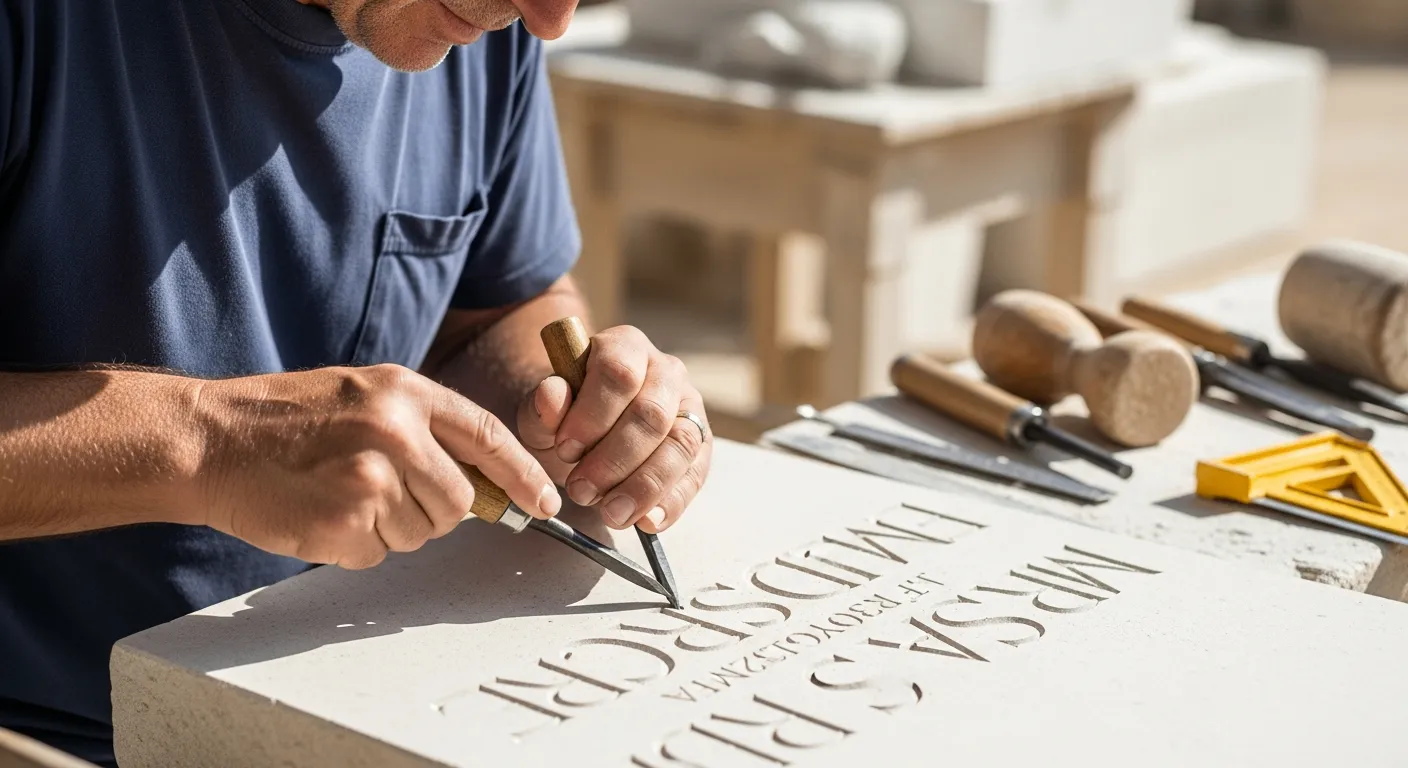
Limestone, another sedimentary rock, is similar to sandstone in terms of workability. It is often chosen for its light color and smooth texture, making it suitable for both indoor and outdoor applications, though it requires protection from acidic rain.
Slate, with its fine-grained texture and natural cleavage, presents a unique option for stone lettering. It is relatively soft and easy to split into thin sheets, making it ideal for creating plaques and signs with incised lettering.
When selecting a stone, consider the intended location of the finished piece. Outdoor installations require stones that can withstand temperature fluctuations, moisture, and exposure to sunlight.
For indoor applications, you may have more flexibility in your choice, allowing you to prioritize aesthetic qualities over durability. Ultimately, the best stone for your project will depend on your specific needs, budget, and aesthetic preferences.
Always source your stone from reputable suppliers who can provide information about its origin, composition, and suitability for carving. Inspect the stone carefully for any cracks, flaws, or imperfections that could compromise its structural integrity.
Consider the size and shape of the stone in relation to your design. A larger stone will allow for more elaborate inscriptions, while a smaller stone may be better suited for simpler designs.
The color of the stone can also play a significant role in the overall aesthetic. Darker stones tend to create a more dramatic and formal look, while lighter stones offer a more subtle and elegant appearance.
Think about how the color of the stone will complement the surrounding environment. A stone that blends in with its surroundings may create a more harmonious look, while a stone that contrasts sharply may create a more striking visual impact.
Essential Tools for Stone Lettering
Having the right tools is essential for achieving precise and professional-looking stone lettering. The tools you’ll need will vary depending on the type of stone you’re working with and the complexity of your design.
However, some fundamental tools are common to most stone lettering projects. These include chisels, mallets, measuring tools, and safety equipment, all designed to help you create clean, accurate inscriptions.
Chisels are the primary cutting tools used in stone lettering. They come in various shapes and sizes, each designed for a specific purpose.
Point chisels are used for roughing out the initial shape of the letters, while flat chisels are used for refining the edges and creating smooth surfaces. Tooth chisels, also known as comb chisels, have multiple teeth and are used for removing larger amounts of material quickly.
Mallets are used to strike the chisels, providing the force needed to cut into the stone. They are typically made of wood, rawhide, or polyurethane, each offering different levels of impact and durability.
A wooden mallet provides a softer impact, which is suitable for softer stones like marble and limestone. Rawhide mallets offer a balance between softness and durability, making them a versatile choice for a variety of stones.
Polyurethane mallets are the most durable and offer the greatest impact, making them ideal for harder stones like granite. Measuring tools are essential for accurately transferring your design onto the stone and ensuring that your lettering is properly aligned and spaced.
These tools include rulers, squares, compasses, and calipers. A ruler is used for measuring straight lines and distances, while a square is used to ensure that corners are right angles.
A compass is used for drawing circles and arcs, and calipers are used for measuring the thickness of the stone and the depth of the cuts. Safety equipment is paramount when working with stone, as the process can generate dust and flying debris.
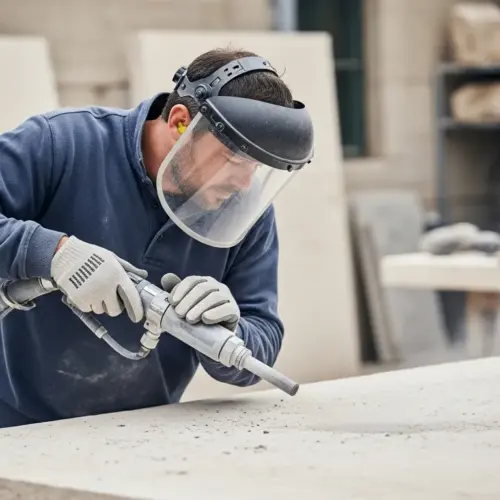
Always wear safety glasses to protect your eyes from flying chips and dust. A dust mask or respirator is essential for preventing the inhalation of stone dust, which can cause respiratory problems.
Gloves will protect your hands from cuts and abrasions, and ear protection will help to reduce noise exposure. In addition to these essential tools, you may also find other tools helpful, such as a grinder for shaping and smoothing the stone, a polishing wheel for creating a high-gloss finish, and a lettering stencil for creating precise and consistent letterforms.
Investing in high-quality tools will not only make the carving process easier and more efficient but will also ensure that your finished piece is of the highest quality. Take care of your tools by cleaning them regularly and storing them properly to prolong their lifespan.
Sharpen your chisels regularly to maintain their cutting edge. A dull chisel requires more force to use and is more likely to slip, which can lead to mistakes and injuries.
Designing Your Stone Lettering Layout
Before you even touch a chisel to stone, careful planning and design are crucial for achieving a visually appealing and well-balanced inscription. The layout of your stone lettering should consider factors such as the size and shape of the stone, the length of the text, and the desired style and readability.
Start by sketching out your design on paper, experimenting with different letterforms, spacing, and arrangements. Consider the overall aesthetic you want to achieve, whether it’s a traditional serif font for a classic look or a modern sans-serif font for a contemporary feel.
| Design Element | Considerations | Tips |
|---|---|---|
| Letter Style | Serif, Sans-serif, Script | Choose a style that complements the stone and the message. |
| Letter Size | Proportion to stone, Readability | Ensure letters are large enough to be easily read but not overwhelming. |
| Spacing | Kerning, Leading, Word Spacing | Maintain consistent spacing for a balanced and professional look. |
| Arrangement | Centered, Justified, Asymmetrical | Consider the visual impact and the overall design of the piece. |
Pay close attention to kerning, the spacing between individual letters, and leading, the vertical space between lines of text. Proper kerning and leading enhance readability and prevent the letters from appearing cramped or too far apart.
Consider the overall composition of the inscription. Will the text be centered, justified, or arranged in a more asymmetrical manner?
A centered arrangement creates a sense of balance and formality, while a justified arrangement creates a clean and uniform look. An asymmetrical arrangement can be used to create a more dynamic and visually interesting design.
Think about the hierarchy of information. Which words or phrases should be emphasized? You can use different font sizes, styles, or weights to create visual emphasis.
Consider adding decorative elements to your design, such as borders, flourishes, or symbols. These elements can add visual interest and enhance the overall aesthetic appeal of the inscription.
However, be careful not to overcrowd the design, as too many decorative elements can detract from the readability of the text. Use a grid system to help you align and space the letters and elements in your design.
A grid system provides a framework for creating a consistent and harmonious layout. Experiment with different grid systems to find one that works best for your design.
Get feedback on your design from others before you start carving. A fresh pair of eyes can often spot errors or areas for improvement that you may have missed.
Consider creating a mock-up of your design on paper or cardboard before transferring it to the stone. This will allow you to visualize the finished piece and make any necessary adjustments before you start carving.
Transferring Your Design to the Stone
Once you’re satisfied with your design, the next step is to transfer it accurately onto the surface of the stone. Several methods can be used for this purpose, each with its own advantages and disadvantages.
The most common techniques include using carbon paper, stencils, or freehand drawing, depending on the complexity of the design and your level of experience. Carbon paper is a simple and effective way to transfer a design from paper to stone.
Place the carbon paper between your design and the stone surface, then trace over the lines with a pencil or stylus. The pressure will transfer the design onto the stone, leaving a faint outline to guide your carving.
For more intricate designs, stencils can provide a more precise and repeatable method of transfer. You can create your own stencils using adhesive vinyl or purchase pre-made stencils from art supply stores.
Adhesive vinyl stencils are particularly useful for sandblasting, a technique that uses compressed air to blast abrasive particles onto the stone surface, creating a recessed design. Freehand drawing is a more advanced technique that requires a steady hand and a good eye for detail.
Use a soft pencil or charcoal to sketch your design directly onto the stone surface. This method allows for greater flexibility and creativity, but it also requires more skill and experience.
Before transferring your design, prepare the stone surface by cleaning it thoroughly with a brush and water. This will remove any dirt, dust, or debris that could interfere with the transfer process.
If you’re using carbon paper, make sure the carbon side is facing down towards the stone surface. Secure the design and carbon paper in place with tape to prevent them from shifting during the transfer process.
When tracing the design, apply even pressure to ensure that all the lines are transferred clearly. Avoid pressing too hard, as this could damage the stone surface.
If you’re using a stencil, make sure it’s securely attached to the stone surface to prevent the abrasive particles from seeping underneath. Use a specialized adhesive spray to help the stencil adhere to the stone.
If you’re drawing freehand, start by sketching the basic outlines of the letters and then gradually add more detail. Use a light touch and erase any mistakes as you go.
Once you’ve transferred the design, go over the lines with a permanent marker to make them more visible and durable. This will help you to see the design clearly as you carve.
Carving Techniques for Different Letter Styles
The actual carving process requires a combination of skill, patience, and precision. Different letter styles may require different carving techniques to achieve the desired effect.
Understanding these techniques will help you create clean, crisp letterforms that are both visually appealing and structurally sound. When carving serif letters, start by outlining the main strokes with a point chisel, carefully following the transferred design.
- Use a steady hand
- Maintain consistent pressure
- Angle the chisel appropriately
- Remove small amounts of material at a time
- Regularly check your progress
Then, use a flat chisel to refine the edges and create the characteristic serifs, the small decorative strokes at the ends of the letters. For sans-serif letters, the carving process is similar, but without the added complexity of the serifs.
When carving curved letterforms, use a round chisel or a gouge to create smooth, flowing lines. Rotate the chisel as you carve to maintain a consistent curve.
For incised lettering, where the letters are carved into the surface of the stone, use a V-shaped chisel to create sharp, clean lines. Hold the chisel at a slight angle to the stone surface and use a series of small, controlled strikes to remove the material.
For relief lettering, where the letters are raised above the surface of the stone, carve away the background around the letters, leaving the letters standing proud. Be careful not to damage the edges of the letters as you carve away the background.
When carving in hard stones like granite, use a carbide-tipped chisel for greater durability and cutting power. Carbide-tipped chisels are more expensive than traditional steel chisels, but they will last much longer and provide a cleaner cut.
Keep your chisels sharp by honing them regularly with a sharpening stone. A sharp chisel will cut more cleanly and require less force to use, reducing the risk of mistakes and injuries.
Work in a well-ventilated area to avoid inhaling stone dust. Use a dust collection system to remove the dust as you carve.
Take frequent breaks to avoid fatigue. Carving stone can be physically demanding, and fatigue can lead to mistakes and injuries.
Practice on scrap pieces of stone before working on your final project. This will allow you to develop your skills and techniques without risking damage to your finished piece.
Be patient and persistent. Stone lettering is a challenging art form, but with practice and dedication, you can achieve beautiful and lasting results.
Finishing and Polishing Your Stone Lettering
Once the carving is complete, the final step is to finish and polish the stone lettering to enhance its appearance and protect it from the elements. This may involve removing any remaining tool marks, smoothing the surface, and applying a sealant or protective coating.
Start by using a variety of abrasive tools to remove any rough edges or uneven surfaces. Sandpaper, abrasive pads, and polishing stones can be used to gradually smooth the stone, working from coarser grits to finer grits.
For a more polished look, you can use a polishing compound and a buffing wheel to bring out the natural luster of the stone. Apply the polishing compound to the stone surface and use the buffing wheel in a circular motion, being careful not to overheat the stone.
Once the polishing is complete, clean the stone thoroughly to remove any residual compound or dust. Finally, apply a sealant or protective coating to help protect the stone from moisture, dirt, and UV damage.
Before applying any finishing products, make sure the stone is completely dry. Moisture can interfere with the adhesion of sealants and coatings.
Choose a sealant or coating that is specifically designed for use on stone. These products will provide the best protection against the elements and will not damage the stone surface.
Apply the sealant or coating in thin, even layers, following the manufacturer’s instructions. Avoid applying too much product at once, as this can lead to drips and runs.
Allow the sealant or coating to dry completely before handling the finished piece. This will prevent fingerprints and smudges.
For outdoor installations, consider applying a water repellent to help protect the stone from moisture damage. Water repellents create a barrier that prevents water from penetrating the stone surface.
If you’re working with a porous stone like sandstone or limestone, you may need to apply multiple coats of sealant or coating to achieve adequate protection. Allow each coat to dry completely before applying the next.
Regularly clean your stone lettering with a mild soap and water solution to remove dirt and grime. Avoid using harsh chemicals or abrasive cleaners, as these can damage the stone surface.
Inspect your stone lettering regularly for any signs of damage, such as cracks, chips, or discoloration. Repair any damage promptly to prevent it from worsening.
With proper care and maintenance, your stone lettering will last for generations to come. The finishing and polishing process is an essential part of creating a beautiful and durable work of art.
Conclusion
Stone lettering is a rewarding art form that allows you to create lasting tributes and artistic expressions. By understanding the techniques involved in choosing the right stone, using essential tools, designing effective layouts, and mastering carving and finishing techniques, you can create stunning inscriptions that will stand the test of time.
Whether you’re creating a memorial, a decorative plaque, or an architectural element, the principles of stone lettering remain the same. With practice, patience, and attention to detail, you can develop your skills and create beautiful, meaningful works of art that will be admired for generations to come, furthering the art of epigraphy.