Stone carving is an ancient art form that allows you to transform raw stone into beautiful and intricate sculptures. Whether you’re a complete beginner or have some experience with other art forms, learning stone carving techniques can be a rewarding and fulfilling experience. This article will guide you through the essential stone carving techniques, from selecting the right stone to finishing your masterpiece.
We will cover everything you need to know to get started, including the necessary tools, basic carving methods, and safety precautions. By the end of this guide, you’ll have a solid foundation in stone carving and be ready to embark on your own creative projects.
So, grab your tools, choose your stone, and let’s begin this exciting artistic adventure together. This guide will get you started on the path to mastering stone sculpting tools and techniques.
Selecting the Right Stone for Your Project
Choosing the right stone is the first and most important step in any stone carving project. The type of stone you select will significantly impact the carving process and the final appearance of your sculpture.
Different types of stone have varying levels of hardness, grain, and color, each lending itself to different carving styles and levels of detail. For beginners, softer stones like soapstone and alabaster are highly recommended due to their ease of carving.
These stones are relatively soft and forgiving, allowing you to practice basic carving methods without excessive effort or risk of damaging your tools. Limestone is another good option for beginners, offering a balance between workability and durability.
More experienced carvers may choose harder stones like marble, granite, or even harder types of limestone. Marble is prized for its fine grain and ability to hold intricate details, while granite is known for its exceptional hardness and resistance to weathering.
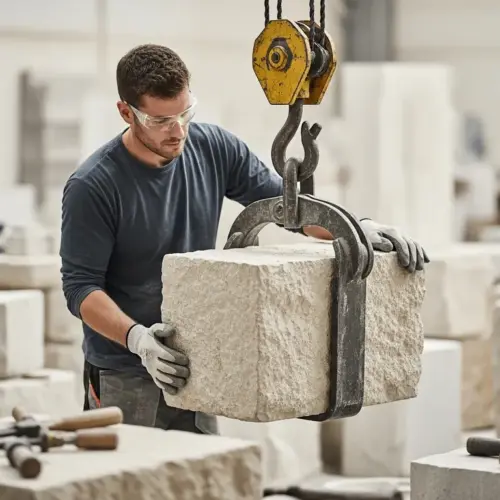
Consider the size and complexity of your project when selecting your stone. For larger sculptures, you’ll need a correspondingly large block of stone, while smaller, more detailed pieces may require a finer-grained stone.
The color of the stone also plays a crucial role in the overall aesthetic of your sculpture. Consider whether you want a stone with a uniform color or one with interesting patterns and variations.
Think about how the color will interact with light and shadow, as this can significantly impact the final appearance of your piece. Some stones also have natural inclusions or imperfections that can add character and uniqueness to your sculpture.
When sourcing your stone, consider local quarries or stone suppliers. This can often be more cost-effective than purchasing stone from a national supplier, and it also supports local businesses.
Before purchasing a large block of stone, it’s always a good idea to obtain a smaller sample to test its workability and see how it responds to your carving tools. This will help you avoid any surprises and ensure that you’re happy with your chosen stone.
Ultimately, the best stone for your project will depend on your personal preferences, skill level, and the specific requirements of your design. Take your time to research different types of stone and experiment with various options until you find the perfect match for your artistic vision.
Essential Stone Carving Tools and Their Uses
Having the right tools is essential for successful stone carving. Stone sculpting tools come in a variety of shapes and sizes, each designed for a specific purpose.
Here’s a breakdown of some of the most common and essential stone carving tools: * Mallet: Used to strike chisels and other hand tools, providing the force needed to remove stone. * Chisels: Available in various shapes (flat, tooth, point, round) for different carving tasks, such as roughing out, shaping, and detailing.
A point chisel is used for removing large amounts of stone quickly, while a flat chisel is used for smoothing surfaces. Tooth chisels are great for creating textured surfaces.
You’ll also want to have a set of rasps and rifflers, which are used for refining shapes and removing smaller amounts of stone. Rasps are coarser than rifflers and are used for more aggressive material removal.
Rifflers, with their smaller size and variety of shapes, are perfect for reaching into tight spaces and creating fine details. Don’t forget measuring and marking tools like calipers, rulers, pencils, and markers for transferring your design and ensuring accuracy.
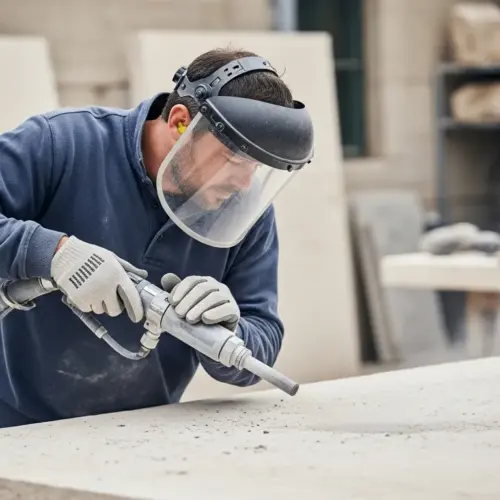
Lastly, safety gear like safety glasses, gloves, and a dust mask are crucial for protecting yourself from flying debris and harmful dust particles. Investing in quality tools and safety equipment will not only make your carving experience more enjoyable but also safer and more efficient.
Beyond the basic tools, consider investing in specialized equipment as your skills progress. Angle grinders with diamond blades can be incredibly useful for removing large amounts of stone quickly and efficiently. However, they require careful handling and strict adherence to safety guidelines.
Pneumatic tools, such as air hammers and chisels, can also be a valuable addition to your toolkit, especially for larger and more complex projects. These tools provide more power and control than hand tools, allowing you to work faster and with greater precision.
When choosing chisels, look for high-quality steel that will hold its edge and withstand repeated use. Different types of steel are available, each with its own advantages and disadvantages. Research different steel types to find the best option for your needs and budget.
The handles of your tools are also important. Look for handles that are comfortable to grip and provide a secure hold. Wooden handles are a popular choice, as they absorb shock and provide a natural feel.
Regularly inspect your tools for any signs of wear and tear. Replace any damaged or worn-out tools to ensure your safety and the quality of your work. Proper tool maintenance is crucial for extending the life of your tools and ensuring their optimal performance.
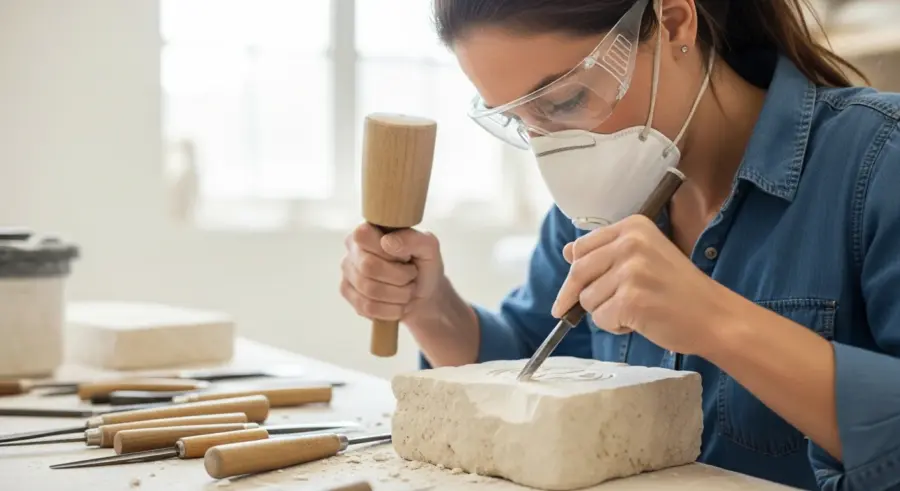
Basic Carving Techniques: Pointing, Roughing Out, and Detailing
Mastering the basic stone carving techniques is essential for creating successful sculptures. These techniques include pointing, roughing out, and detailing, each serving a distinct purpose in the carving process.
Pointing involves using a point chisel and mallet to remove large amounts of stone quickly and efficiently. This technique is typically used to establish the overall shape and form of your sculpture.
| Technique | Tool | Purpose |
|---|---|---|
| Pointing | Point Chisel | Remove large amounts of stone |
| Roughing Out | Tooth Chisel | Refine the general shape |
| Detailing | Flat or Round Chisel | Create fine details |
| Smoothing | Rasps and Rifflers | Refine the surface |
Roughing out follows pointing and involves using tooth chisels to refine the general shape and remove any remaining large pieces of stone. Detailing is the final stage, where you use flat or round chisels to create fine details and textures.
When pointing, hold the point chisel at a slight angle to the stone and strike it firmly with the mallet. Avoid hitting the chisel too hard, as this can cause the stone to crack or splinter.
Work in a systematic manner, removing stone evenly from all sides of the sculpture. This will help you maintain the overall shape and prevent any areas from becoming too thin or weak.
When roughing out, use a tooth chisel with a wider blade to remove larger amounts of stone more quickly. Hold the chisel at a steeper angle to the stone and strike it with moderate force.
Pay close attention to the overall shape of your sculpture and make adjustments as needed. Use calipers and other measuring tools to ensure that your sculpture is symmetrical and proportional.
When detailing, use a flat or round chisel with a narrow blade to create fine lines and textures. Hold the chisel at a shallow angle to the stone and strike it with light taps of the mallet.
Work slowly and carefully, paying attention to the details of your design. Use rasps and rifflers to smooth out any rough edges and refine the surface of your sculpture.
Remember to take breaks frequently to rest your hands and eyes. Stone carving can be physically demanding, so it’s important to avoid fatigue and prevent injuries. With practice and patience, you’ll master these basic carving techniques and be able to create beautiful and intricate sculptures.
Transferring Your Design to the Stone
Before you start carving, it’s essential to transfer your design onto the stone. This ensures that you have a clear guide to follow and helps you maintain accuracy throughout the carving process.
There are several methods for transferring your design, each with its own advantages and disadvantages. One common method is to create a paper template of your design and trace it onto the stone using carbon paper.
Simply place the carbon paper between the template and the stone, then trace the outline of your design with a pencil or pen. The carbon paper will transfer the design onto the stone, leaving you with a clear outline to follow.
Another method is to use a grid system, where you divide your design into a grid and then transfer that grid onto the stone. This can be particularly useful for complex designs with many intricate details.
You can also use a projector to project your design onto the stone and then trace the outline. This method is especially helpful for larger sculptures where it can be difficult to create a paper template.
Regardless of the method you choose, make sure to use a pencil or marker that is easily visible on the stone and won’t smudge or fade during the carving process. Take your time and be precise when transferring your design to ensure that your final sculpture accurately reflects your vision.
For complex designs, consider using a combination of methods. You might start by projecting a basic outline onto the stone and then use a grid system to transfer the finer details.
Before transferring your design, make sure the surface of the stone is clean and smooth. This will help the carbon paper or pencil marks adhere properly and prevent smudging.
If you’re using carbon paper, use a fresh sheet for each transfer to ensure a clear and crisp outline. Avoid pressing too hard when tracing, as this can damage the stone or create unwanted marks.
If you make a mistake when transferring your design, don’t worry. You can usually erase pencil marks with a soft eraser or gently wipe away carbon paper marks with a damp cloth.
Once you’ve transferred your design, take a step back and examine it carefully. Make sure that all the lines are clear and accurate and that the design is properly aligned on the stone. If you’re not happy with the transfer, you can always make adjustments before you start carving.
Safety Precautions for Stone Carving
Stone carving can be a rewarding art form, but it’s essential to prioritize safety to prevent injuries. The nature of the work involves sharp tools and the potential for flying debris.
Always wear safety glasses to protect your eyes from flying stone chips and dust. A dust mask or respirator is also crucial to prevent inhalation of harmful stone dust, which can cause respiratory problems over time.
- Wear safety glasses
- Use a dust mask or respirator
- Wear gloves
- Ensure adequate ventilation
- Keep your work area clean
Wear gloves to protect your hands from cuts and abrasions. Ensure that your work area is well-ventilated to minimize dust exposure.
In addition to these basic precautions, it’s also important to be aware of the specific hazards associated with the tools and techniques you’re using. When using power tools, always follow the manufacturer’s instructions and wear appropriate hearing protection.
Be careful when handling sharp chisels and other cutting tools. Keep your fingers away from the blade and always cut away from your body. Use a mallet with a comfortable grip and avoid striking the chisel too hard, as this can cause it to slip.
Keep your work area clean and free of clutter. This will help prevent accidents and make it easier to focus on your work. Dispose of stone dust and debris properly to avoid creating a slip hazard.
Take breaks frequently to rest your hands and eyes. Stone carving can be physically demanding, so it’s important to avoid fatigue and prevent injuries. If you experience any pain or discomfort, stop working and seek medical attention.
Consider taking a stone carving safety course to learn more about safe working practices. A qualified instructor can provide valuable guidance and help you develop good habits that will protect you from injury.
Always be aware of your surroundings and take steps to minimize the risk of accidents. By following these safety precautions, you can enjoy the art of stone carving without putting yourself or others at risk.
Limestone Carving Techniques
Limestone is a popular choice for stone carving due to its relative softness and uniform texture. These qualities make it easier to work with compared to harder stones like granite or marble, especially for beginners.
However, mastering limestone carving techniques requires understanding its specific properties and how to best utilize them. When starting a limestone carving project, it’s crucial to select a piece of stone that is free from cracks and flaws.
Carefully inspect the stone for any signs of weakness or damage that could compromise the final sculpture. Once you’ve selected your stone, begin by transferring your design onto the surface using one of the methods described earlier.
When roughing out the shape, use a point chisel and mallet to remove large amounts of stone. Be careful not to apply too much force, as limestone can be prone to chipping or cracking.
As you progress to the detailing stage, switch to smaller chisels and rasps to refine the shape and create intricate details. Limestone’s uniform texture allows for precise carving and the creation of smooth, flowing lines.
Take advantage of this by using rifflers to create subtle textures and highlights that will bring your sculpture to life. Remember to keep your tools sharp and clean to ensure clean cuts and prevent the stone from crumbling.
Limestone is also relatively porous, which means it can absorb moisture. To prevent staining or damage, it’s important to seal your limestone sculpture with a stone sealant after you’ve finished carving and polishing it.
When carving limestone, be aware of the direction of the grain. Carving against the grain can cause the stone to chip or crumble, while carving with the grain will result in cleaner cuts.
Experiment with different carving techniques to create a variety of textures and effects. You can use a tooth chisel to create a rough, textured surface or a flat chisel to create a smooth, polished surface.
Limestone is also a relatively soft stone, which means it’s easy to carve but also easy to scratch or damage. Be careful when handling your limestone sculpture and avoid placing it in areas where it could be exposed to abrasion or impact.
With proper care and attention, your limestone sculpture will last for many years to come. Enjoy the process of working with this beautiful and versatile stone and let your creativity flow.
Stone Sculpting Tools Maintenance
Proper maintenance of your stone sculpting tools is essential for ensuring their longevity and optimal performance. Sharp tools are not only more effective but also safer to use, as they require less force and reduce the risk of slippage.
Regularly sharpen your chisels and other cutting tools using a sharpening stone or grinder. Follow the manufacturer’s instructions for the specific tool and stone to avoid damaging the blade.
Keep your rasps and rifflers clean by brushing them with a wire brush to remove any accumulated stone dust. Store your tools in a dry, protected place to prevent rust and corrosion.
Periodically inspect your tools for any signs of damage, such as cracks or chips, and replace them as needed. Taking good care of your stone sculpting tools will not only save you money in the long run but also make your carving experience more enjoyable and efficient.
When sharpening chisels, maintain the original bevel angle to ensure optimal cutting performance. Use a honing guide to help you maintain a consistent angle and achieve a sharp, even edge.
Lubricate your tools regularly with a light oil to prevent rust and corrosion. This is especially important for tools that are used frequently or stored in humid environments.
Replace wooden handles that are cracked or loose to ensure a safe and comfortable grip. Consider using ergonomic handles to reduce fatigue and prevent injuries.
Clean your tools after each use to remove any stone dust or debris. Use a brush and a mild detergent to clean the blades and handles.
Store your tools in a tool chest or cabinet to protect them from damage and keep them organized. Label each tool clearly so you can easily find what you need.
By following these simple maintenance tips, you can keep your stone sculpting tools in top condition and enjoy years of reliable service. Remember that proper tool maintenance is an investment in your craft and will ultimately save you time and money in the long run.
Advanced Stone Carving Techniques
Once you’ve mastered the basic stone carving techniques, you can explore more advanced methods to further enhance your skills and creativity. These techniques include undercutting, piercing, and creating complex textures.
Undercutting involves carving away stone beneath an overhanging feature, creating a sense of depth and shadow. This technique can be used to create dramatic effects and add visual interest to your sculptures.
Piercing involves carving holes or openings through the stone, creating a sense of lightness and transparency. This technique can be used to create intricate patterns and designs.
Experiment with different tools and techniques to create a variety of textures, from smooth and polished surfaces to rough and jagged edges. By mastering these advanced stone carving techniques, you can take your sculptures to the next level and create truly unique and impressive works of art.
Another advanced technique is relief carving, where you carve a design into the surface of the stone, leaving the background untouched. This technique can be used to create intricate patterns and designs with a three-dimensional effect.
Consider incorporating different types of stone into your sculptures to create contrast and visual interest. You can combine different colors, textures, and hardnesses of stone to create unique and striking effects.
Experiment with different finishes to enhance the beauty of your stone sculptures. You can polish the stone to a high shine, leave it with a matte finish, or apply a sealant to protect it from the elements.
Study the works of master stone carvers to learn from their techniques and gain inspiration for your own creations. Visit museums, galleries, and studios to see examples of their work and learn about their processes.
Attend workshops and seminars to learn new techniques and network with other stone carvers. These events can provide valuable opportunities for learning, sharing ideas, and building relationships.
By continuously learning and experimenting, you can push the boundaries of your stone carving skills and create truly exceptional works of art. Embrace the challenges and enjoy the journey of mastering this ancient and rewarding craft.
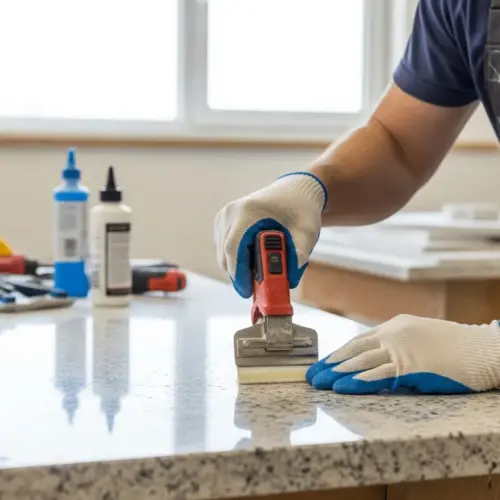
Finishing and Polishing Your Stone Carving
The final step in the stone carving process is finishing and polishing your sculpture. This involves refining the surface of the stone to achieve the desired level of smoothness and shine.
Start by using rasps and rifflers to remove any remaining tool marks and smooth out the surface. Then, use progressively finer grades of sandpaper to further refine the surface and prepare it for polishing.
Once the surface is smooth and free of scratches, you can begin polishing it with a polishing compound and a soft cloth or buffing wheel. Apply the polishing compound to the surface and gently rub it in using circular motions.
Continue polishing until you achieve the desired level of shine. For a more matte finish, you can skip the polishing step and simply seal the stone with a stone sealant to protect it from moisture and dirt.
Remember to wear gloves and eye protection when using polishing compounds and sealants. With careful finishing and polishing, you can transform your stone carving into a beautiful and lasting work of art.
The specific polishing compounds and techniques you use will depend on the type of stone you’re working with. Research the best methods for polishing your chosen stone to achieve the desired results.
For harder stones like granite, you may need to use diamond polishing pads to achieve a high shine. These pads are available in a range of grits, from coarse to fine, and are used with water to lubricate the surface and prevent overheating.
For softer stones like soapstone, you can use a variety of polishing compounds, including wax, oil, and commercial stone polishes. Experiment with different products to find the one that works best for you.
When polishing, be patient and work in small areas at a time. Avoid applying too much pressure, as this can damage the stone or create uneven results.
After polishing, clean the surface of the stone with a soft cloth to remove any remaining polishing compound. Apply a stone sealant to protect the stone from moisture and dirt and enhance its natural beauty.
Conclusion
Stone carving is a challenging but rewarding art form that allows you to express your creativity and create beautiful, lasting works of art. By following the stone carving techniques outlined in this guide, you can learn the essential skills and knowledge needed to get started on your own stone carving projects.
Remember to prioritize safety, choose the right stone and tools, and practice the basic carving methods until you feel comfortable. With patience, perseverance, and a passion for the art, you can master the art of stone carving and create sculptures that will be admired for generations to come.
The journey of learning stone carving is a continuous process of discovery and refinement. Don’t be afraid to experiment with different techniques, tools, and materials to find your own unique style and voice.
Join a stone carving community or club to connect with other artists and share your experiences. Learning from others and collaborating on projects can be a great way to expand your skills and knowledge.
Visit museums and galleries to see examples of stone carvings from different cultures and time periods. Studying the works of master carvers can provide inspiration and help you develop your own artistic vision.
Most importantly, have fun and enjoy the process of creating something beautiful and lasting from stone. Stone carving is a truly rewarding art form that can bring you a lifetime of joy and fulfillment.