Pointing stone walls is a craft that blends historical techniques with modern materials. It is more than just filling gaps; it’s about preserving the structural integrity and aesthetic appeal of stone structures. Done well, pointing stone walls can last for generations.
This guide provides a comprehensive look at the materials, tools, and methods required for successful pointing stone walls. We will cover everything from understanding the importance of pointing to troubleshooting common problems that may arise during the process.
Whether you’re a seasoned stone mason or a homeowner looking to tackle a DIY project, this guide will equip you with the knowledge and skills necessary to restore and maintain your stone walls. Let’s get started with the basics of repointing mortar.
Understanding the Importance of Pointing in Stone Walls
Pointing is the visible surface of mortar joints in a stone wall. Its primary function is to protect the wall from water penetration. Water can cause significant damage to the stone and mortar over time, leading to structural instability and decay.
Proper pointing also enhances the aesthetic appeal of the stone wall. It defines the visual character and contributes to the overall appearance of the stone structure. The color and texture of the mortar should complement the stone.
Beyond aesthetics and water protection, pointing plays a crucial role in maintaining the structural integrity of the wall. It binds the stones together, distributing weight evenly and preventing movement. Without sound pointing, the wall can weaken and collapse.
Ignoring deteriorated pointing can lead to costly repairs down the road. Regular inspection and maintenance of pointing are essential for preserving the longevity and stability of stone walls. Ignoring this can lead to more serious structural damage.
The mortar joints are the weakest part of a stone wall and therefore the most vulnerable to the elements. When water seeps into these joints, it can freeze and expand, causing the mortar to crack and crumble. This process, known as freeze-thaw, is a major cause of deterioration in stone walls.
Furthermore, water penetration can lead to the growth of mold and mildew within the wall. This can not only damage the structure but also pose health risks to occupants. Therefore, maintaining sound pointing is crucial for preventing these issues.
In addition to protecting against water damage, pointing also helps to prevent the intrusion of pests and insects. Cracks and gaps in the mortar joints can provide entry points for these unwanted guests. Proper pointing seals these entry points, keeping your home or building pest-free.
The appearance of your stone wall significantly impacts the overall aesthetic of your property. Deteriorated pointing can make a wall look neglected and unsightly. Fresh, well-maintained pointing can enhance the beauty and value of your property.
Think of pointing as the “glue” that holds your stone wall together. It’s a critical component that should not be overlooked. Regular maintenance and timely repairs will ensure the longevity and stability of your stone structure.
Preparing the Mortar Joints for Pointing
Before you can begin pointing stone walls, proper preparation of the mortar joints is essential. This involves removing the old, deteriorated mortar to create a clean surface for the new mortar to adhere to. Neglecting this step can compromise the success of the repointing mortar.
Start by carefully inspecting the mortar joints and identifying areas where the mortar is loose, cracked, or missing. Use a pointing chisel and hammer to carefully remove the old mortar, working along the joints to a depth of about 2 to 2.5 times the joint width. Be careful not to damage the adjacent stones.
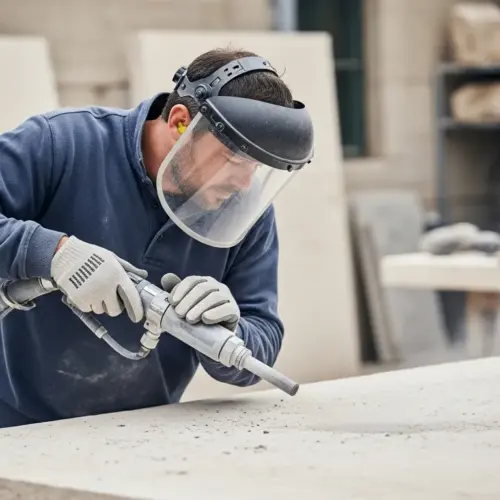
For larger projects, consider using power tools such as an angle grinder with a diamond blade or a rotary tool with a mortar removal bit. These tools can speed up the process, but require careful handling to avoid damaging the stone. Always wear safety glasses and a dust mask when using power tools.
After removing the old mortar, use a brush and water to clean the joints and remove any loose debris. This will provide a clean, slightly damp surface for the new mortar to bond to. A clean joint is critical for proper adhesion.
The depth to which you remove the old mortar is crucial for a strong, lasting repair. Removing to the recommended depth ensures that the new mortar has enough surface area to bond to. This creates a more secure and durable joint.
When using power tools, it’s important to use the correct type of blade or bit. A diamond blade is specifically designed for cutting through mortar and stone. Using the wrong tool can damage the stone and create excessive dust.
Dust control is essential when removing old mortar, especially when using power tools. Wear a dust mask or respirator to protect your lungs from harmful particles. Consider using a vacuum attachment to collect dust as you work.
After cleaning the joints with a brush and water, allow them to dry slightly before applying the new mortar. A slightly damp surface is ideal for promoting adhesion. Avoid applying mortar to joints that are too wet or too dry.
Take your time during the preparation process. Proper preparation is the foundation for a successful pointing project. Rushing this step can lead to problems down the road. A well-prepared joint is half the battle.
Selecting the Right Mortar for Pointing Stone Walls
Choosing the right mortar is crucial for the longevity and performance of your repointing project. The mortar should be compatible with the type of stone used in the wall. Using the wrong mortar can cause damage to the stone over time.
Lime-based mortars are generally recommended for historic stone structures because they are softer and more flexible than modern cement-based mortars. This allows the wall to breathe and accommodate movement without cracking. Cement mortars are less flexible than lime mortars.
Here’s a quick guide to help you choose the right mortar mix:
| Mortar Type | Composition | Best For |
|---|---|---|
| Type O | 1 part cement, 2 parts lime, 9 parts sand | Soft stones, sheltered locations |
| Type N | 1 part cement, 1 part lime, 6 parts sand | General use, moderate exposure |
| Type S | 2 parts cement, 1 part lime, 9 parts sand | High exposure, load-bearing walls |
| Lime Mortar | Lime putty, sand | Historic structures, soft stones |
Consider the color of the mortar as well. The mortar color should match the original mortar or complement the color of the stone for a cohesive appearance. Test the mortar on a small, inconspicuous area first.
The compatibility of the mortar with the stone is paramount. Using a mortar that is too hard can actually damage softer stones. The harder mortar will not allow the stone to breathe and expand and contract naturally with temperature changes.
Lime mortars are more porous than cement mortars, allowing moisture to evaporate from the wall. This is particularly important in older structures where the original construction relied on this breathability. Trapped moisture can lead to significant damage.
When choosing a mortar mix, consider the exposure of the wall to the elements. Walls that are exposed to high levels of moisture or freeze-thaw cycles require a more durable mortar. Type S mortar is often recommended for these situations.
Always consult with a qualified stone mason or historical preservation expert if you are unsure about which mortar to use. They can assess the specific needs of your project and recommend the best option. Professional advice is always a good investment.
Don’t be afraid to experiment with different mortar colors to find the perfect match for your stone. You can add pigments to the mortar mix to achieve the desired color. Always test the color on a small area before applying it to the entire wall.
Mixing and Applying the Mortar
Proper mixing of the mortar is essential for achieving the desired consistency and workability. Always follow the manufacturer’s instructions for mixing ratios and water content. Using the correct proportions is critical.
For small projects, you can mix the mortar by hand in a mortar tub using a shovel or hoe. For larger projects, consider using a mechanical mortar mixer to ensure thorough and consistent mixing. A mechanical mixer saves time and effort.
Add water gradually to the dry ingredients, mixing until you achieve a plastic, workable consistency similar to thick paste. Avoid adding too much water, which can weaken the mortar. The mortar should be moist but not soupy.
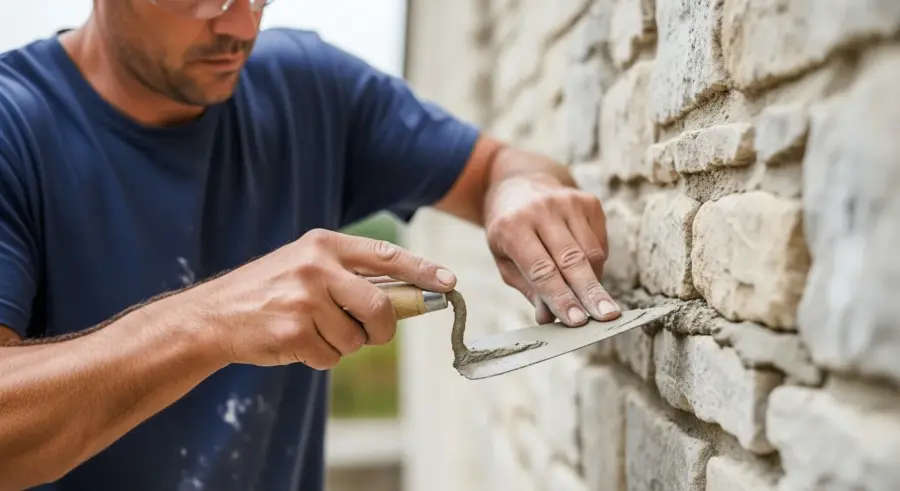
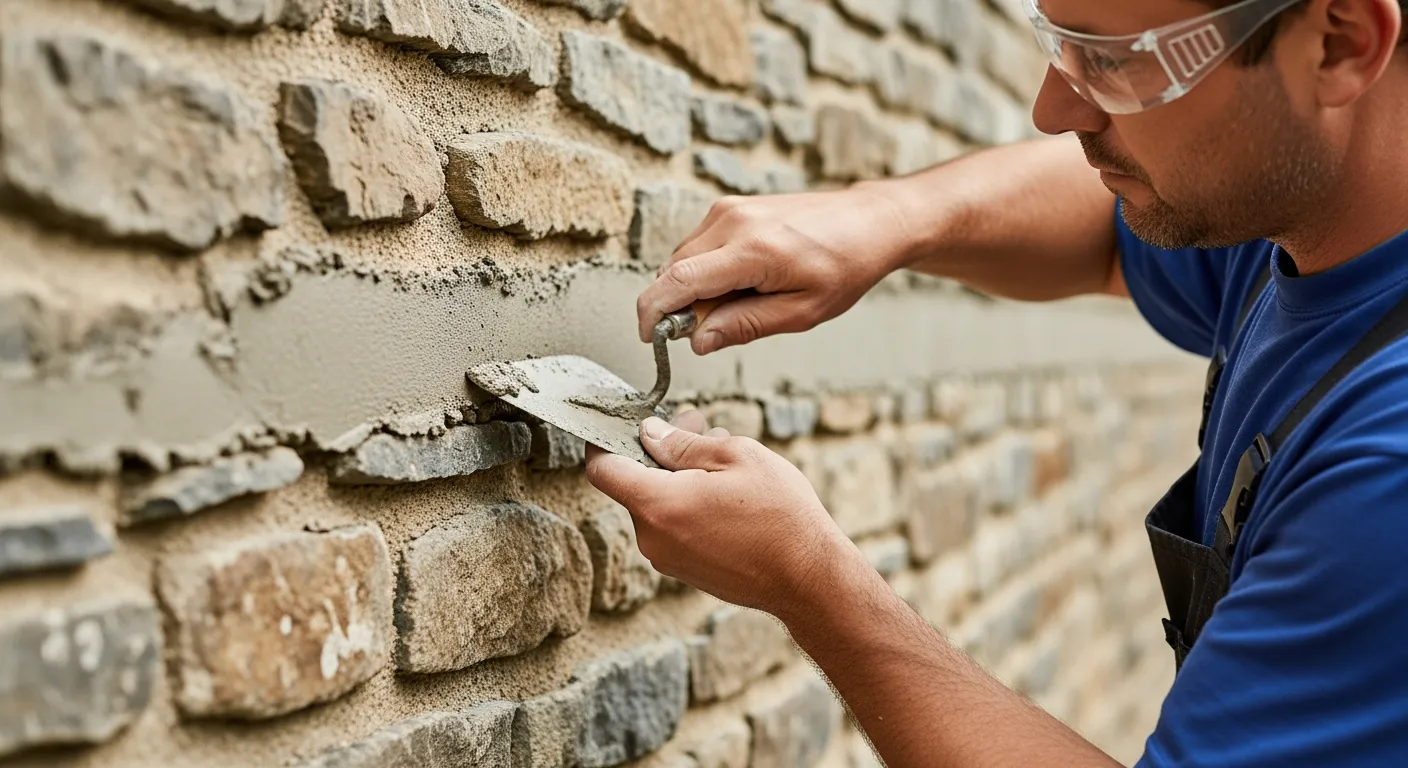
Once the mortar is mixed, use a pointing trowel to apply it to the prepared joints. Work the mortar firmly into the joints, ensuring that it fills the entire depth of the joint. Avoid leaving any gaps or voids.
For wider joints, apply the mortar in layers, allowing each layer to partially set before applying the next. This prevents the mortar from slumping or cracking. Multiple layers provide better support.
The consistency of the mortar is key to successful application. If the mortar is too dry, it will be difficult to work with and may not adhere properly. If it’s too wet, it will slump and be weak. Aim for a consistency similar to thick putty.
When mixing mortar by hand, be sure to thoroughly combine the dry ingredients before adding water. This will ensure that the cement, lime, and sand are evenly distributed throughout the mix. Uneven mixing can lead to inconsistent results.
A pointing trowel is specifically designed for applying mortar to narrow joints. It has a long, narrow blade that allows you to reach into tight spaces. Using the right tool will make the job much easier.
Pack the mortar firmly into the joints to ensure that it makes good contact with the stone. This will help to create a strong, watertight seal. Use the pointing trowel to press the mortar into the joints, working from the back to the front.
Clean your tools regularly to prevent mortar from hardening on them. Keep a bucket of water nearby for rinsing your trowel and other tools. Clean tools will make the job easier and produce better results.
Finishing the Mortar Joints
Finishing the mortar joints is a critical step in achieving the desired aesthetic and functional outcome. The finish should be appropriate for the style of the wall and the type of mortar used. Different finishes offer different looks.
Several different joint finishes are commonly used in stone masonry, including: flush, concave, V-joint, and weathered. A flush joint is level with the surface of the stone, while a concave joint is slightly recessed and curved inward. A V-joint is angled inward, and a weathered joint slopes downward to shed water.
To create a concave joint, use a jointing tool or a rounded piece of metal to press the mortar inward, creating a smooth, curved surface. For a V-joint, use a V-shaped tool to create a clean, angled line. For a weathered joint, use a trowel to create a sloping surface.
The choice of joint finish depends on the style of the wall, the type of stone, and the desired aesthetic. Consider the historical context of the structure when selecting a joint finish. Some finishes are more appropriate for certain styles.
After finishing the joints, use a soft brush to remove any excess mortar from the surface of the stone. Be careful not to smear the mortar or damage the finished joints. Cleanliness is important for a professional look.
The concave joint is a popular choice because it is durable and sheds water effectively. It also creates a shadow line that enhances the appearance of the stone. The concave joint is a good all-around choice.
A flush joint can be difficult to achieve and maintain. It is also more susceptible to water damage because it does not shed water as effectively as other joint finishes. Flush joints are less common in exterior applications.
The V-joint is a more decorative option that can add visual interest to the wall. However, it can also be more difficult to execute properly. A steady hand is required to create a clean, uniform V-shape.
A weathered joint is designed to shed water away from the wall. It is often used in areas with high rainfall. The sloping surface of the joint helps to prevent water from penetrating the mortar.
Experiment with different joint finishes on a small, inconspicuous area before committing to a particular style. This will allow you to see how the finish looks with your stone and mortar. Testing is always a good idea.
Curing the Mortar
Curing is the process of keeping the mortar moist to allow it to properly hydrate and harden. Proper curing is essential for achieving maximum strength and durability. Neglecting this step can lead to weak, crumbly mortar.
The curing process typically lasts for 3 to 7 days, depending on the type of mortar and the weather conditions. During this time, the mortar should be kept moist but not saturated. The curing time can vary.
In hot, dry weather, you may need to mist the mortar with water several times a day to prevent it from drying out too quickly. In cool, damp weather, you may only need to mist it once or twice a day. Monitor the mortar closely during the curing process.
Covering the mortar with plastic sheeting can also help to retain moisture and prevent it from drying out too quickly. Be sure to leave some ventilation to prevent the buildup of condensation. Ventilation is important to prevent mold growth.
The ideal curing conditions are cool and humid. This allows the mortar to hydrate slowly and evenly, resulting in a stronger, more durable joint. Avoid exposing the mortar to direct sunlight or strong winds during the curing process.
If the mortar dries out too quickly, it can crack and crumble. This is because the cement in the mortar needs water to properly hydrate and form a strong bond. Proper curing provides the necessary moisture for this process to occur.
In addition to misting the mortar with water, you can also use burlap or other absorbent materials to keep it moist. Soak the burlap in water and then drape it over the mortar joints. This will help to retain moisture and prevent the mortar from drying out.
Be careful not to over-water the mortar. Too much water can weaken the mortar and cause it to slump. The goal is to keep the mortar moist, not saturated. A light misting is usually sufficient.
Monitor the weather forecast and adjust your curing methods accordingly. If rain is expected, you may need to remove the plastic sheeting to prevent the mortar from becoming oversaturated. If hot, dry weather is expected, you may need to increase the frequency of misting.
Essential Tools and Materials for Pointing Stone Walls
Having the right tools and materials on hand will make the pointing process much easier and more efficient. Here is a list of essential items you will need:
Proper preparation will prevent many problems. These tools will help you maintain and repair stone walls.
- Pointing chisel
- Hammer
- Mortar tub
- Pointing trowel
- Jointing tools
- Soft brush
- Water sprayer
- Mortar mixer (optional)
- Safety glasses
- Dust mask
A good quality pointing chisel is essential for removing old mortar without damaging the stone. Choose a chisel that is the right size and shape for the joints you are working on. A sharp chisel will make the job easier.
A variety of jointing tools will allow you to create different joint finishes. Experiment with different tools to find the ones that you prefer. Jointing tools come in a variety of shapes and sizes.
A soft brush is useful for removing excess mortar from the surface of the stone without damaging the finished joints. Choose a brush with soft bristles that will not scratch the stone. A clean brush is essential for a professional finish.
Safety glasses and a dust mask are essential for protecting your eyes and lungs from dust and debris. Always wear these items when working with mortar. Safety should always be a top priority.
Consider investing in a mortar mixer if you have a large project. A mortar mixer will save you time and effort and ensure that the mortar is thoroughly mixed. A well-mixed mortar is essential for a strong, durable joint.
Tuckpointing Techniques for Stone Wall Repair
Tuckpointing is a specialized technique used to create the illusion of very fine mortar joints. It involves applying a colored mortar that matches the stone, then adding a thin ribbon of white or contrasting mortar on top. This creates a neat, uniform appearance.
To tuckpoint a stone wall, first prepare the joints as described earlier, removing any loose or deteriorated mortar. Then, apply a base coat of mortar that matches the color of the stone. Allow the base coat to set slightly before proceeding.
Next, use a tuckpointing tool or a small trowel to apply a thin ribbon of white or contrasting mortar on top of the base coat. The ribbon should be perfectly straight and uniform in width. Take your time to achieve a clean, professional look.
Tuckpointing can be a time-consuming process, but the results can be stunning. It is often used on historic buildings to restore their original appearance. Tuckpointing requires skill and patience.
The base coat of mortar should be slightly recessed from the surface of the stone to create a channel for the tuckpointing ribbon. This will help to define the ribbon and create a clean, crisp line. Recessing the base coat is key to the tuckpointing effect.
The tuckpointing ribbon should be applied with a steady hand and a consistent pressure. Any inconsistencies in the width or depth of the ribbon will be noticeable. Practice on a small area before tackling the entire wall.
Use a tuckpointing tool or a small trowel to create a perfectly straight and uniform ribbon. A tuckpointing tool is specifically designed for this purpose and can help you achieve a professional look. The right tool makes the job easier.
Allow the tuckpointing ribbon to cure properly before exposing it to the elements. This will help to prevent cracking and discoloration. Proper curing is essential for a long-lasting repair.
Tuckpointing is a specialized skill that requires practice and patience. If you are not comfortable performing this task yourself, consider hiring a professional stone mason. A professional will ensure that the job is done correctly.
Troubleshooting Common Pointing Problems
Even with careful planning and execution, problems can sometimes arise during the pointing process. Here are some common issues and how to address them. Knowing these issues can help prevent them.
Mortar Cracking: This can be caused by using too much cement in the mortar mix, allowing the mortar to dry out too quickly, or movement in the wall. To prevent cracking, use a lime-based mortar, cure the mortar properly, and address any structural issues in the wall. Lime mortars are more flexible.
Mortar Slumping: This can occur when the mortar is too wet or the joints are too wide. To prevent slumping, use a stiffer mortar mix and apply the mortar in layers. Allow each layer to partially set before applying the next. Stiffer mixes hold their shape better.
Mortar Discoloration: This can be caused by impurities in the mortar mix, efflorescence, or exposure to the elements. To prevent discoloration, use clean materials, seal the mortar, and provide adequate drainage. Clean materials prevent unwanted reactions.
Poor Adhesion: This can occur when the joints are not properly cleaned or the mortar is not properly mixed. To ensure good adhesion, clean the joints thoroughly and use a properly mixed mortar. Good adhesion is critical for longevity.
Efflorescence is a white, powdery deposit that can appear on the surface of the mortar. It is caused by salts that are dissolved in water and then deposited on the surface as the water evaporates. Efflorescence can be removed with a stiff brush and water.
If you are experiencing mortar cracking due to movement in the wall, it is important to address the underlying structural issues. This may involve repairing foundation cracks or reinforcing the wall. Addressing the root cause is essential for a lasting repair.
Mortar that is too wet is more likely to slump and crack. It is also more susceptible to water damage. Always use the correct amount of water when mixing mortar. Follow the manufacturer’s instructions carefully.
If you are experiencing poor adhesion, try roughening the surface of the stone before applying the mortar. This will provide a better surface for the mortar to grip. A rough surface promotes better adhesion.
Always inspect your work carefully after it is completed. Look for any cracks, gaps, or other imperfections. Address any problems promptly to prevent further damage. Regular inspection and maintenance are key.
Conclusion
Pointing stone walls is a skilled craft that requires careful attention to detail and a thorough understanding of materials and techniques. By following the guidelines outlined in this guide, you can successfully restore and maintain your stone walls, preserving their beauty and structural integrity for years to come.
Remember to always prioritize safety, use the right tools and materials, and take your time to achieve the best possible results. With practice and patience, you can master the art of pointing stone walls. Good luck with your stone wall repair!
The information provided in this guide is intended for general informational purposes only. It is not a substitute for professional advice. Always consult with a qualified stone mason or historical preservation expert before undertaking any pointing project.
Stone walls are a valuable asset that can add beauty and character to your property. By taking the time to properly maintain them, you can ensure that they will last for generations to come. Proper maintenance protects your investment.
We hope this guide has been helpful. Thank you for reading and good luck with your stone wall pointing project! We wish you the best in your endeavors.