
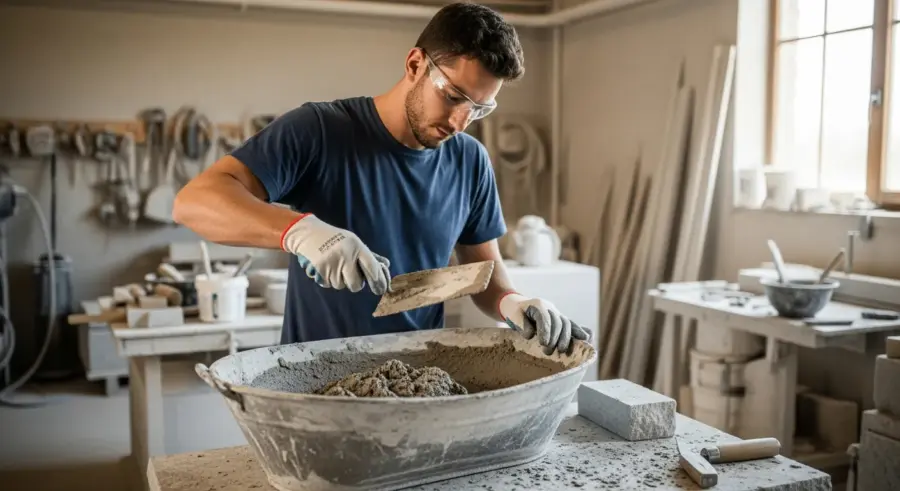
Achieving the perfect consistency when mixing stone mortar is essential for successful masonry projects. The right mortar not only binds stones together but also contributes to the structural integrity and aesthetic appeal of the finished work. Proper stone mortar mixing ensures durability and longevity.
However, mastering the art of stone mortar mixing requires understanding the different types of mortar, selecting appropriate aggregates, and following precise mixing techniques. The goal is to create a mortar that is workable, strong, and compatible with the specific type of stone being used. This article provides a comprehensive guide to stone mortar mixing.
We will explore the various aspects of achieving the perfect consistency, from choosing the right ingredients to testing the final product. Whether you are restoring an old stone structure or building a new one, this guide will equip you with the knowledge and skills needed for effective stone mortar mixing. Let’s get started and explore the nuances of stone mortar mixing.
Understanding the Different Types of Mortar for Stone
Selecting the right type of mortar is the first step in any stone masonry project. Different types of mortar offer varying levels of strength, flexibility, and permeability, each suited for specific applications and stone types. Understanding these differences is key to ensuring the longevity and stability of your structure.
Lime mortar, cement mortar, and hydraulic lime mortar are three common choices, each with unique characteristics. Each of these options has benefits and drawbacks that you should consider. Let’s examine each of these in detail.
Lime mortar, known for its flexibility and breathability, is an excellent choice for historic restoration projects. Its ability to accommodate movement and allow moisture to evaporate prevents damage to softer stones. It is also more environmentally friendly.
Cement mortar, on the other hand, offers high strength and durability. It is well-suited for modern construction where structural integrity is a primary concern, especially in load-bearing walls. However, it lacks the flexibility of lime mortar.
Lime mortar is prized for its breathability, which allows moisture to escape from the stone structure, preventing water damage and promoting a healthier indoor environment. This breathability is particularly beneficial in older buildings that were not designed with modern waterproofing techniques. Lime mortar also tends to be more compatible with softer stones, such as sandstone and limestone, reducing the risk of damage caused by differential expansion and contraction. It’s a great choice for historical preservation.
However, lime mortar sets much slower than cement mortar, requiring longer curing times and potentially delaying project completion. It also has lower compressive strength compared to cement mortar, making it less suitable for applications where high load-bearing capacity is required. Despite these drawbacks, the benefits of lime mortar often outweigh the disadvantages, especially in restoration projects. The slower setting time can be a challenge.
Cement mortar, typically composed of Portland cement, sand, and water, provides exceptional strength and durability. It is ideal for modern construction projects where structural integrity is paramount, such as foundations, retaining walls, and high-rise buildings. Cement mortar sets relatively quickly, allowing for faster construction times and earlier loading of the structure. It is a reliable choice for many projects.
However, cement mortar’s rigidity can be a disadvantage in some applications. Its lack of flexibility can lead to cracking and damage to the stone structure, particularly in areas prone to movement or settlement. Cement mortar also tends to be less breathable than lime mortar, potentially trapping moisture within the stone and leading to deterioration over time. Consider the long-term effects of cement mortar.
Hydraulic lime mortar offers a compromise between the flexibility of lime mortar and the strength of cement mortar. It contains hydraulic lime, which sets through a chemical reaction with water, providing faster setting times and higher strength compared to non-hydraulic lime mortar. Hydraulic lime mortar is suitable for a wide range of applications, including both restoration and new construction projects. It offers a balanced approach.
Different types of hydraulic lime are available, each with varying levels of strength and setting times. Natural hydraulic lime (NHL) is a popular choice for restoration projects, as it provides good strength and breathability while remaining compatible with historic materials. Artificially produced hydraulic lime may offer higher strength but may also be less breathable. Choosing the right type of hydraulic lime is crucial for achieving the desired performance. Consider the specific needs of your project.
Choosing the Right Aggregates for Your Mortar Mix
Aggregates play a crucial role in the performance of stone mortar, influencing its strength, workability, and overall durability. Selecting the right type and size of aggregates is essential for achieving the desired properties in your mortar mix. The aggregate choice will significantly affect the final outcome.
Sand is the most common aggregate used in mortar, but not all sand is created equal. Different types of sand, such as sharp sand, soft sand, and graded sand, offer varying characteristics that can impact the mortar’s workability and strength. The correct sand is important to your mix.
Sharp sand, with its angular particles, provides excellent strength and bonding properties. It is ideal for applications where high compressive strength is required, such as in load-bearing walls. It can be a great option for your project.
Soft sand, with its rounded particles, offers better workability and is easier to spread. It is well-suited for more delicate stone work where ease of application is a priority. Consider this for intricate projects.
The size and grading of the sand particles also play a significant role. Well-graded sand, which contains a mix of different particle sizes, provides better packing and reduces the amount of binder (cement or lime) required. This can lead to a more economical and durable mortar mix. Using a variety of sizes is beneficial.
In addition to sand, other aggregates can be used in stone mortar, such as crushed stone, gravel, and even recycled materials like crushed glass. These aggregates can provide unique properties to the mortar mix, such as increased strength, improved drainage, or enhanced aesthetic appeal. Experimenting with different aggregates can yield interesting results. Consider the possibilities of alternative aggregates.
When selecting aggregates, it is essential to ensure they are clean and free from contaminants, such as clay, silt, and organic matter. These contaminants can interfere with the bonding process and weaken the mortar. Washing the aggregates before use is often recommended, especially if they are sourced from a local quarry or riverbed. Cleanliness is key to a strong mortar.
The proportion of aggregate in the mortar mix also affects its properties. A higher aggregate content generally leads to increased strength and reduced shrinkage, but it can also make the mortar more difficult to work with. The ideal aggregate-to-binder ratio depends on the specific application and the desired properties of the mortar. Finding the right balance is important.
For lime mortar, it is particularly important to use aggregates that are compatible with lime. Avoid using aggregates that contain reactive silica, as they can react with the lime and cause expansion and cracking. Limestone aggregates are generally a good choice for lime mortar, as they are chemically compatible and provide good workability. Choosing compatible materials is crucial for lime mortar.
Measuring and Mixing Mortar Ingredients Accurately
Accurate measurement and thorough mixing are essential for achieving consistent and reliable mortar. Precise ratios of cement, lime, sand, and water ensure that the mortar achieves its intended strength and workability. It is important to be exact in this stage.
Using the correct tools, such as measuring buckets and a mortar mixer, can significantly improve the accuracy and efficiency of the mixing process. This helps to ensure a consistent mix. Manual mixing is also possible.
| Mortar Type | Cement | Lime | Sand |
|---|---|---|---|
| Type N | 1 part | 1 part | 6 parts |
| Type S | 2 parts | 1 part | 9 parts |
| Type O | 1 part | 2 parts | 9 parts |
| Type M | 3 parts | 1 part | 12 parts |
For small projects, hand mixing may be sufficient, but for larger jobs, a mechanical mortar mixer is recommended. This ensures a uniform consistency throughout the mix. This helps to avoid any weak spots.
When mixing, start by combining the dry ingredients, ensuring they are evenly distributed before adding water. Gradually add water while continuously mixing until the mortar reaches the desired consistency. Do not add too much water at once.
When measuring ingredients, always use the same unit of measurement for all components. Whether you are using buckets, shovels, or measuring cups, consistency is key to achieving the correct proportions. Using different units can lead to significant errors in the mix. Stay consistent with your measurements.
For hand mixing, use a clean, non-absorbent surface, such as a mixing tub or a concrete slab. Avoid mixing mortar directly on the ground, as this can introduce contaminants and affect the mortar’s properties. A clean surface is essential for a good mix.
When using a mortar mixer, follow the manufacturer’s instructions carefully. Overloading the mixer can lead to incomplete mixing and uneven consistency. It is better to mix smaller batches than to overload the mixer. Follow the instructions for best results.
After mixing, allow the mortar to slake for a period of time before use. Slaking is the process of allowing the mortar to rest and absorb water, which improves its workability and bond strength. The slaking time varies depending on the type of mortar and the environmental conditions. Allowing the mortar to slake can improve its performance.
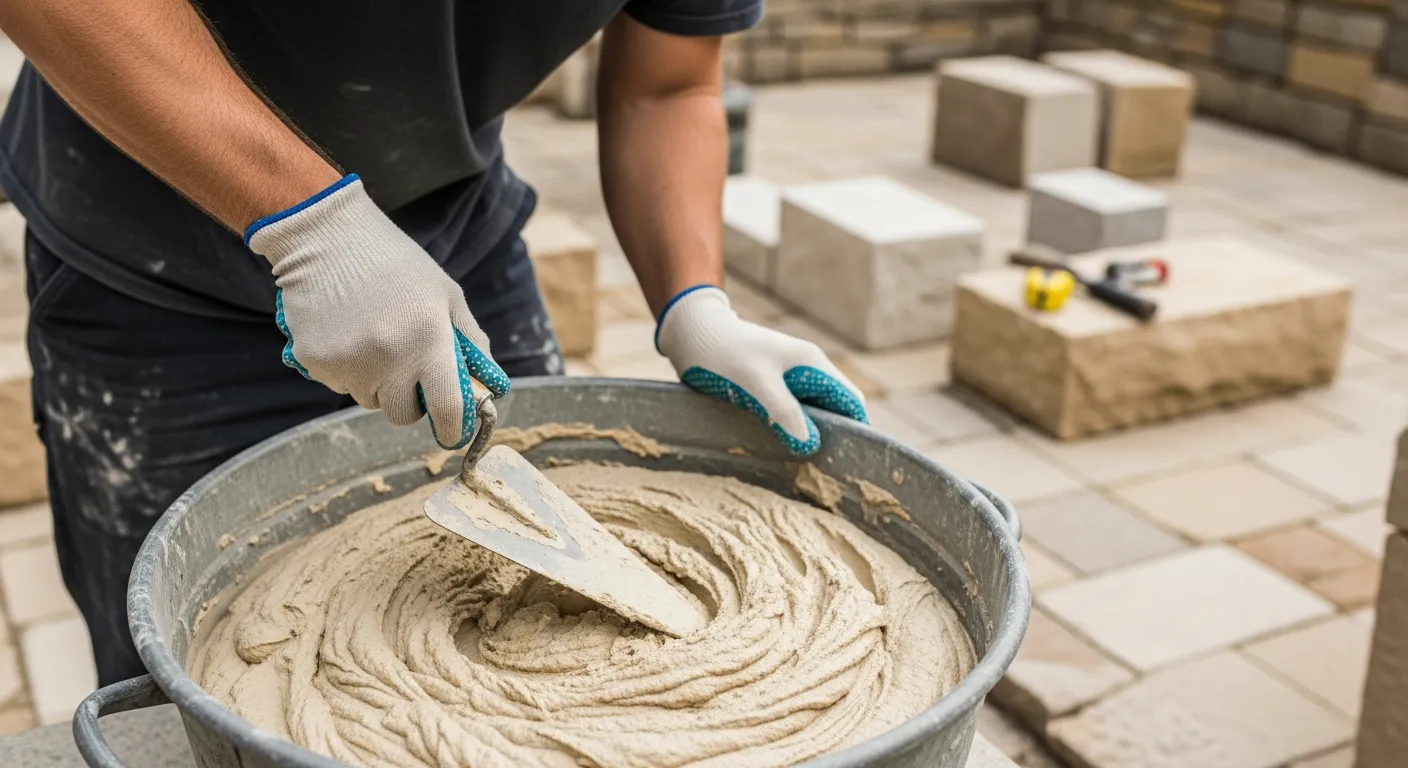
During the mixing process, it is important to monitor the consistency of the mortar and adjust the water content as needed. The mortar should be plastic and workable, but not too wet or runny. The ideal consistency is often described as being similar to that of peanut butter. Adjust the water content as needed to achieve the desired consistency.
Achieving the Ideal Mortar Consistency for Different Applications
The ideal consistency of mortar varies depending on the specific application and the type of stone being used. A mortar that is too wet can be weak and prone to shrinkage, while a mortar that is too dry can be difficult to work with and may not bond properly. It is important to get the balance right.
For general stone laying, a plastic, workable consistency is typically desired. The mortar should be firm enough to hold its shape but pliable enough to spread easily and adhere to the stone surfaces. This is a good general purpose consistency.
When repointing, a slightly drier consistency is often preferred to prevent the mortar from slumping or staining the surrounding stone. This allows for precise application and minimizes the risk of damage. The consistency can affect the final look.
For intricate carving or delicate stone work, a smoother, more fluid mortar may be necessary to fill fine details and ensure complete coverage. This may require additional water in the mix. Adjust accordingly based on your project.
The type of stone also influences the ideal mortar consistency. Porous stones, such as sandstone and limestone, tend to absorb water from the mortar more quickly, requiring a slightly wetter mix to ensure proper hydration and bonding. Non-porous stones, such as granite and marble, require a drier mix to prevent the mortar from running or staining the stone. Consider the porosity of the stone.
The ambient temperature and humidity also affect the mortar’s consistency. In hot, dry conditions, the mortar will dry out more quickly, requiring a wetter mix to maintain workability. In cool, humid conditions, the mortar will retain moisture longer, allowing for a drier mix. Adjust the consistency based on the weather.
When applying mortar to vertical surfaces, a stiffer consistency is generally preferred to prevent slumping. This allows the mortar to hold its shape and maintain proper coverage. Using a stiffer mix can prevent slumping.
For bedding stones, a slightly wetter consistency may be desired to ensure full contact and even distribution of the load. This allows the mortar to fill any voids or irregularities in the stone surface. A wetter mix can improve load distribution.
Ultimately, achieving the ideal mortar consistency requires practice and experience. It is important to observe how the mortar behaves under different conditions and adjust the mix accordingly. With time, you will develop a feel for the right consistency for different applications. Practice makes perfect when mixing mortar.
Testing the Strength and Workability of Your Mortar Mix
Before using your mortar in a project, it is essential to test its strength and workability. These tests help ensure that the mortar will perform as expected and provide the necessary structural support. Testing can help you avoid future problems.
A simple slump test can be performed to assess the mortar’s workability. Place a small amount of mortar on a trowel and observe how it holds its shape. It should hold its form without being too dry or too runny.
- Visual inspection for consistency
- Slump test for workability
- Compression test for strength
- Flexural strength test for flexibility
- Bond strength test for adhesion
For more rigorous testing, compression tests can be conducted to measure the mortar’s compressive strength. These tests involve applying pressure to a sample of hardened mortar until it fails, providing a quantitative measure of its strength. This is a good way to test.
Additionally, bond strength tests can be performed to evaluate how well the mortar adheres to the stone. These tests involve bonding two stones together with the mortar and then measuring the force required to separate them. This ensures that the mortar will adhere properly.
The slump test is a quick and easy way to assess the workability of the mortar. The mortar should have a slump that allows it to be easily spread and tooled without being too runny or stiff. The ideal slump will vary depending on the specific application and the type of mortar being used. Adjust the water content as needed to achieve the desired slump.
Compression tests are typically performed on cylindrical or cubic samples of hardened mortar. The samples are subjected to a compressive load until they fail, and the maximum load is recorded. The compressive strength is then calculated by dividing the maximum load by the cross-sectional area of the sample. Compression tests provide a quantitative measure of the mortar’s strength.
Bond strength tests can be performed using various methods, such as the slant shear test or the direct tension test. These tests measure the force required to break the bond between the mortar and the stone. A higher bond strength indicates better adhesion and a more durable connection. Good adhesion is crucial for the long-term performance of the stone structure.
In addition to these tests, visual inspection can also provide valuable information about the mortar’s quality. Look for any signs of cracking, crumbling, or discoloration, which may indicate problems with the mix or the curing process. Early detection of problems can prevent more serious issues down the road.
It is important to perform these tests on a representative sample of the mortar mix. Take multiple samples from different locations within the batch to ensure that the results are accurate and reliable. A representative sample will provide a more accurate assessment of the mortar’s properties.
Storing and Handling Mortar Safely
Proper storage and handling of mortar are crucial for maintaining its quality and ensuring safety on the job site. Mortar should be stored in a cool, dry place to prevent premature hardening or degradation. This will help maintain the mortar’s quality.
When handling mortar, always wear appropriate personal protective equipment (PPE), including gloves, safety glasses, and a dust mask. This protects your skin, eyes, and respiratory system from potential hazards. Safety should always be a priority.
Lime mortar, in particular, can be caustic and cause skin irritation, so it is essential to avoid direct contact. Wash any exposed skin thoroughly with soap and water after handling lime mortar. This is an important step to avoid irritation.
When mixing mortar, work in a well-ventilated area to minimize exposure to dust. If working indoors, use a fan or open windows to improve air circulation. This helps to reduce dust inhalation.
Mortar bags should be stored off the ground on pallets or platforms to prevent moisture from seeping in. This will help to keep the mortar dry and prevent it from hardening prematurely. Proper storage is essential for maintaining the mortar’s quality.
When transporting mortar, secure the load properly to prevent bags from shifting or falling. This will help to prevent accidents and injuries. Secure the load to prevent accidents.
Avoid lifting heavy bags of mortar alone. Use a hand truck or ask for assistance to prevent back injuries. Lifting heavy objects can be dangerous, so it is important to take precautions. Get help when lifting heavy bags.
When cleaning up mortar spills, use a wet sponge or cloth to wipe up the excess material. Avoid allowing mortar to dry on surfaces, as it can be difficult to remove. Clean up spills promptly to prevent staining.
Dispose of empty mortar bags properly in accordance with local regulations. Avoid burning or burying mortar bags, as this can be harmful to the environment. Dispose of bags properly to protect the environment.
Understanding the Impact of Weather Conditions on Mortar
Weather conditions can significantly affect the curing process and performance of mortar. Extreme temperatures, high humidity, and direct sunlight can all impact the mortar’s strength, workability, and overall durability. It is important to consider the weather.
In hot weather, mortar can dry out too quickly, leading to cracking and reduced bond strength. To prevent this, keep the mortar moist by spraying it with water periodically during the curing process. This will help maintain its strength.
In cold weather, mortar can freeze, which can disrupt the curing process and weaken the mortar. Protect the mortar from freezing by covering it with insulating blankets or using heated enclosures. This will prevent the mortar from freezing.
High humidity can also affect the mortar’s curing process, slowing it down and potentially leading to the growth of mold or mildew. Ensure adequate ventilation to promote proper drying. Keep the mortar well ventilated.
Direct sunlight can cause the mortar to dry unevenly, leading to cracking and discoloration. Shade the mortar from direct sunlight during the curing process to ensure uniform drying. Shading the mortar can prevent uneven drying.
Rain can wash away freshly applied mortar, weakening the bond and leaving unsightly stains. Protect the mortar from rain by covering it with plastic sheeting or tarps. Protecting the mortar from rain is essential.
Wind can also cause the mortar to dry out too quickly, leading to cracking and reduced bond strength. Protect the mortar from wind by erecting windbreaks or using wind-resistant mortar mixes. Windbreaks can help prevent rapid drying.
In freezing temperatures, consider using a mortar mix that is specifically designed for cold-weather applications. These mixes contain additives that help to prevent the mortar from freezing and ensure proper curing. Cold-weather mixes can be beneficial in freezing conditions.
Always consult the manufacturer’s instructions for the specific mortar mix you are using. The instructions will provide guidance on how to protect the mortar from the effects of weather and ensure proper curing. Follow the manufacturer’s instructions carefully.
Troubleshooting Common Stone Mortar Mixing Problems
Even with careful planning and execution, problems can sometimes arise during stone mortar mixing. Recognizing and addressing these issues promptly is essential for achieving the desired results. Let’s look at some common problems.
One common problem is mortar that is too stiff or difficult to work with. This can be caused by using too little water or allowing the mortar to sit for too long before use. Adding a small amount of water and remixing can often restore the mortar’s workability.
Another issue is mortar that is too runny or prone to slumping. This can be caused by adding too much water or using sand that is too fine. Adding more sand or allowing the mortar to set slightly before use can help improve its consistency.
Cracking can also occur in mortar, often due to rapid drying or excessive shrinkage. Keeping the mortar moist during the curing process and using a mortar mix with appropriate shrinkage characteristics can help prevent cracking. This can prevent damage to the structure.
If the mortar is not bonding properly to the stone, it may be due to a dirty or contaminated stone surface. Clean the stone thoroughly before applying the mortar to ensure a good bond. A clean surface is essential for proper bonding.
Efflorescence, a white, powdery deposit on the mortar surface, can be caused by soluble salts in the mortar mix or the stone. Using a low-salt mortar mix and ensuring proper drainage can help prevent efflorescence. Proper drainage can help prevent efflorescence.
If the mortar is discoloring or staining the stone, it may be due to the use of inappropriate aggregates or additives. Choose aggregates and additives that are compatible with the stone to prevent discoloration. Choose compatible materials to prevent staining.
If the mortar is shrinking excessively, it may be due to the use of too much water or a mortar mix with high shrinkage characteristics. Reduce the amount of water in the mix and use a mortar mix with low shrinkage characteristics. Reduce the amount of water to prevent shrinkage.
If the mortar is crumbling or deteriorating, it may be due to freeze-thaw damage or exposure to harsh chemicals. Protect the mortar from freeze-thaw cycles and avoid exposure to harsh chemicals. Protect the mortar from harsh conditions.
Exploring Different Mortar Additives and Their Benefits
Mortar additives can enhance specific properties of the mortar, such as workability, water resistance, and durability. These additives can be particularly useful for addressing specific challenges or improving the overall performance of the mortar. Consider using additives to improve your mortar.
Air-entraining agents can improve the mortar’s resistance to freeze-thaw cycles by creating tiny air bubbles that relieve internal pressure. These agents are particularly beneficial in cold climates where freeze-thaw damage is a concern. They can help extend the life of your structure.
Water-reducing admixtures can improve the mortar’s workability and reduce the amount of water needed, leading to increased strength and reduced shrinkage. These admixtures are useful for achieving a denser, more durable mortar. They can make the mortar easier to work with.
Pigments can be added to mortar to achieve a desired color, allowing the mortar to blend seamlessly with the surrounding stone. This is especially useful for restoration projects where matching the original mortar color is important. This will help create a cohesive look.
Accelerators can speed up the setting time of mortar, which is particularly useful in cold weather or when time is of the essence. However, accelerators can also reduce the workability of the mortar, so it is important to use them sparingly. Use accelerators with caution.
Retarders can slow down the setting time of mortar, which is useful in hot weather or when working on large projects. Retarders can also improve the workability of the mortar, making it easier to spread and tool. Retarders can improve workability in hot weather.
Water repellents can improve the mortar’s resistance to water penetration, which is particularly useful in areas with high rainfall or humidity. Water repellents can also help to prevent efflorescence. Water repellents can prevent water damage.
Bonding agents can improve the adhesion of mortar to the stone, which is particularly useful when working with smooth or non-porous stones. Bonding agents can also help to prevent cracking and shrinkage. Bonding agents improve adhesion.
Always follow the manufacturer’s instructions when using mortar additives. Using too much or too little of an additive can have negative effects on the mortar’s properties. Follow the instructions carefully to avoid problems.
Conclusion
Mastering stone mortar mixing is a blend of science and art, demanding a thorough understanding of materials, techniques, and environmental factors. By carefully selecting the right mortar type, choosing appropriate aggregates, and following precise mixing procedures, you can create a mortar that not only binds stones together but also enhances the beauty and longevity of your stone structures. The perfect mix is possible with patience.
Remember to test your mortar mix for strength and workability, handle materials safely, and be mindful of weather conditions. With practice and attention to detail, you can achieve the perfect consistency and ensure the success of your stone masonry projects. Good luck with your next project.