Historic stone structures stand as silent witnesses to bygone eras, their weathered surfaces whispering tales of the past. Preserving these treasures requires a delicate balance of respect for their age and a commitment to their longevity. Safe and effective stone cleaning methods are essential for maintaining the beauty and integrity of these irreplaceable landmarks.
This article will explore gentle stone cleaning methods, focusing on techniques that minimize the risk of damage while effectively removing dirt, grime, and biological growth. Understanding the nuances of historic stone cleaning is critical for anyone involved in the preservation of these valuable assets.
From identifying different types of stone to selecting appropriate cleaning agents, we will cover the essential steps for ensuring a successful and sustainable cleaning process. Let’s examine the art and science of preserving our stone heritage through careful and considered cleaning practices.
Identifying Different Types of Stone and Their Cleaning Needs
Before any cleaning begins, it’s crucial to accurately identify the type of stone you’re working with. Different stones have varying porosities, hardness levels, and chemical compositions, which directly impact their susceptibility to damage from cleaning agents. Cleaning limestone surfaces, for example, requires a different approach than cleaning granite.
Limestone, sandstone, marble, granite, and slate each react differently to various cleaning solutions. Abrasive cleaners can scratch softer stones like limestone and marble, while acidic cleaners can dissolve them. Understanding these differences is the first step in choosing appropriate stone cleaning methods.
For instance, porous stones like sandstone are more prone to absorbing stains and moisture, necessitating gentler, less invasive cleaning techniques. Dense stones like granite are more resistant to staining but can still be damaged by harsh chemicals. Always consult with a stone conservation expert if you’re uncertain about the type of stone or its specific cleaning requirements.
Visual inspection can provide initial clues, but laboratory analysis might be necessary for definitive identification. Consider the stone’s color, texture, and grain pattern, as well as any visible signs of deterioration. A professional assessment will help ensure that the selected cleaning methods are both effective and safe for the specific stone in question.
The geological origin of the stone also plays a significant role in determining its properties. Stones formed from sedimentary processes, like limestone and sandstone, are generally more porous and susceptible to weathering than igneous rocks like granite. Metamorphic rocks, such as marble and slate, have unique characteristics influenced by heat and pressure during their formation.
Furthermore, consider any previous treatments or coatings that may have been applied to the stone. These coatings can affect the stone’s porosity and its reaction to cleaning agents. Removing old or incompatible coatings may be necessary before cleaning can begin, but this should be done with extreme care to avoid damaging the underlying stone.
Documenting the stone type and its condition before, during, and after cleaning is crucial for tracking the effectiveness of the cleaning process and identifying any potential problems. This documentation can also be valuable for future maintenance and preservation efforts. Detailed records help ensure consistent and informed care for the historic stone structure.
In some cases, multiple types of stone may be present in a single structure, requiring a tailored cleaning approach for each material. This is particularly common in older buildings that have been modified or repaired over time. Careful assessment and planning are essential for ensuring that all stone surfaces are cleaned safely and effectively.
Testing Cleaning Methods on a Small Area First
Once the stone type has been identified, it’s essential to test any proposed cleaning method on a small, inconspicuous area. This allows you to assess the potential impact of the cleaning agent on the stone’s surface without risking widespread damage. Always choose an area that is hidden or less visible to the public.
Apply the cleaning solution to the test area according to the manufacturer’s instructions, and carefully monitor the stone for any adverse reactions. Look for signs of discoloration, etching, staining, or softening of the stone’s surface. Document the process with photographs to track changes over time.
Allow the test area to dry completely before evaluating the results. Some reactions may not be immediately apparent and can take several days or weeks to fully manifest. Check for any residual cleaning agent that may have been absorbed into the stone.
If the test area shows no signs of damage and the cleaning is effective, you can proceed with cleaning the entire surface. However, if any adverse reactions are observed, you’ll need to reconsider your cleaning method and seek advice from a stone conservation professional. This cautious approach is crucial for preventing irreversible damage to historic stone structures.
The test area should be representative of the overall condition of the stone structure. If there are areas with heavier soiling or more significant deterioration, consider testing the cleaning method on those areas as well. This will provide a more comprehensive assessment of the cleaning agent’s effectiveness and potential impact.
During the testing process, carefully control the application of the cleaning agent. Use a small brush or sponge to apply the solution evenly and avoid oversaturation. Monitor the dwell time, or the amount of time the cleaning agent is allowed to remain on the stone surface, to prevent overexposure and potential damage.
After rinsing the test area, examine the runoff water for any signs of discoloration or sediment. This can indicate that the cleaning agent is dissolving or dislodging components of the stone. If the runoff water is heavily discolored, it may be necessary to adjust the cleaning method or choose a different cleaning agent.
Document the environmental conditions during the testing process, including temperature, humidity, and sunlight exposure. These factors can influence the effectiveness of the cleaning agent and the potential for damage. Maintaining accurate records will help you interpret the results of the testing process and make informed decisions about the overall cleaning strategy.
Manual Cleaning Techniques: Brushing, Scraping, and Washing
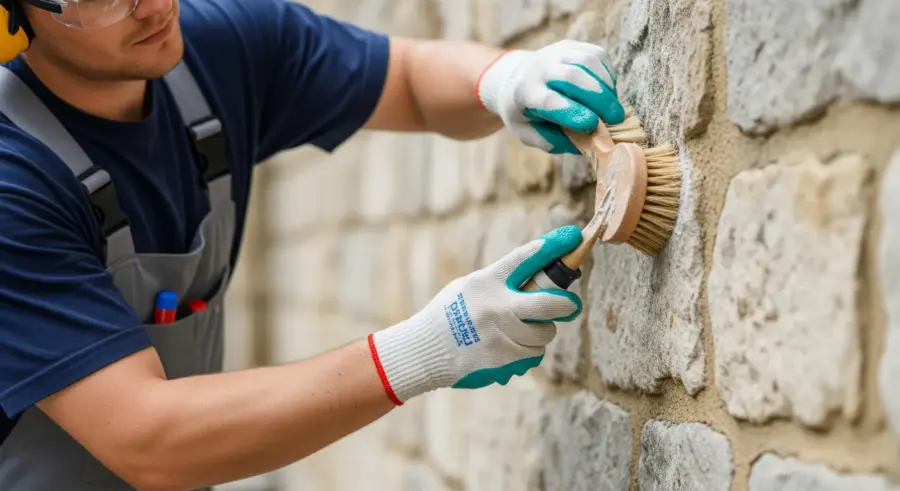
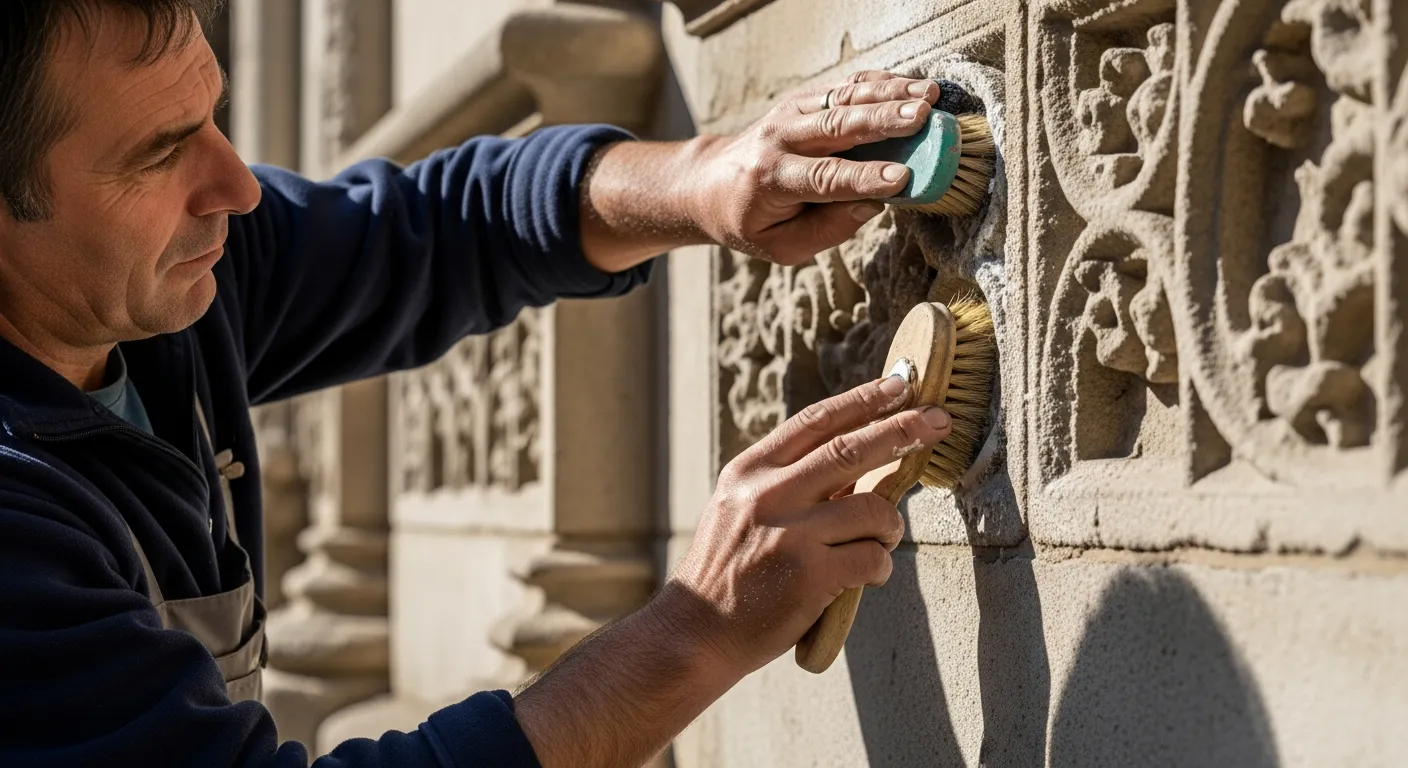
Manual cleaning techniques are often the safest and most controlled approach to removing surface dirt and grime from historic stone. These methods rely on physical action rather than harsh chemicals, minimizing the risk of damage to the stone. Brushing, scraping, and washing are the fundamental techniques in this category.
Soft-bristled brushes are ideal for removing loose dirt, dust, and biological growth from the stone’s surface. Use gentle, circular motions to avoid scratching or damaging the stone. Stiff-bristled brushes can be used for more stubborn dirt, but only on durable stones like granite, and always with caution.
| Technique | Tools | Stone Types | Precautions |
|---|---|---|---|
| Brushing | Soft-bristled brushes, Stiff-bristled brushes | All stone types (soft brush), Granite, Hard Sandstone (stiff brush) | Avoid excessive pressure, Use appropriate brush stiffness |
| Scraping | Wooden or plastic scrapers, Scalpels | Granite, Hard Limestone | Avoid metal tools, Use gentle pressure |
| Washing | Water, Mild soap, Sponges | All stone types | Use distilled water, Rinse thoroughly |
| Poulticing | Absorbent material, Cleaning agent | Porous stones (Sandstone, Limestone) | Monitor drying time, Avoid harsh chemicals |
Scraping can be effective for removing more tenacious deposits, such as hardened dirt or paint, but should only be performed by experienced professionals. Use wooden or plastic scrapers to avoid scratching the stone. Metal tools should never be used, as they can cause irreversible damage.
Washing with water and a mild, pH-neutral soap can help to remove remaining dirt and residues. Use distilled water to prevent mineral deposits from forming on the stone’s surface. Rinse thoroughly to remove all traces of soap, as soap residue can attract dirt and promote biological growth.
When brushing, select brushes with natural bristles, as synthetic bristles can sometimes be too abrasive. Pay attention to the condition of the bristles and replace brushes when they become worn or damaged. A clean brush is essential for preventing the transfer of dirt and grime back onto the stone surface.
Scraping should be performed with a light touch and at a shallow angle to avoid gouging or scratching the stone. Use a variety of scraper shapes and sizes to access different areas and contours. Sharpening the scrapers regularly will help maintain their effectiveness and prevent damage to the stone.
When washing, use a gentle, blotting motion rather than rubbing vigorously. This will help to prevent the spread of dirt and grime and minimize the risk of scratching the stone. Change the water frequently to avoid re-depositing dirt onto the surface. Washing is a simple yet effective method.
Consider using steam cleaning as an alternative to traditional washing methods. Steam cleaning uses hot water vapor to loosen dirt and grime without the need for harsh chemicals. The steam can penetrate into pores and crevices, providing a deeper clean. However, steam cleaning should be used with caution on delicate stones, as the heat can cause damage.
Chemical Cleaning Agents: When and How to Use Them
Chemical cleaning agents should only be considered when manual cleaning techniques prove insufficient. The use of chemicals carries inherent risks, and it’s crucial to select the appropriate agent for the specific type of stone and the nature of the soiling. Always consult with a stone conservation expert before using any chemical cleaner.
Alkaline cleaners, such as ammonia-based solutions, can be effective for removing organic stains, such as algae and mildew. Acidic cleaners, such as diluted hydrochloric acid, can be used to remove mineral deposits, such as calcium carbonate. However, both alkaline and acidic cleaners can damage certain types of stone, particularly limestone and marble.
Poultices are a gentle way to draw out stains from porous stones. A poultice consists of an absorbent material, such as diatomaceous earth or bentonite clay, mixed with a cleaning agent. The poultice is applied to the stained area, covered with plastic wrap, and allowed to dry slowly, drawing the stain into the absorbent material.
When using chemical cleaning agents, always follow the manufacturer’s instructions carefully. Wear appropriate personal protective equipment, including gloves, eye protection, and a respirator. Ensure adequate ventilation to avoid inhaling harmful fumes. Never mix different cleaning agents, as this can create dangerous chemical reactions. After applying the cleaning agent, rinse the stone thoroughly with distilled water to remove any remaining residues.
Always start with the weakest possible cleaning agent and gradually increase the strength as needed. Overly aggressive cleaning agents can cause irreversible damage to the stone’s surface. It’s better to repeat the cleaning process with a weaker solution than to risk damaging the stone with a strong one.
Consider using enzymatic cleaners, which are biological agents that break down organic stains without harming the stone. Enzymatic cleaners are often more environmentally friendly than traditional chemical cleaners. However, they may require longer dwell times to be effective.
When applying chemical cleaning agents, use a brush or sponge to apply the solution evenly and avoid oversaturation. Pay attention to the dwell time and rinse the stone thoroughly after the cleaning agent has been applied. Neutralizing the cleaning agent with a mild alkaline or acidic solution can help to prevent further damage.
Dispose of chemical cleaning agents properly according to local regulations. Never pour cleaning agents down the drain or into the environment. Store cleaning agents in a safe place, away from children and pets. Responsible handling of chemical cleaning agents is essential for protecting both the stone and the environment.
Removing Stains from Stone: A Targeted Approach
Different types of stains require different removal strategies. Organic stains, like algae, moss, and mildew, often respond well to enzymatic cleaners or diluted bleach solutions. Mineral stains, such as rust or hard water deposits, may require acidic cleaners or specialized stain removers.
Oil-based stains, like grease or tar, can be challenging to remove. Start by blotting up any excess oil with absorbent materials like paper towels or cloths. Then, apply a solvent-based cleaner or a poultice containing a degreasing agent. Repeat the process as needed until the stain is removed.
For stubborn stains, consider using a specialized stain remover designed for the specific type of stain and stone. These products often contain a blend of chemicals that target the stain’s molecular structure, breaking it down and allowing it to be easily removed. Always follow the manufacturer’s instructions and test the product on a small, inconspicuous area first.
Patience is key when removing stains from stone. Avoid aggressive scrubbing or the use of harsh chemicals, as these can damage the stone’s surface. Multiple applications of a gentle cleaning agent are often more effective than a single application of a strong one. If you’re unsure about the best approach, consult with a stone conservation expert.
For rust stains, consider using a poultice containing a rust remover or a solution of oxalic acid. Apply the poultice to the stain, cover it with plastic wrap, and allow it to dry slowly. Rinse the area thoroughly with distilled water after removing the poultice. Repeat the process as needed until the stain is removed.
For graffiti removal, start by using a gentle solvent-based cleaner designed for removing paint. Apply the cleaner to the graffiti, allow it to dwell for a few minutes, and then gently scrub the area with a soft brush. Rinse the area thoroughly with distilled water. If the graffiti is particularly stubborn, you may need to use a specialized graffiti remover.
For biological stains, consider using a solution of diluted bleach or a biocide. Apply the solution to the stained area, allow it to dwell for a few minutes, and then rinse the area thoroughly with distilled water. Take care to protect surrounding plants and surfaces from the bleach solution.
For efflorescence, brush away the white, powdery deposits with a soft brush. If the efflorescence is persistent, consider using a solution of diluted vinegar or a specialized efflorescence remover. Identify and address the source of the moisture that is causing the efflorescence to prevent it from returning. Proper drainage and ventilation are essential for preventing efflorescence.
Preventing Damage During the Cleaning Process
Preventing damage is paramount when cleaning historic stone. Overly aggressive cleaning techniques can cause irreversible harm to the stone’s surface, eroding its delicate patina and compromising its structural integrity. Always prioritize gentle methods and avoid harsh chemicals whenever possible.
One of the most common causes of damage is the use of abrasive cleaning tools, such as wire brushes or scouring pads. These tools can scratch and erode the stone’s surface, leaving it looking dull and damaged. Instead, opt for soft-bristled brushes, sponges, or cloths.
- Use soft-bristled brushes
- Avoid abrasive cleaners
- Control water pressure
- Protect surrounding areas
- Monitor the stone closely
High-pressure water cleaning can also be detrimental to historic stone, especially if the stone is already weakened or deteriorated. The force of the water can dislodge loose particles and erode the surface. If pressure washing is necessary, use the lowest possible pressure setting and a wide-angle nozzle.
Protect surrounding areas from cleaning agents and water runoff. Cover plants, landscaping, and adjacent surfaces with plastic sheeting or drop cloths. Be mindful of sensitive materials, such as metal or wood, that could be damaged by cleaning solutions. Proper preparation is essential for minimizing the risk of collateral damage.
Avoid cleaning stone during extreme weather conditions, such as freezing temperatures or intense heat. Freezing temperatures can cause water to expand within the stone’s pores, leading to cracking and spalling. Intense heat can accelerate the evaporation of cleaning agents, leaving behind harmful residues. Choose a mild, overcast day for cleaning stone.
Monitor the stone closely during the cleaning process for any signs of damage. Look for discoloration, etching, softening, or cracking. If you observe any of these signs, stop cleaning immediately and reassess your approach. It may be necessary to switch to a gentler cleaning method or consult with a stone conservation expert.
Document the cleaning process with photographs and notes. This will help you track the effectiveness of the cleaning and identify any potential problems. Detailed documentation is essential for ensuring consistent and informed care for the historic stone structure. Maintaining a cleaning log can be very helpful.
Consider using a sacrificial coating to protect the stone surface during the cleaning process. A sacrificial coating is a temporary layer that is applied to the stone before cleaning and then removed after cleaning. The coating absorbs the cleaning agents and protects the underlying stone from damage. However, sacrificial coatings should be used with caution, as they can sometimes trap moisture and promote biological growth.
Rinsing and Drying the Stone Surface
Thorough rinsing is crucial after any cleaning process, whether manual or chemical. Residual cleaning agents can attract dirt and promote biological growth, negating the benefits of the cleaning. Use distilled water to rinse the stone surface, ensuring that all traces of cleaning solution are removed.
Pay particular attention to crevices, joints, and other areas where cleaning agents may accumulate. Use a soft brush or sponge to dislodge any trapped residues. Rinse until the water runs clear, indicating that all cleaning agents have been removed.
Allow the stone surface to dry completely after rinsing. Trapped moisture can lead to efflorescence, a white, powdery deposit that forms when water-soluble salts migrate to the surface and evaporate. Efflorescence can be unsightly and can also damage the stone over time.
Promote drying by providing adequate ventilation. Use fans or dehumidifiers to speed up the process, especially in humid environments. Avoid applying sealants or coatings to the stone until it is completely dry, as this can trap moisture and exacerbate efflorescence. Proper rinsing and drying are essential for ensuring the long-term health and appearance of historic stone structures.
Consider using a wet-vacuum to remove excess water from the stone surface after rinsing. A wet-vacuum can help to speed up the drying process and prevent efflorescence. However, be careful not to scratch the stone surface with the vacuum nozzle.
Monitor the stone surface for any signs of efflorescence during the drying process. If efflorescence appears, brush it away with a soft brush and repeat the rinsing process. It may be necessary to identify and address the source of the moisture that is causing the efflorescence to prevent it from returning.
Avoid exposing the stone surface to direct sunlight during the drying process. Direct sunlight can cause the stone to dry too quickly, leading to cracking and spalling. Shade the stone surface with tarps or umbrellas to slow down the drying process.
Allow the stone to dry naturally whenever possible. Avoid using heat guns or other artificial drying methods, as these can damage the stone. Patience is key when drying historic stone. Proper rinsing and drying are essential for preserving the beauty and integrity of these valuable structures.
Long-Term Maintenance and Preservation Tips
Cleaning is just one aspect of preserving historic stone. Long-term maintenance and preventative measures are essential for ensuring the ongoing health and beauty of these structures. Regular inspections can help to identify potential problems early on, before they escalate into costly repairs.
Address any structural issues promptly, such as cracks, loose stones, or water damage. Repairing these problems will prevent further deterioration and protect the stone from the elements. Ensure that drainage systems are functioning properly to prevent water from pooling around the base of the structure.
Consider applying a breathable sealant to the stone surface to protect it from water damage and staining. Choose a sealant that is specifically designed for use on historic stone and that will not trap moisture. Reapply the sealant periodically, according to the manufacturer’s instructions.
Control biological growth by regularly removing algae, moss, and mildew. Use gentle cleaning methods and avoid harsh chemicals. Consider installing copper flashing or other deterrents to prevent biological growth from returning. With proper maintenance and care, historic stone structures can continue to stand as testaments to the past for generations to come. Implementing effective stone cleaning methods is a crucial part of this preservation effort.
Regularly inspect the stone surface for signs of deterioration, such as cracking, spalling, or efflorescence. Address any problems promptly to prevent further damage. Early detection and treatment are essential for preserving historic stone structures.
Protect the stone surface from physical damage, such as impacts from vehicles or vandalism. Install barriers or bollards to prevent vehicles from getting too close to the structure. Implement security measures to deter vandalism.
Control vegetation growth around the stone structure. Roots can damage the stone and trap moisture. Trim back trees and shrubs to prevent them from coming into contact with the stone. Consider using herbicides to control weed growth.
Develop a comprehensive maintenance plan for the historic stone structure. The plan should include regular inspections, cleaning, repairs, and preventative measures. Review and update the plan periodically to ensure that it remains effective. A well-maintained historic stone structure is a valuable asset that will be enjoyed for generations to come. Regular stone cleaning methods are an important part of this.
Conclusion
Gentle stone cleaning is an art and a science, requiring a deep understanding of stone types, cleaning methods, and potential risks. By following the guidelines outlined in this article, you can safely and effectively clean historic stone structures, preserving their beauty and integrity for future generations. Always prioritize the preservation of the stone over achieving a perfectly clean appearance.
Remember to test all cleaning methods on a small, inconspicuous area first, and to consult with a stone conservation expert when in doubt. With careful planning and execution, you can ensure that your cleaning efforts contribute to the long-term health and preservation of these irreplaceable treasures. Historic stone cleaning is a critical task that demands respect and expertise.
The preservation of historic stone structures is a responsibility that we all share. By understanding the principles of gentle stone cleaning and long-term maintenance, we can ensure that these valuable assets continue to inspire and educate future generations. The careful application of stone cleaning methods is a key part of this.
Ultimately, the goal of historic stone cleaning is not simply to remove dirt and grime, but to preserve the unique character and history of these structures. By respecting the age and fragility of the stone, we can ensure that it continues to tell its story for many years to come. Understanding and applying the correct stone cleaning methods is essential to this goal.