Stone inlay is an ancient art form that involves embedding pieces of contrasting stone into a base stone to create decorative patterns. This technique, also known as intarsia or pietre dure, has been used for centuries to embellish furniture, floors, walls, and other architectural elements. Mastering stone inlay techniques requires precision, patience, and a keen eye for design.
The result is a stunning visual effect that adds a touch of elegance and sophistication to any space. By understanding the principles and methods involved, you can create your own beautiful stone inlays and add a unique artistic flair to your projects.
This guide will provide a detailed overview of the process, from choosing the right stones to the final polishing and sealing. Whether you’re a seasoned stone mason or a DIY enthusiast, you’ll find valuable information and practical tips to help you achieve professional-quality results with stone inlay techniques.
Choosing the Right Stones for Inlay
Selecting the appropriate stones is a critical first step in creating a successful stone inlay project. The stones you choose will influence the overall aesthetic and durability of your finished piece.
Consider the color, texture, and hardness of the stones you plan to use. Contrasting colors will create a more dramatic effect, while complementary colors can provide a subtle and harmonious look.
Hardness is also an important factor, as softer stones may be more prone to scratching and wear. Common choices for stone inlay include marble, granite, limestone, slate, and various types of semi-precious stones like onyx, jasper, and agate.
Marble is a popular option due to its wide range of colors and patterns, as well as its relative softness, which makes it easier to cut and shape. Granite, on the other hand, is a much harder stone that is more resistant to scratches and stains, making it a good choice for high-traffic areas.
Think about the overall design you want to achieve before settling on your stone selection. A complex design with many small pieces may benefit from using softer stones that are easier to manipulate. Conversely, a simpler design with larger pieces may be better suited to harder, more durable stones.
The source of your stones can also impact their quality and appearance. Consider sourcing your stones from reputable suppliers who can provide information about their origin and characteristics. This can help ensure that you’re getting high-quality materials that will stand the test of time.
Don’t be afraid to mix and match different types of stones to create a unique and visually appealing design. Combining stones with different textures and colors can add depth and dimension to your inlay. Just be sure to consider the compatibility of the stones in terms of hardness and porosity to ensure a lasting bond.
Ultimately, the best stones for your inlay project will depend on your specific design goals and budget. Take the time to research different options and experiment with different combinations to find the perfect materials for your project. Remember that the beauty of stone inlay lies in the natural variations and imperfections of the stone itself, so embrace the unique character of your materials.
Consider the scale of your project when selecting stones. For larger projects, using readily available and cost-effective stones like marble or limestone might be more practical. For smaller, more intricate projects, you might be able to justify using more expensive and exotic stones like lapis lazuli or malachite to create a truly stunning visual effect.
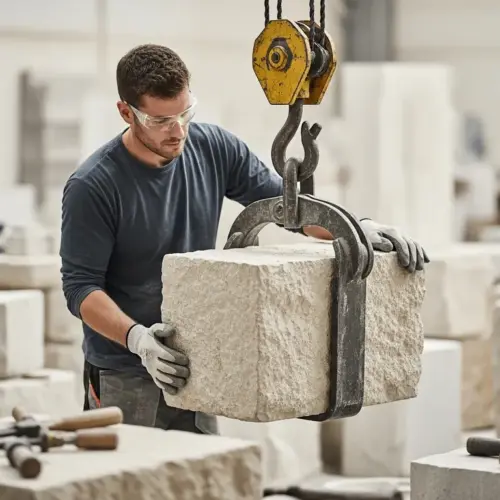
Preparing the Base Stone for Inlay
The base stone serves as the foundation for your stone inlay design. Proper preparation of the base stone is essential to ensure a strong and lasting bond with the inlay pieces.
Start by cleaning the surface of the base stone thoroughly to remove any dirt, dust, or debris. Use a mild detergent and a scrub brush to clean the stone, then rinse it with clean water and allow it to dry completely.
Next, use a router or chisel to create a recess in the base stone that will accommodate the inlay pieces. The depth of the recess should be slightly less than the thickness of the inlay pieces, allowing them to sit flush with the surface of the base stone.
Be sure to create a clean, crisp edge along the perimeter of the recess to provide a secure fit for the inlay pieces. For intricate designs, you may want to use a template to guide your cutting and ensure accuracy.
The flatness of the base stone is paramount for a successful inlay. Use a leveling tool to ensure the surface is even, and correct any imperfections before proceeding. This will prevent unevenness in the final product and ensure a seamless appearance.
Consider the type of adhesive you will be using when preparing the recess. Some adhesives require a slightly rough surface for optimal bonding. If using such an adhesive, lightly roughen the inside of the recess with sandpaper or a wire brush.
For larger inlay projects, consider using a CNC machine to create the recesses. This will ensure a high degree of accuracy and consistency, especially for complex designs. CNC machining can save time and effort, while also minimizing the risk of errors.
If you are using a chisel, be sure to use sharp, well-maintained tools. Dull chisels can cause chipping and cracking, which can compromise the integrity of the base stone. Practice your chiseling technique on a scrap piece of stone before working on the actual project.
Always wear safety glasses and a dust mask when working with stone. Stone dust can be harmful to your lungs and eyes. Work in a well-ventilated area to minimize exposure to dust and debris. Safety should always be your top priority.
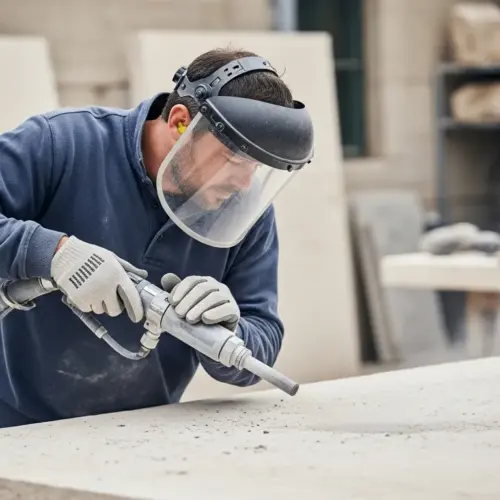
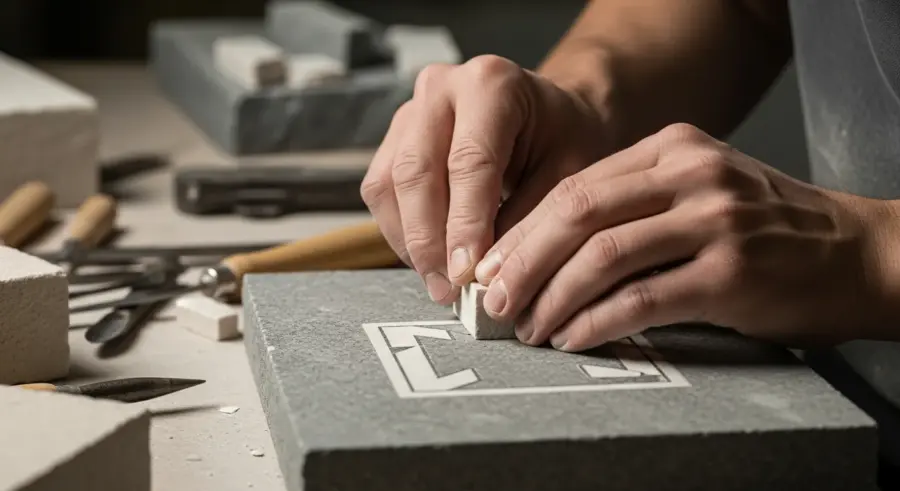
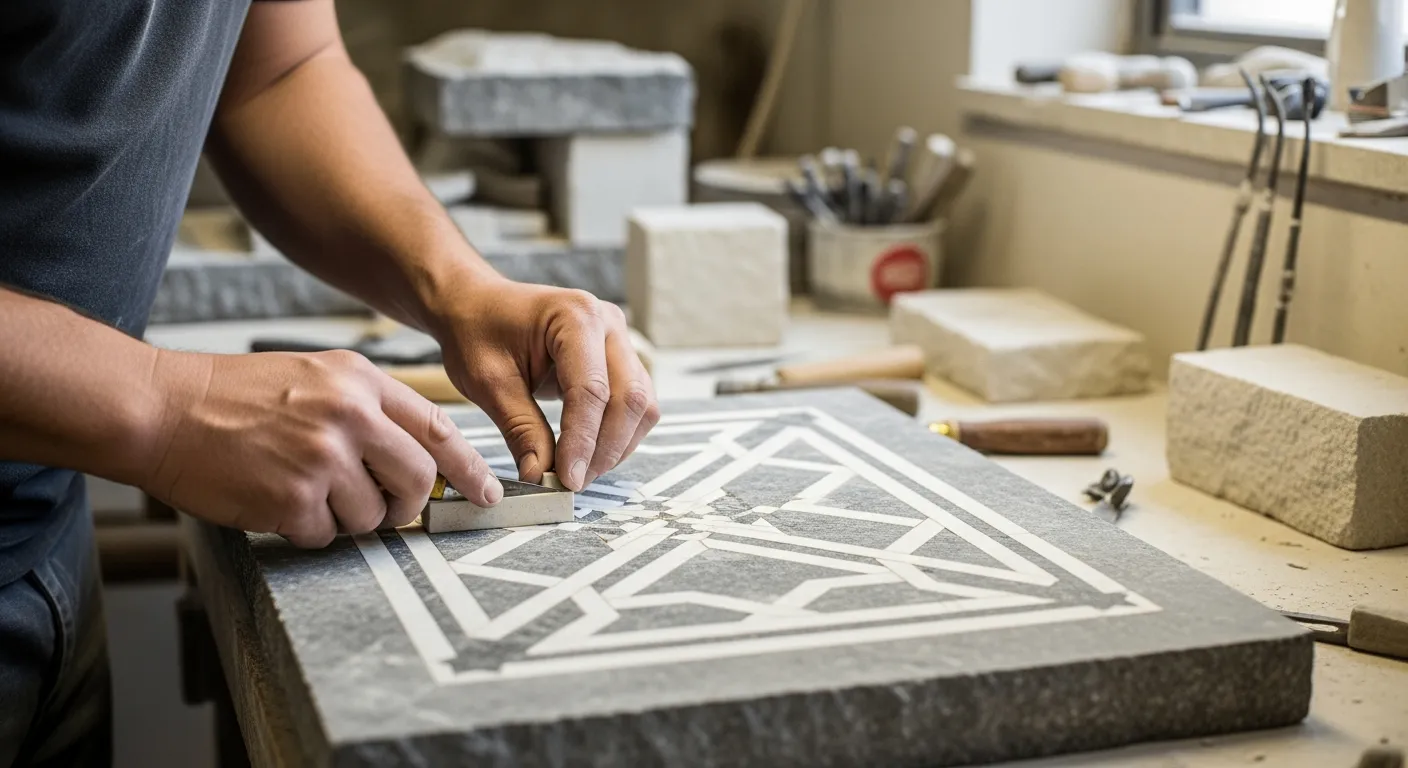
Cutting and Shaping Inlay Pieces Precisely
Achieving precise cuts and shapes is crucial for creating a professional-looking stone inlay. The inlay pieces should fit snugly into the recesses in the base stone, with minimal gaps or overlaps.
There are several tools and techniques you can use to cut and shape stone inlay pieces, depending on the type of stone and the complexity of the design.
| Tool | Stone Type | Description |
|---|---|---|
| Wet Saw | Marble, Limestone | Used for straight cuts and basic shapes. |
| Diamond Blade Saw | Granite, Hard Stones | Ideal for cutting harder stones with precision. |
| Rotary Tool with Diamond Bits | All Stones | Excellent for intricate shapes and fine details. |
| Chisels and Hammers | Softer Stones | Traditional method for shaping softer stones by hand. |
When cutting stone, always wear safety glasses and a dust mask to protect yourself from flying debris and harmful particles. Work in a well-ventilated area to minimize exposure to dust.
Creating accurate templates is essential for complex inlay designs. Use durable materials like acrylic or metal to create templates that can be reused multiple times. Ensure the templates are precisely cut and accurately reflect the desired shape of the inlay pieces.
When using a wet saw, be sure to use the appropriate blade for the type of stone you are cutting. Using the wrong blade can result in chipping, cracking, or even blade failure. Always follow the manufacturer’s recommendations for blade selection.
For intricate shapes and fine details, consider using a waterjet cutter. Waterjet cutting uses a high-pressure stream of water mixed with abrasive particles to cut through stone with incredible precision. This technique is ideal for creating complex curves and sharp corners.
If you are using a rotary tool with diamond bits, use a light touch and work in small increments. Applying too much pressure can cause the bit to overheat and wear out quickly. Let the tool do the work, and avoid forcing it.
Practice your cutting and shaping techniques on scrap pieces of stone before working on the actual inlay pieces. This will allow you to refine your skills and avoid making costly mistakes. Patience and practice are key to achieving precise cuts and shapes.
Adhering Inlay Pieces to the Base Stone
Once you have cut and shaped your inlay pieces, the next step is to adhere them to the base stone. The choice of adhesive will depend on the type of stone you are using, as well as the intended use of the finished piece.
Epoxy resins are a popular choice for stone inlay due to their strong bonding properties and resistance to water and chemicals. Other options include construction adhesives, thin-set mortar, and even traditional lime mortars, depending on the specific application.
Before applying the adhesive, make sure both the base stone and the inlay pieces are clean and dry. Apply a thin, even layer of adhesive to the back of the inlay piece, then carefully position it into the recess in the base stone.
Press down firmly to ensure good contact between the two surfaces, and remove any excess adhesive that may squeeze out around the edges. Use clamps or weights to hold the inlay pieces in place while the adhesive cures, following the manufacturer’s instructions for drying time.
Consider the open time of the adhesive you are using. Open time refers to the amount of time you have to work with the adhesive before it begins to set. Choose an adhesive with an appropriate open time for your project, especially if you are working on a complex design with many pieces.
For porous stones, consider applying a sealer to the back of the inlay pieces before applying the adhesive. This will prevent the stone from absorbing too much adhesive, which can weaken the bond. Allow the sealer to dry completely before applying the adhesive.
When using clamps or weights, be sure to protect the surface of the stone from damage. Use padding or shims to distribute the pressure evenly and prevent scratching or denting. Avoid over-tightening the clamps, as this can also damage the stone.
Always follow the manufacturer’s instructions for mixing and applying the adhesive. Using the wrong mixing ratio or application technique can result in a weak bond or other problems. Pay close attention to the instructions and follow them carefully.
Before adhering the inlay pieces, dry-fit them into the recesses to ensure a proper fit. Make any necessary adjustments before applying the adhesive. This will save you time and effort in the long run and ensure a professional-looking result.
Grouting and Filling Gaps in Stone Inlay
Even with precise cutting, small gaps can sometimes occur between the inlay pieces and the base stone. Grouting and filling these gaps is essential for creating a seamless and durable surface.
Choose a grout or filler that matches the color of the inlay pieces or complements the overall design. Epoxy-based grouts are a good choice for their durability and water resistance, while cement-based grouts are more traditional and may be suitable for certain applications.
Apply the grout or filler to the gaps using a rubber float or a small trowel, pressing it firmly into the joints to ensure they are completely filled. Remove any excess grout or filler from the surface of the stone using a damp sponge, being careful not to disturb the filled joints.
Allow the grout or filler to dry completely according to the manufacturer’s instructions, then buff the surface of the stone with a clean cloth to remove any remaining residue. This step is crucial for achieving a smooth and professional finish.
Consider using a color-matched grout to seamlessly blend the inlay pieces with the base stone. This creates a more unified and refined appearance. Experiment with different grout colors to find the perfect match for your project.
For intricate designs with very small gaps, use a grout syringe to apply the grout precisely. This will prevent the grout from spreading onto the surface of the stone and make cleanup easier. A grout syringe is a valuable tool for detail work.
When removing excess grout, use a clean, damp sponge and rinse it frequently. Avoid using too much water, as this can weaken the grout and cause it to crack. Wring out the sponge thoroughly before wiping the surface of the stone.
After the grout has dried, use a grout haze remover to remove any remaining residue from the surface of the stone. Follow the manufacturer’s instructions carefully to avoid damaging the stone. A grout haze remover will restore the stone’s natural beauty.
For high-traffic areas, consider using a flexible grout caulk to fill the gaps. Flexible grout caulk is more resistant to cracking and movement than traditional grout. This will help ensure the longevity of your stone inlay.
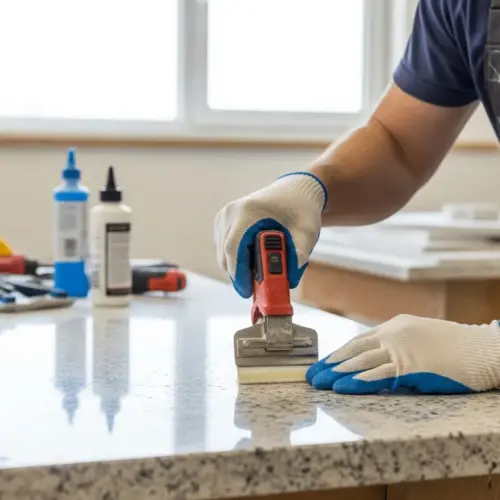
Grinding and Polishing the Inlay Surface
Once the adhesive and grout have fully cured, it’s time to grind and polish the surface of the stone inlay to achieve a smooth, even finish. This process involves using a series of abrasive pads or stones to gradually remove any unevenness and create a polished sheen.
Start with a coarse grit pad or stone to remove any major imperfections, then gradually work your way up to finer grits to refine the surface. Use a wet grinder or polisher to keep the stone cool and prevent dust, and always wear safety glasses and a dust mask.
When polishing, apply even pressure and work in a consistent pattern to avoid creating swirl marks or uneven spots. Rinse the surface frequently with clean water to remove any slurry and check your progress.
For a high-gloss finish, you may want to use a polishing compound or wax specifically designed for stone. Apply the compound or wax according to the manufacturer’s instructions, and buff the surface with a soft cloth to achieve a lustrous shine.
Before grinding, ensure the surface is completely clean and free of any debris. Even small particles can scratch the stone during the grinding process. A thorough cleaning is essential for a flawless finish.
When using a wet grinder or polisher, maintain a consistent water flow to keep the stone cool and lubricated. Overheating can damage the stone and reduce the effectiveness of the abrasive pads. A steady water supply is crucial for optimal results.
For edges and corners, use a smaller, handheld grinder or polisher to reach those difficult areas. Pay close attention to detail to ensure a consistent finish throughout the entire surface. Detail work is essential for a professional-looking result.
After polishing, use a stone sealant to protect the surface from stains and scratches. The sealant will also enhance the natural beauty of the stone and make it easier to clean. A sealant is a worthwhile investment for long-term protection.
Consider using a diamond polishing paste for the final polishing step. Diamond polishing paste contains microscopic diamond particles that create an incredibly smooth and glossy finish. This is the ultimate touch for a truly luxurious look.
Sealing and Protecting Stone Inlay
Sealing is the final step in the stone inlay process, and it’s essential for protecting the stone from stains, scratches, and other damage. A good sealer will penetrate the pores of the stone and create a barrier against moisture and contaminants.
There are many different types of stone sealers available, so choose one that is appropriate for the type of stone you are using and the intended use of the finished piece.
- Penetrating sealers
- Surface sealers
- Color-enhancing sealers
- Impregnating sealers
- Water-based sealers
Before applying the sealer, make sure the stone surface is clean and dry. Apply the sealer according to the manufacturer’s instructions, using a brush, roller, or sprayer.
Before applying the sealer to the entire project, test it on a small, inconspicuous area to ensure it doesn’t discolor or damage the stone. This will prevent costly mistakes and ensure the sealer is compatible with your stone.
Apply multiple thin coats of sealer rather than one thick coat. This will allow the sealer to penetrate the stone more effectively and create a stronger barrier. Multiple thin coats are more effective than a single thick coat.
Allow the sealer to dry completely between coats, following the manufacturer’s instructions for drying time. Rushing the drying process can compromise the effectiveness of the sealer. Patience is key to a successful sealing job.
Consider using a stone enhancer in addition to a sealer. A stone enhancer will deepen the color of the stone and bring out its natural beauty. A stone enhancer can add a touch of elegance and sophistication to your stone inlay.
Reapply the sealer periodically, as needed, to maintain its protective properties. The frequency of reapplication will depend on the type of sealer and the level of traffic the stone inlay receives. Regular maintenance is essential for long-term protection.
Maintaining Your Stone Inlay
Proper maintenance is crucial for preserving the beauty and longevity of your stone inlay. Regular cleaning and care will help prevent stains, scratches, and other damage.
Clean your stone inlay regularly with a mild detergent and a soft cloth or mop. Avoid using harsh chemicals, abrasive cleaners, or scouring pads, as these can damage the surface of the stone.
For spills and stains, clean them up as quickly as possible to prevent them from soaking into the stone. Blot the spill with a clean cloth, then wash the area with a mild detergent and water.
If you notice any scratches or other damage, you may be able to repair them yourself using a stone repair kit. For more serious damage, it’s best to consult with a professional stone restoration specialist.
Use coasters and placemats to protect your stone inlay from scratches and spills. This is especially important for furniture and countertops. Prevention is always better than cure.
Avoid placing heavy objects directly on the stone inlay, as this can cause scratches or cracks. Use protective pads or mats to distribute the weight evenly. Protect your stone inlay from excessive weight.
Dust your stone inlay regularly to prevent the buildup of dirt and grime. A soft cloth or duster is all you need. Regular dusting will keep your stone inlay looking its best.
Consider using a stone cleaner specifically designed for your type of stone. These cleaners are formulated to be gentle and effective, and they won’t damage the surface of the stone. Choose the right cleaner for your stone.
If you have any doubts about how to clean or maintain your stone inlay, consult with a professional stone care specialist. They can provide expert advice and guidance. Don’t hesitate to seek professional help when needed.
Exploring Advanced Stone Inlay Techniques
Once you’ve mastered the basic stone inlay techniques, you can start exploring more advanced methods to create even more intricate and stunning designs. One such technique is double inlay, which involves layering multiple pieces of stone on top of each other to create a three-dimensional effect.
Another advanced technique is marquetry, which involves creating complex patterns using thin veneers of different types of stone. Marquetry requires a high degree of skill and precision, but the results can be truly breathtaking.
You can also experiment with different types of stone and other materials to create unique and innovative inlay designs. Consider incorporating metal, glass, or even wood into your stone inlays to add texture, color, and visual interest.
The possibilities are endless when it comes to stone inlay, so don’t be afraid to experiment and push the boundaries of what’s possible. With practice and creativity, you can create truly one-of-a-kind works of art that will be admired for generations to come.
Explore the use of undercuts to create more complex and secure inlay joints. Undercuts involve creating a beveled edge on the inlay pieces that interlocks with a corresponding recess in the base stone. This technique provides a stronger and more durable bond.
Experiment with different textures and finishes to add depth and dimension to your stone inlay designs. Consider using sandblasting, etching, or carving to create unique surface effects. Texture can add a new dimension to your stone inlay.
Incorporate lighting into your stone inlay designs to create dramatic and eye-catching effects. Backlighting can highlight the natural beauty of the stone and create a warm and inviting ambiance. Lighting can transform your stone inlay into a work of art.
Consider using computer-aided design (CAD) software to create complex and intricate inlay designs. CAD software allows you to precisely plan and visualize your designs before you begin working with the stone. CAD software can help you bring your vision to life.
Attend workshops and seminars to learn from experienced stone inlay artists. These events can provide valuable insights and techniques that you can use to improve your skills. Learning from the experts can accelerate your progress.
Conclusion
Stone inlay is a rewarding and challenging art form that allows you to create beautiful and enduring works of art. By following the techniques and tips outlined in this guide, you can achieve professional-quality results and add a touch of elegance to any space.
Remember to choose the right stones, prepare the base stone carefully, and cut and shape the inlay pieces with precision. Adhere the pieces securely, grout any gaps, and grind and polish the surface to a smooth finish, and always seal and protect your stone inlay to ensure its longevity.
With practice and dedication, you can master the art of stone inlay and create stunning designs that will be admired for years to come. Embrace the challenge, explore your creativity, and let your imagination guide you as you embark on your stone inlay journey.
Whether you’re creating intricate patterns for furniture, floors, or walls, the beauty and durability of stone inlay will add a timeless touch to your creations. So gather your tools, select your stones, and start creating your own unique stone inlay masterpieces today, enjoying the process of working with natural materials and bringing your artistic vision to life.
The art of stone inlay is a journey of continuous learning and discovery. Embrace the challenges, celebrate the successes, and never stop exploring the endless possibilities of this ancient and beautiful art form. Your dedication will be rewarded with stunning and enduring works of art.
Stone inlay is more than just a craft; it’s a way to connect with the natural world and express your creativity. Let the beauty and versatility of stone inspire you to create works of art that will be cherished for generations to come. Your creations will be a testament to the enduring power of human artistry.
So, go forth and create! Let your imagination soar, and let the stones tell their story through your hands. The world awaits your unique and beautiful stone inlay creations. Your artistic journey begins now!