Conclusion
Building stone stairs is a rewarding project that can add lasting beauty and value to your property. By following these guidelines and taking the time to plan and execute each step carefully, you can create a stunning and durable set of stairs that will be enjoyed for years to come.
Remember to prioritize safety, stability, and aesthetics in your design, and don’t be afraid to get creative with your choice of stone and landscaping. With a little patience and effort, you can transform your outdoor space with a beautiful and functional stone staircase.
Embarking on a stone stair construction project can dramatically enhance the appeal and functionality of your outdoor space. Stone stairs offer a timeless elegance and rugged durability that few other materials can match.
Whether you’re looking to create a grand entrance to your home or a charming pathway through your garden, understanding the essentials of stone stair construction is key. This guide will walk you through each step, from planning and design to laying and maintaining your stone stairs, ensuring a successful and satisfying outcome.
We’ll cover everything you need to know about stone stair construction. You’ll learn about selecting the right materials and techniques for laying stone steps, so you can achieve a beautiful and lasting result.
Planning and Designing Your Stone Stairs
The first step in any successful stone stair project is careful planning and design. This involves considering the location, purpose, and style of your stone staircase design to ensure it complements your existing surroundings.
Start by assessing the site where you plan to build your stairs. Consider the natural terrain, drainage patterns, and any existing structures that might influence your design.
Think about the overall aesthetic you want to achieve. Do you prefer a rustic, natural look or a more formal, refined appearance?
The style of your home and garden should inform your choice of stone and the overall design of the stairs. Also, consider the practical aspects of your stone stair construction, such as the rise and run of each step.
The rise is the vertical height of each step, and the run is the horizontal depth. A comfortable and safe set of stairs typically has a rise of around 6 to 7 inches and a run of 10 to 12 inches.
Consider the slope of the terrain and the total vertical distance you need to cover with your stairs. This will determine the number of steps required and the overall length of the staircase.
Sketch out a few different design options, taking into account the existing landscape and any potential obstacles. Think about the width of the stairs and whether you want them to be straight, curved, or winding.
Also, factor in the materials you plan to use and how they will integrate with the surrounding environment. Consider obtaining necessary permits and complying with local building codes before starting construction.
Proper planning will save time and money in the long run. It will also ensure that your stone stairs are both beautiful and functional.
Don’t underestimate the importance of accurate measurements and detailed drawings. These will serve as your guide throughout the construction process.
Preparing the Ground and Foundation
Proper ground preparation is essential for the stability and longevity of your stone stairs. A solid foundation will prevent settling, shifting, and other issues that can compromise the integrity of your structure.
Begin by excavating the area where the stairs will be located. Remove any topsoil, vegetation, and loose debris until you reach a stable, compacted base.
The depth of your excavation will depend on the size and weight of the stones you plan to use, as well as the soil conditions in your area. As a general rule, excavate at least 6 to 8 inches below the desired finished grade.
Next, install a base layer of compacted gravel. This layer will provide drainage and help distribute the weight of the stairs evenly.
Use a plate compactor to thoroughly compact the gravel base, ensuring a firm and level surface. For added stability, consider pouring a concrete footing at the base of the stairs, especially if you’re working with large, heavy stones.
The concrete footing should extend beyond the width and depth of the bottom step. This will provide a solid anchor for the entire staircase.
Ensure that the footing is level and smooth before allowing it to cure. If the soil is particularly unstable, consider using geotextile fabric beneath the gravel base to prevent soil erosion and improve drainage.
Proper compaction is crucial for preventing settling. Rent a plate compactor from a local equipment rental store for best results.
Take your time and ensure that the foundation is perfectly level and stable before proceeding to the next step. A well-prepared foundation is the key to a long-lasting and beautiful stone staircase.
Remember to check local building codes regarding foundation requirements. This will help you avoid costly mistakes and ensure compliance.
Choosing the Right Stone for the Stairs
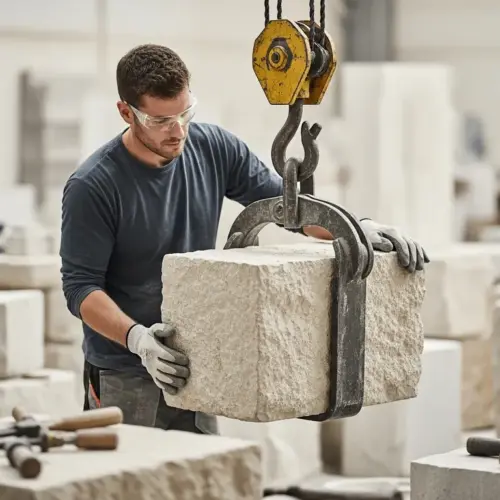
Selecting the right type of stone is a critical decision that will impact both the appearance and durability of your stairs. There are many different types of stone to choose from, each with its own unique characteristics and advantages.
Consider factors such as the stone’s color, texture, size, and resistance to weathering when making your selection. Here’s a breakdown of some popular options:
| Stone Type | Characteristics | Best Uses |
|---|---|---|
| Flagstone | Flat, layered, and available in various colors | Informal pathways, garden steps |
| Limestone | Durable, smooth texture, often light-colored | Formal entrances, classic designs |
| Sandstone | Textured, warm colors, good slip resistance | Outdoor steps, natural settings |
| Granite | Extremely durable, resistant to weathering | High-traffic areas, harsh climates |
| Bluestone | Blue-gray color, smooth surface | Modern designs, patios |
Consider the overall style of your home and garden when choosing a stone type. A rustic stone like sandstone or flagstone might be a good choice for a cottage-style garden.
A more formal stone like limestone or granite might be better suited for a traditional or contemporary home. Think about the color of the stone and how it will complement the surrounding landscape.
Darker stones can create a dramatic effect, while lighter stones can brighten up a shady area. Also, consider the texture of the stone and how it will feel underfoot.
Some stones have a smooth, polished surface, while others have a rough, textured surface. Choose a stone that provides good slip resistance, especially if the stairs will be exposed to rain or snow.
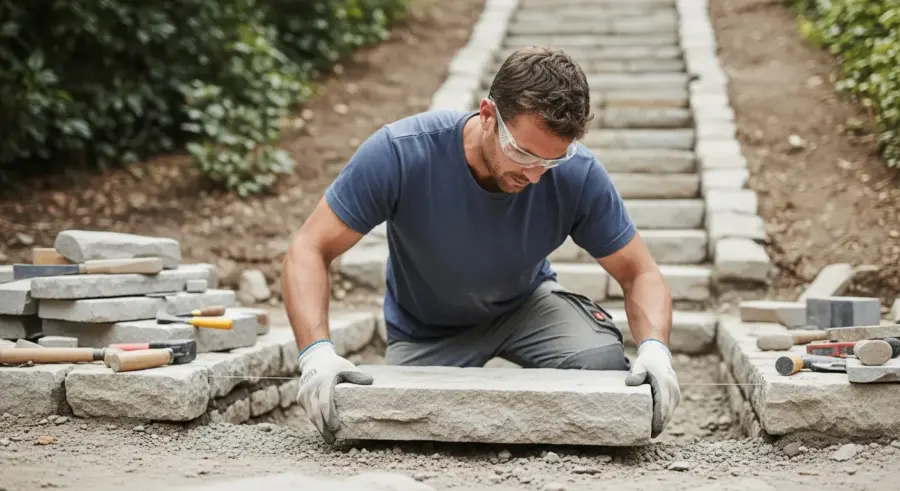
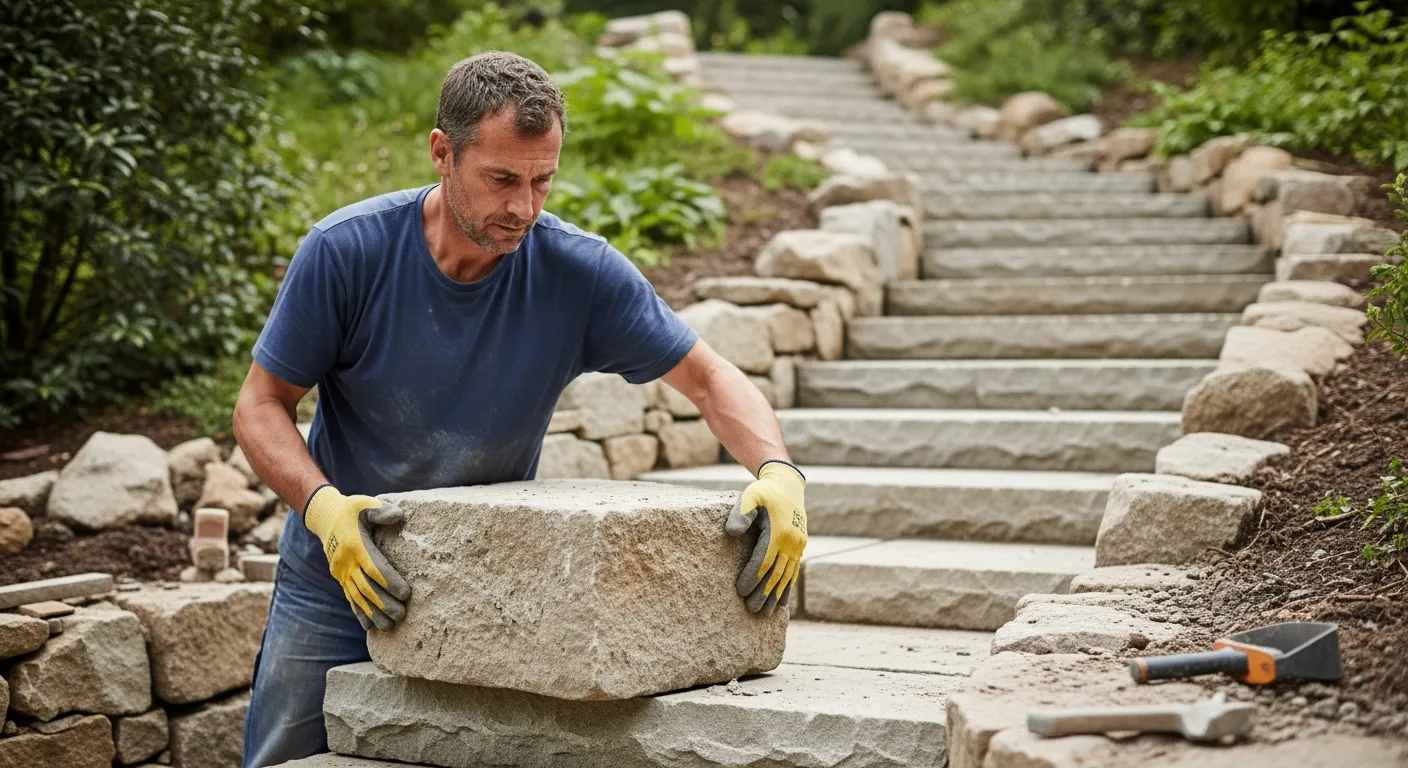
Laying the Stone Steps
With your ground prepared and your stone selected, it’s time to start laying the steps. This process requires careful attention to detail to ensure each step is level, stable, and properly aligned.
Begin by placing the bottom step, ensuring it rests firmly on the compacted gravel base or concrete footing. Use a level to check that the step is perfectly horizontal in all directions.
If necessary, add or remove gravel beneath the stone to achieve a level surface. Once the first step is in place, backfill behind it with compacted gravel to provide support.
Repeat this process for each subsequent step, working your way up the slope. Maintain a consistent rise and run for each step to ensure comfortable and safe use.
Use a string line or measuring tape to ensure each step is aligned properly. As you lay each stone, consider the natural variations in shape and size.
Select stones that fit together well and create a visually appealing pattern. Use a rubber mallet to gently tap the stones into place.
Avoid using excessive force, which can damage the stone. Check the level of each step frequently to ensure that it remains horizontal.
Use shims to fine-tune the level if necessary. As you work your way up the staircase, be sure to compact the gravel behind each step thoroughly.
This will prevent the steps from shifting or settling over time. Take your time and pay attention to detail to ensure that each step is properly laid.
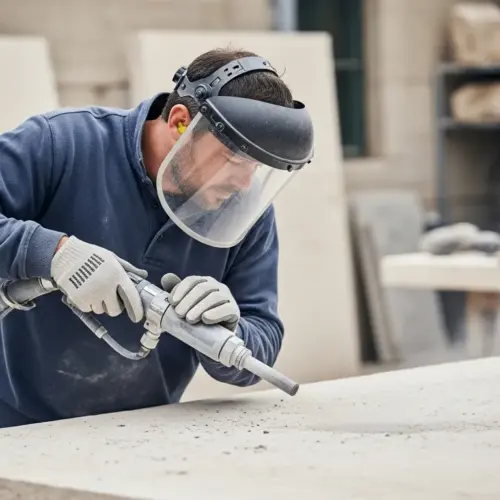
A well-laid staircase will be both beautiful and functional for years to come. Remember to wear safety glasses and gloves when working with stone.
Mortaring or Dry-Stacking the Steps
Once all the stones are in place, you have the option of mortaring them together or dry-stacking them. Each method has its own advantages and considerations.
Mortaring involves using a cement-based mortar to bond the stones together. This creates a more permanent and stable structure, but it also requires more skill and effort.
- Enhanced stability and longevity
- Reduced risk of shifting or settling
- More formal and refined appearance
- Requires more skill and effort
- Less forgiving of errors
Dry-stacking, on the other hand, involves arranging the stones without mortar, relying on their weight and interlocking shapes to create a stable structure. Dry-stacking is a more natural and rustic approach that is easier to execute.
If you choose to mortar the stones, be sure to use a high-quality mortar mix designed for outdoor use. Apply the mortar between the stones, filling all gaps and joints.
Use a trowel to smooth the mortar and create a clean, professional finish. Remove any excess mortar with a damp sponge.
Allow the mortar to cure completely before using the stairs. If you choose to dry-stack the stones, be sure to select stones that fit together snugly.
Use smaller stones to fill in any gaps and create a stable structure. Dry-stacking requires careful planning and attention to detail.
But it can create a beautiful and natural-looking staircase. Consider the aesthetic you want to achieve when choosing between mortaring and dry-stacking.
Mortaring provides a more formal and polished look, while dry-stacking offers a more rustic and natural appearance. Ultimately, the choice is up to you.
Finishing and Maintaining the Stone Stairs
Once your stone stairs are complete, there are a few finishing touches you can add to enhance their appearance and functionality. Consider adding landscaping around the stairs to soften the edges and create a more inviting atmosphere.
Plant flowers, shrubs, or ground cover to complement the stone and blend the stairs into the surrounding environment. You might also want to install lighting along the stairs to improve safety and visibility at night.
Low-voltage landscape lighting can be easily installed and will add a warm, welcoming glow to your outdoor space. Maintaining your stone stairs is essential to ensure their longevity and prevent damage.
Regularly sweep or hose down the stairs to remove dirt, leaves, and debris. Inspect the stairs periodically for any signs of cracking, shifting, or loose stones.
Address any issues promptly to prevent them from escalating into more serious problems. If you live in an area with harsh winters, consider applying a de-icing salt specifically designed for stone to prevent damage from freezing and thawing.
Sealing the stone can also help protect it from the elements and prevent staining. Choose a sealant that is specifically designed for the type of stone you have used.
Reapply the sealant every few years as needed. Trim any vegetation that is growing too close to the stairs.
This will prevent the plants from damaging the stone or creating a safety hazard. With proper care and maintenance, your stone stairs will provide beauty and functionality for many years to come.
Consider adding a handrail for added safety, especially if the stairs are steep or have multiple steps. A well-maintained staircase will enhance the value and appeal of your property.
Enhancing Stone Stair Design with Lighting
Strategic lighting can dramatically enhance both the safety and aesthetic appeal of your stone stairs. Well-placed lights not only prevent accidents but also highlight the natural beauty of the stone, creating a warm and inviting ambiance.
Consider using low-voltage LED lights that are energy-efficient and long-lasting. These can be installed along the sides of the stairs, embedded in the stone, or placed in nearby landscaping to cast a soft glow on the steps.
Uplighting can emphasize the texture and color variations of the stone, while downlighting provides practical illumination for each step. Motion-sensor lights are another excellent option for added security and convenience.
These lights automatically turn on when someone approaches the stairs, providing instant visibility and deterring potential intruders. Experiment with different lighting techniques to find the perfect balance of functionality and style for your stone staircase design.
String lights can create a festive and whimsical atmosphere. Path lights can guide visitors along the stairs and prevent them from straying off course.
Consider using lights with different color temperatures to create different moods. Warm white lights can create a cozy and inviting atmosphere, while cool white lights can provide brighter and more functional illumination.
Be sure to choose lights that are weatherproof and designed for outdoor use. Install the lights according to the manufacturer’s instructions and take precautions to prevent electrical hazards.
Proper lighting can transform your stone stairs into a stunning focal point of your outdoor space. It also enhances safety and security.
Don’t underestimate the power of well-placed lighting to elevate your stone stair design. Consider solar-powered lights for an eco-friendly lighting option.
Dealing with Drainage Issues in Stone Stair Construction
Proper drainage is crucial for preventing water damage and ensuring the long-term stability of your stone stairs. Water can seep into the joints between stones, causing them to crack and shift over time, especially in areas with frequent freezing and thawing.
To address drainage issues, start by ensuring that the ground around the stairs slopes away from the structure. This will help divert water away from the foundation.
Consider installing a French drain behind the stairs to collect and redirect excess water. A French drain consists of a perforated pipe buried in a trench filled with gravel.
The pipe collects water and carries it away from the stairs to a designated drainage area. You can also incorporate drainage channels into the design of the stairs themselves.
These channels allow water to flow freely down the steps without pooling or accumulating. For mortared stairs, be sure to use a water-resistant mortar mix to prevent water from penetrating the joints.
Use a sealant to further protect the stone from water damage. Regularly inspect the stairs for any signs of water damage, such as cracks or stains.
Address any issues promptly to prevent them from escalating into more serious problems. Consider installing a sump pump if the drainage is particularly poor.
A sump pump will automatically pump water away from the stairs to a designated drainage area. Proper drainage is essential for preserving the beauty and longevity of your stone stairs.
Don’t neglect this important aspect of stone stair construction. Ensure that the gravel base is properly compacted to facilitate drainage.
Incorporating Landscaping Around Your Stone Stairs
Landscaping can significantly enhance the beauty and functionality of your stone stairs. By carefully selecting and arranging plants, you can create a seamless transition between the stairs and the surrounding environment.
Choose plants that complement the color and texture of the stone, and consider the amount of sunlight and water available in the area. Low-growing ground cover plants, such as creeping thyme or sedum, are excellent choices for softening the edges of the stairs and preventing soil erosion.
Planting flowers along the sides of the stairs will add a splash of color and create a more inviting atmosphere. Consider using native plants that are well-suited to your local climate and require minimal maintenance.
Shrubs can be used to create a sense of enclosure and privacy around the stairs. Be sure to select shrubs that won’t grow too tall and obstruct the view or create a safety hazard.
Adding decorative rocks or boulders can also enhance the natural look of your stone stair construction. These elements can be used to create visual interest and complement the overall design.
Consider adding a small water feature near the stairs to create a soothing and relaxing atmosphere. A birdbath or fountain can attract birds and other wildlife to your garden.
Use mulch to suppress weeds and retain moisture in the soil. Choose a mulch that complements the color and texture of the stone.
Consider adding a bench or seating area near the stairs to create a place to rest and enjoy the view. A well-landscaped staircase can transform your outdoor space into a beautiful and inviting oasis.
Don’t be afraid to experiment with different plant combinations and design elements. Incorporate seasonal plants for year-round color and interest.
Ensure that the landscaping does not obstruct the stairs or create a safety hazard. Prune plants regularly to maintain their shape and size.
Conclusion
Building stone stairs is a rewarding project that can add lasting beauty and value to your property. By following these guidelines and taking the time to plan and execute each step carefully, you can create a stunning and durable set of stairs that will be enjoyed for years to come.
Remember to prioritize safety, stability, and aesthetics in your design, and don’t be afraid to get creative with your choice of stone and landscaping. With a little patience and effort, you can transform your outdoor space with a beautiful and functional stone staircase.