

Natural stone, with its timeless beauty and enduring strength, is a prized material in construction and design. However, like any material, stone is susceptible to damage over time. Cracks and chips can detract from its appearance and compromise its structural integrity.
Fortunately, various stone fillers are available to restore damaged stone to its former glory. Choosing Stone Fillers for Repairs is a crucial step in the restoration process.
This article will guide you through the process of selecting the appropriate stone filler for your repair needs, exploring the different types of fillers available, and providing practical tips for achieving a seamless finish. From epoxy fillers to polyester and acrylic options, understanding the characteristics of each type is essential. We will cover everything you need to know to tackle those unsightly cracks and chips, ensuring your stone surfaces remain beautiful and durable for years to come.
Assessing Damage and Choosing the Right Filler
Before you even think about applying a filler, take a good, hard look at the damage. Is it a hairline crack, a significant chip, or something in between?
The type and extent of the damage will largely determine the best type of filler to use. For instance, a narrow crack might only need a thin, penetrating filler, while a larger chip will require something more substantial to fill the void.
Another important consideration is the type of stone you’re working with. Different stones have different properties, such as porosity and hardness, which can affect how well a filler adheres and performs. For example, marble, being a softer stone, might require a more flexible filler than granite.
Think about the location of the damage, too. Is it indoors or outdoors? Will it be exposed to moisture, sunlight, or heavy traffic? Outdoor repairs, especially in areas with freeze-thaw cycles, demand fillers that can withstand the elements.
The initial assessment is the foundation of a successful repair. A hasty decision can lead to using the wrong filler, resulting in a repair that fails prematurely or doesn’t match the surrounding stone.
Take your time to thoroughly evaluate the damage. Use a magnifying glass and a bright light to examine the cracks and chips closely. Are there any signs of underlying issues, such as water damage or structural instability?
Consider the aesthetic impact of the repair. Do you want the repair to be invisible, or are you okay with a slight difference in color or texture? Some fillers are easier to color-match than others.
Don’t forget to factor in your skill level and the tools you have available. Some fillers require more advanced techniques and specialized equipment than others. If you’re a beginner, it’s best to start with a simpler filler that’s easy to use.
Ultimately, the best filler is the one that addresses the specific needs of the repair while also being compatible with your skills and resources. Careful planning and attention to detail will ensure a successful and long-lasting repair.
Epoxy Fillers: Strong and Durable
Epoxy fillers are known for their exceptional strength and durability, making them a top choice for repairing stone that’s subject to heavy use or stress. These fillers are composed of two parts: a resin and a hardener, which, when mixed, create a chemical reaction that results in a very strong, rigid bond.
Because of their robust nature, epoxy fillers are particularly well-suited for structural repairs. They are ideal for filling large chips, cracks, and even reinforcing weakened areas in stone structures.
One of the key advantages of epoxy fillers is their resistance to chemicals and moisture. This makes them a great option for kitchen countertops, bathroom vanities, and outdoor applications where the stone is likely to come into contact with various substances.
However, epoxy fillers can be more challenging to work with than other types. They typically have a longer curing time, and the mixing process requires precision to ensure the correct ratio of resin to hardener.
The superior strength of epoxy fillers comes from their chemical composition. The cross-linking of the resin and hardener creates a dense, impenetrable matrix that can withstand significant stress and impact.
This makes them ideal for repairing areas that are subject to heavy foot traffic, such as stairs or walkways. They are also a good choice for repairing stone that is used in industrial settings, where it may be exposed to harsh chemicals or extreme temperatures.
When working with epoxy fillers, it’s important to wear gloves and eye protection to avoid skin and eye irritation. Ensure adequate ventilation in the work area, as the fumes from epoxy can be harmful if inhaled.
Proper surface preparation is crucial for epoxy fillers to bond effectively. The stone surface must be clean, dry, and free of any loose debris. Consider using a primer to improve adhesion, especially on porous stones.
While epoxy fillers are strong and durable, they can be brittle and prone to cracking if not applied properly. Avoid applying thick layers of epoxy at once, as this can lead to uneven curing and cracking. Instead, apply multiple thin layers, allowing each layer to cure before applying the next.
Polyester Fillers: Fast-Curing and Versatile
Polyester fillers are a popular choice for stone repair due to their fast curing time and ease of use. These fillers are typically a one-part system that requires the addition of a hardener to initiate the curing process.
This quicker curing time can be a significant advantage when you’re working on projects with tight deadlines. They are also more forgiving in terms of mixing ratios compared to epoxy fillers.
| Filler Type | Curing Time | Strength | Best Use |
|---|---|---|---|
| Epoxy | Longer (several hours) | High | Structural repairs, high-stress areas |
| Polyester | Fast (minutes to hours) | Medium | General repairs, filling chips and cracks |
| Acrylic | Medium (hours) | Low to Medium | Cosmetic repairs, flexible applications |
| Cementitious | Variable (days) | High (matched to stone) | Historic repairs, large-scale patching |
Polyester fillers are also quite versatile, suitable for both indoor and outdoor use. They can be used to fill chips, cracks, and small voids in a variety of stone types.
The speed of polyester fillers is due to the chemical reaction initiated by the hardener. This rapid curing allows for quicker turnaround times and reduces the risk of the repair being disturbed before it’s fully set.
However, the faster curing time also means that you need to work quickly when applying polyester fillers. Once the hardener is added, the filler will start to thicken and become difficult to work with within a matter of minutes.
Polyester fillers are generally less expensive than epoxy fillers, making them a more budget-friendly option for many stone repair projects. They are also easier to sand and polish, which can save time and effort during the finishing process.
When using polyester fillers, it’s important to choose a product that is specifically designed for stone repair. Some polyester fillers are formulated for use on wood or metal and may not adhere properly to stone surfaces.
Like epoxy fillers, polyester fillers can release harmful fumes during the curing process. Ensure adequate ventilation in the work area and wear a respirator if necessary. Also, be aware that polyester fillers can shrink slightly as they cure, so it’s important to overfill the repair area slightly to compensate for this shrinkage.
Acrylic Fillers: Flexible and Paintable
Acrylic fillers are known for their flexibility and paintability, making them a good choice for cosmetic repairs where the appearance of the repair is paramount. These fillers are typically water-based and easy to apply, with a smooth, pliable consistency.
This flexibility is especially beneficial in situations where the stone is subject to movement or vibration. Acrylic fillers can expand and contract with the stone, reducing the risk of cracking or dislodging over time.
One of the main advantages of acrylic fillers is their ability to be painted or tinted to match the surrounding stone. This allows for a seamless repair that blends in with the original surface.
However, acrylic fillers are not as strong or durable as epoxy or polyester fillers. They are best suited for minor cosmetic repairs and should not be used in areas where the stone is subject to heavy stress or impact.
The water-based nature of acrylic fillers makes them easy to clean up with soap and water. This can be a significant advantage for DIYers who are new to stone repair.
Acrylic fillers are also less likely to release harmful fumes than epoxy or polyester fillers, making them a safer option for indoor use. However, it’s still important to ensure adequate ventilation in the work area.
When using acrylic fillers, it’s important to choose a product that is specifically designed for stone repair. Some acrylic fillers are formulated for use on drywall or wood and may not adhere properly to stone surfaces.
Acrylic fillers are typically less expensive than epoxy or polyester fillers, making them a budget-friendly option for minor cosmetic repairs. They are also readily available at most hardware stores and home improvement centers.
While acrylic fillers are flexible and paintable, they can be prone to shrinking and cracking if not applied properly. Avoid applying thick layers of acrylic filler at once, as this can lead to uneven drying and cracking. Instead, apply multiple thin layers, allowing each layer to dry before applying the next.
Cementitious Fillers: Traditional and Color-Matched
Cementitious fillers offer a traditional approach to stone repair, particularly valued in historic preservation. These fillers are composed of cement, sand, and other aggregates, carefully mixed to match the color and texture of the original stone.
The primary benefit of cementitious fillers is their compatibility with many types of natural stone. When properly matched, they create repairs that are visually cohesive and structurally sound.
These fillers are especially useful in large-scale patching and repairs where maintaining the original aesthetic is crucial. They can be custom-blended to mimic the specific color variations and veining patterns found in the existing stone.
Cementitious fillers typically require longer curing times than other options, and they may be more susceptible to cracking if not properly mixed or applied. However, their durability and aesthetic appeal make them a preferred choice for many conservation projects.
The art of using cementitious fillers lies in the precise matching of color and texture. This often requires a skilled artisan with experience in working with natural stone.
The aggregates used in cementitious fillers can include crushed stone, marble dust, and other materials that are similar to the composition of the original stone. This helps to ensure a seamless blend between the repair and the surrounding surface.
Cementitious fillers are often used in the restoration of historic buildings and monuments, where preserving the original character of the stone is of utmost importance. They are also a good choice for repairing large cracks and voids in stone walls and foundations.
When working with cementitious fillers, it’s important to properly hydrate the stone surface before applying the filler. This helps to prevent the filler from drying out too quickly and cracking.
Cementitious fillers can be challenging to work with, as they require careful mixing and application techniques. However, the results can be stunning, creating repairs that are virtually indistinguishable from the original stone.
Preparing the Stone Surface for Filling
Proper preparation is key to ensuring a successful and long-lasting repair. The stone surface must be clean, dry, and free of any loose debris before you even think about applying the filler.
Start by thoroughly cleaning the area around the damage with a mild detergent and water. Use a brush or sponge to remove any dirt, grime, or old sealant.
- Remove loose particles
- Clean with a stone-safe cleaner
- Dry the surface completely
- Consider etching for better adhesion
- Protect surrounding areas with tape
Once the surface is clean, inspect it for any loose or flaking pieces of stone. Carefully remove these with a chisel or scraper.
The cleaning process is not just about removing visible dirt. It’s about removing any contaminants that could interfere with the filler’s ability to bond properly.
For porous stones, consider using a specialized stone cleaner that is designed to penetrate deep into the pores and remove embedded dirt and grime. Be sure to rinse the surface thoroughly after cleaning to remove any residue from the cleaner.
If the stone surface is particularly smooth or polished, you may need to etch it slightly to create a rougher surface that the filler can grip onto. Use a mild etching solution that is specifically designed for stone.
Protect the surrounding areas of the stone surface with painter’s tape to prevent the filler from getting onto areas that you don’t want to repair. This will also make it easier to clean up any excess filler after it has cured.
Allow the stone surface to dry completely before applying the filler. Moisture can interfere with the filler’s ability to bond properly and can lead to cracking or discoloration.
Applying Filler and Achieving a Seamless Finish
With the stone surface prepped, it’s time to apply the filler. Follow the manufacturer’s instructions for mixing and application.
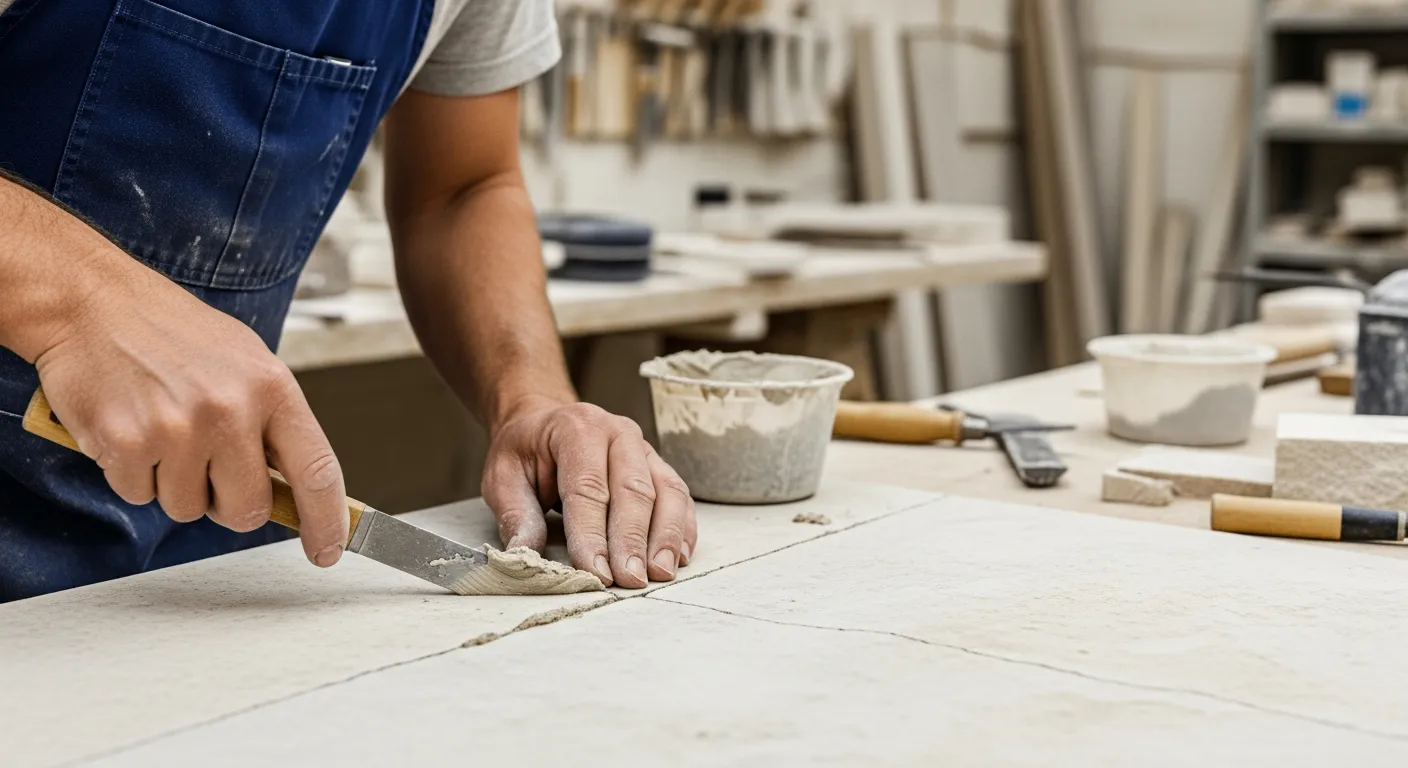
For epoxy and polyester fillers, be sure to mix the resin and hardener thoroughly, paying close attention to the recommended ratios. Use a putty knife or trowel to apply the filler to the damaged area, pressing it firmly into the crack or chip.
Overfill the area slightly to allow for sanding and polishing later. Allow the filler to cure completely according to the manufacturer’s instructions.
Once the filler is cured, use sandpaper to smooth down any excess material and blend the repair with the surrounding stone. Start with a coarser grit sandpaper and gradually work your way up to finer grits for a polished finish.
The mixing process is critical for epoxy and polyester fillers. Improper mixing can result in a filler that is too soft, too brittle, or that doesn’t cure properly.
When applying the filler, work in small sections to prevent it from drying out before you have a chance to smooth it. Use a clean putty knife or trowel for each section.
Pay attention to the angle of your putty knife or trowel. Holding it at a slight angle will help to create a smooth, even surface. Avoid applying too much pressure, as this can cause the filler to squeeze out of the crack or chip.
The sanding and polishing process is essential for achieving a seamless finish. Start with a coarse grit sandpaper to remove any excess filler and blend the repair with the surrounding stone.
Gradually work your way up to finer grits of sandpaper to smooth the surface and remove any scratches. Finish with a polishing compound to restore the shine to the stone.
Sealing and Protecting the Repaired Stone
After the filler has cured and been sanded to a smooth finish, sealing the repaired area is crucial for long-term protection. A good quality stone sealer helps prevent moisture from penetrating the filler and the surrounding stone, which can lead to cracking, staining, and other forms of damage.
Choose a sealer that is specifically designed for the type of stone you are working with. Apply the sealer evenly over the repaired area and allow it to penetrate the stone according to the manufacturer’s instructions.
Consider applying multiple coats of sealer for added protection, especially in high-traffic areas or locations exposed to harsh weather conditions. Regular resealing, typically every one to two years, will help maintain the integrity of the repair and extend the life of your stone surfaces.
Proper sealing not only protects the repair but also enhances the overall appearance of the stone, bringing out its natural color and texture. It’s a small investment that can make a big difference in the longevity and beauty of your stone surfaces.
Selecting the right sealer is as important as selecting the right filler. Different stones have different levels of porosity and require different types of sealers to provide adequate protection.
Some sealers are designed to penetrate deep into the stone and provide long-lasting protection from within. Others are designed to create a protective barrier on the surface of the stone.
When applying the sealer, be sure to follow the manufacturer’s instructions carefully. Applying too much sealer can leave a sticky residue on the surface of the stone.
Allow the sealer to dry completely before using the stone surface. This will typically take several hours, or even overnight.
Regular resealing is essential for maintaining the protection of the stone surface. The frequency of resealing will depend on the type of stone, the type of sealer, and the amount of traffic the surface receives.
Maintaining Your Stone Surfaces After Repair
Once you’ve repaired your stone surfaces, proper maintenance is essential to keep them looking their best. Regular cleaning and care will help prevent future damage and extend the life of your repairs.
Avoid using harsh chemicals or abrasive cleaners, as these can damage the stone and the filler. Instead, opt for mild, stone-safe cleaners and soft cloths or sponges.
Wipe up spills immediately to prevent staining, especially from acidic substances like lemon juice or vinegar. Use coasters and placemats to protect stone countertops and tables from scratches and heat damage.
For outdoor stone surfaces, regularly sweep away leaves, dirt, and debris to prevent buildup and staining. Consider applying a protective coating or sealant to shield the stone from the elements.
Regular cleaning is the first line of defense against damage. Dust and dirt can accumulate on stone surfaces and scratch the finish over time.
When cleaning stone surfaces, always use a soft cloth or sponge. Avoid using abrasive scrub brushes or scouring pads, as these can scratch the stone.
Be particularly careful with acidic substances, such as lemon juice, vinegar, and coffee. These substances can etch the surface of the stone and leave permanent stains.
For outdoor stone surfaces, consider using a pressure washer to remove dirt and grime. However, be careful not to use too much pressure, as this can damage the stone.
Regular inspections can help you identify potential problems early on. Look for cracks, chips, and stains, and address them before they become more serious.
Conclusion
Choosing the right stone filler for repairs is a critical step in maintaining the beauty and integrity of your natural stone surfaces. By understanding the different types of fillers available and their specific properties, you can select the best option for your repair needs.
Whether you opt for the strength of epoxy, the speed of polyester, or the flexibility of acrylic, proper preparation, application, and maintenance are essential for achieving a seamless and long-lasting finish. With a little knowledge and care, you can restore your damaged stone to its former glory and enjoy its timeless beauty for years to come.
The beauty of natural stone lies in its unique character and enduring quality. By taking the time to properly repair and maintain your stone surfaces, you can ensure that they continue to enhance your home or building for many years to come.
Don’t be afraid to seek professional help if you’re not comfortable tackling stone repairs yourself. A qualified stone restoration expert can provide valuable guidance and ensure that the repairs are done correctly.
With the right knowledge and tools, you can keep your stone surfaces looking their best and preserve their beauty for generations to come. Remember, a little maintenance goes a long way in protecting your investment and ensuring the longevity of your natural stone.