
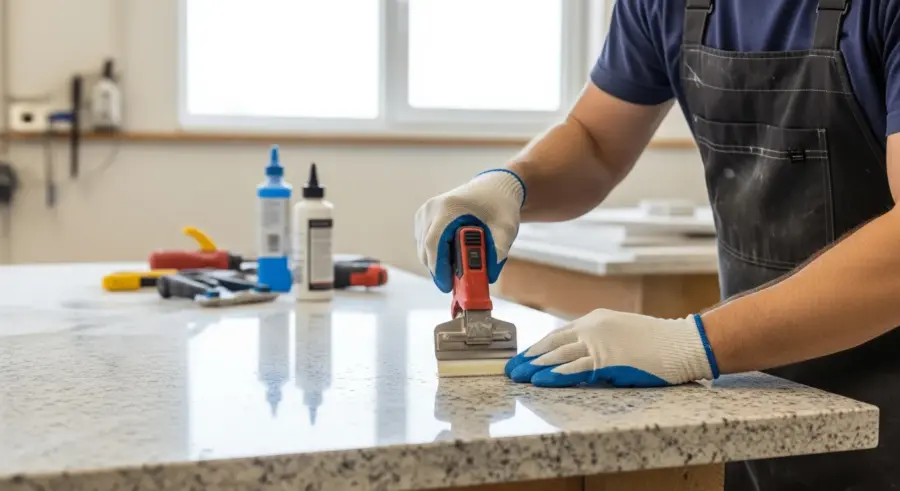
Stone surfaces add elegance and durability to any structure. However, without proper care, these surfaces can suffer from staining, erosion, and other forms of damage. That is why understanding and implementing effective stone sealing techniques is so important.
This comprehensive guide provides valuable insights into the world of stone sealing. You will learn how to protect your investment and preserve the natural beauty of your stone for years to come. From selecting the right sealer to mastering the application process, we’ll cover everything you need to know about stone sealing techniques.
Whether you’re a homeowner, contractor, or simply someone who appreciates the timeless appeal of stone, this article is for you. Let’s explore the world of stone sealing and discover how to keep your stone surfaces looking their best.
Understanding Stone Porosity and Sealer Absorption
Stone porosity plays a significant role in determining how well a sealer will be absorbed. Understanding the unique characteristics of different stone types is important for effective sealing. Some stones, like granite, have very low porosity, meaning they are naturally resistant to liquids and stains.
On the other hand, stones like sandstone and limestone are highly porous, making them more susceptible to damage. These stones readily absorb liquids, including water, oils, and acids, which can lead to staining, discoloration, and deterioration. Knowing your stone’s porosity is the first step in selecting the appropriate stone sealing techniques.
Sealer absorption refers to the amount of sealer that a particular stone can take in. Highly porous stones will require more sealer to achieve adequate protection. Dense stones, conversely, may only need a thin coat of sealer.
Factors such as the stone’s age, surface texture, and previous treatments can also affect sealer absorption. A stone that has been previously sealed might not absorb as much sealer during subsequent applications. It is also worth noting that proper cleaning before sealing can significantly improve sealer absorption.
To further elaborate on stone porosity, it’s essential to consider the microscopic structure of each stone type. The arrangement of mineral grains and the presence of tiny voids determine how easily liquids can penetrate the stone. For example, marble, while often considered a luxurious stone, can be quite porous depending on its grade and finish.
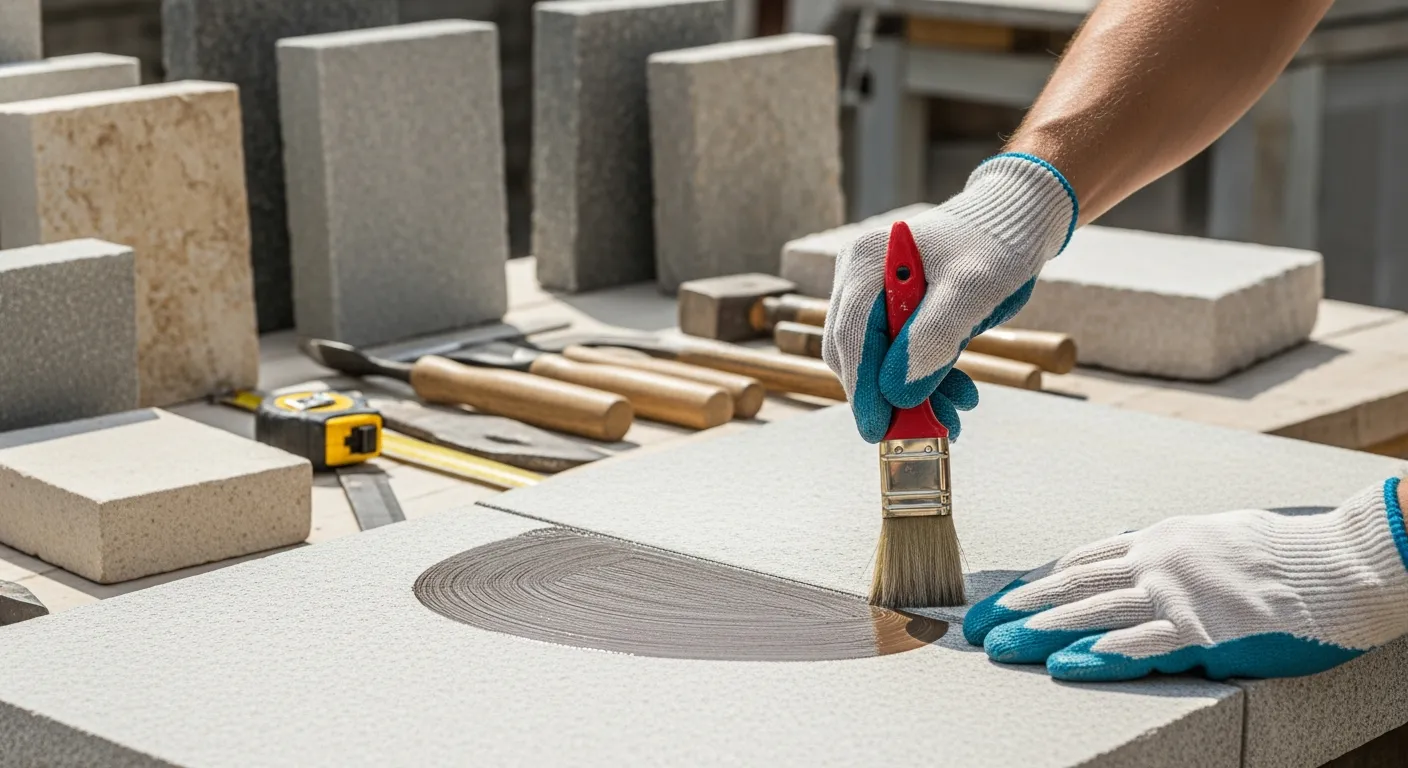
This means that marble countertops in kitchens and bathrooms are susceptible to staining from spills like wine, coffee, and oils. Regular sealing and prompt cleanup are crucial to maintain the beauty of marble surfaces. Similarly, travertine, another popular choice for flooring and backsplashes, has distinctive pores and pits that require careful attention during sealing.
When evaluating sealer absorption, it’s also important to consider the type of finish applied to the stone. A polished finish, for instance, can reduce porosity and limit sealer absorption compared to a honed or textured finish. The polishing process closes some of the surface pores, making it more difficult for liquids to penetrate.
However, even polished stones can benefit from sealing, as the sealer can protect against etching and scratching. Etching occurs when acidic substances react with the calcium carbonate in stones like marble and limestone, leaving dull marks on the surface. Sealing provides a barrier that minimizes this reaction.
Understanding the relationship between stone porosity and sealer absorption is also crucial for preventing efflorescence. Efflorescence is a white, powdery deposit that can appear on the surface of stone, particularly in damp environments. It is caused by the migration of salts from within the stone to the surface, where they crystallize upon evaporation.
A properly applied sealer can help to prevent efflorescence by reducing the amount of water that penetrates the stone. This minimizes the transport of salts to the surface, keeping the stone looking clean and pristine. Therefore, understanding these factors and choosing the right sealer are important steps.
Choosing the Right Sealer for Your Stone Type
Selecting the correct sealer is essential for achieving optimal protection and preserving the aesthetic appeal of your stone. Different sealers are formulated to work best with specific stone types. Using the wrong sealer can lead to ineffective protection or even damage to the stone.
Penetrating sealers are designed to soak into the stone’s pores. They create a protective barrier beneath the surface without altering the stone’s natural appearance. These sealers are ideal for porous stones like sandstone, limestone, and slate, as they provide long-lasting protection against water and oil-based stains.
Topical sealers, on the other hand, form a protective layer on top of the stone. These sealers provide a glossy or matte finish, enhancing the stone’s color and texture. While topical sealers offer excellent stain resistance, they are not as breathable as penetrating sealers and may not be suitable for all stone types.
Enhancing sealers are designed to intensify the natural color and veining of the stone. These sealers penetrate the stone’s surface and bring out its inherent beauty. Enhancing sealers are often used on slate, marble, and other decorative stones to create a richer, more vibrant appearance.
When considering sealers for granite, it’s important to note that while granite is relatively non-porous, it can still benefit from sealing. Sealing granite helps to prevent staining from spills that may sit on the surface for extended periods. Look for sealers specifically formulated for granite, as these will provide the best protection without altering the stone’s natural appearance.
For marble, the choice between penetrating, topical, and enhancing sealers depends on the desired aesthetic and the level of protection needed. Penetrating sealers are a good option for maintaining a natural look while providing basic stain resistance. Topical sealers can provide a more glossy or matte finish, but they may require more maintenance and can be prone to scratching.
Enhancing sealers can bring out the natural veining and color of marble, but they may also darken the stone slightly. It’s crucial to test any sealer in an inconspicuous area before applying it to the entire surface to ensure that you are happy with the results. Consider the location of the stone and the type of use it will endure when selecting a sealer.
For outdoor stone surfaces, such as patios and walkways, it’s important to choose a sealer that is specifically designed for exterior use. These sealers are formulated to withstand the elements, including UV exposure, temperature fluctuations, and moisture. They also often contain additives to prevent the growth of mold and mildew.
When selecting a sealer for slate, consider an enhancing sealer to bring out the stone’s natural color and texture. Slate is a naturally beautiful stone, and an enhancing sealer can accentuate its unique characteristics. Be sure to choose a sealer that is compatible with the type of slate you have, as some sealers may not be suitable for all varieties.
Ultimately, the best way to choose the right sealer for your stone is to consult with a stone care professional. They can assess your stone type, evaluate your specific needs, and recommend the most appropriate sealer for your situation. They can also provide guidance on proper application techniques and maintenance procedures.
Comparing Penetrating, Topical, and Enhancing Sealers
When choosing a sealer, it’s important to consider the specific needs of your stone and the desired aesthetic. Let’s compare the key characteristics of penetrating, topical, and enhancing sealers. This will help you make an informed decision.
Penetrating sealers offer invisible protection by soaking into the stone’s pores, while topical sealers create a surface layer. Enhancing sealers intensify the stone’s natural color while also providing protection. Each type has its strengths and weaknesses.
| Sealer Type | Protection | Appearance | Best For |
|---|---|---|---|
| Penetrating Sealers | Excellent water and oil resistance | Natural, unaltered look | Porous stones like sandstone and limestone |
| Topical Sealers | High stain resistance, glossy or matte finish | Alters the stone’s appearance | Dense stones like granite and marble |
| Enhancing Sealers | Enhances color and veining | Richer, more vibrant look | Decorative stones like slate and marble |
| Considerations | Breathability, longevity, application | Desired aesthetic, maintenance | Stone type, environment, usage |
Delving deeper into penetrating sealers, it’s crucial to understand that their effectiveness relies heavily on the stone’s ability to absorb the product. Stones with very tight pores may not benefit as much from penetrating sealers, as the sealer may not be able to penetrate deeply enough to provide adequate protection. This is why proper surface preparation is so important.
Topical sealers, while offering a more noticeable change in appearance, can also be more susceptible to wear and tear. Scratches, scuffs, and chipping can occur on the surface of topical sealers, requiring more frequent maintenance and reapplication. The choice of finish, whether glossy or matte, also affects the visibility of these imperfections.
Enhancing sealers can dramatically transform the look of certain stones, but it’s important to use them with caution. Over-application of an enhancing sealer can result in an unnatural or overly dark appearance. It’s always best to start with a small amount and gradually build up the desired level of enhancement.
Another important consideration is the breathability of the sealer. Breathable sealers allow moisture vapor to escape from the stone, preventing buildup that can lead to damage. Penetrating sealers are generally more breathable than topical sealers, making them a better choice for stones that are exposed to moisture.
The longevity of the sealer is also a key factor to consider. Some sealers may last for several years, while others may require reapplication every year or two. The lifespan of a sealer depends on several factors, including the type of sealer, the level of traffic, and the environmental conditions.
Ultimately, the best way to compare penetrating, topical, and enhancing sealers is to consider your specific needs and priorities. Do you prioritize natural appearance, maximum protection, or enhanced color? By carefully weighing the pros and cons of each type of sealer, you can make an informed decision that will protect and beautify your stone surfaces for years to come.
Preparing the Stone Surface for Sealing
Proper surface preparation is key to ensuring the sealer adheres correctly and provides long-lasting protection. A clean, dry surface allows the sealer to penetrate the stone’s pores effectively. Without proper preparation, the sealer may not bond properly, leading to premature failure.
Start by thoroughly cleaning the stone surface to remove any dirt, dust, grease, or existing coatings. Use a pH-neutral cleaner specifically designed for stone surfaces. Avoid using harsh chemicals or abrasive cleaners, as these can damage the stone.
For stubborn stains or buildup, consider using a stone-safe scrub brush or a specialized stain remover. Follow the manufacturer’s instructions carefully and test the product in an inconspicuous area first. This will ensure that it does not discolor or damage the stone.
Once the surface is clean, rinse it thoroughly with clean water to remove any cleaner residue. Allow the stone to dry completely before applying the sealer. This may take several hours or even overnight, depending on the stone’s porosity and the ambient humidity.
Beyond simply cleaning the surface, it’s often necessary to profile the stone to ensure optimal sealer adhesion. Profiling involves creating a slightly rough surface that allows the sealer to grip the stone more effectively. This can be achieved through methods such as light sanding or etching.
However, it’s crucial to use the appropriate profiling method for the specific type of stone. Aggressive sanding can damage delicate stones like marble, while etching may not be effective on dense stones like granite. Consulting with a stone care professional is recommended to determine the best profiling technique for your situation.
Another important aspect of surface preparation is addressing any existing cracks or chips in the stone. These imperfections can compromise the sealer’s ability to protect the stone and can also detract from its aesthetic appeal. Repairing these cracks and chips before sealing is essential for achieving a long-lasting and visually appealing result.
Stone repair compounds are available that can be used to fill cracks and chips in stone surfaces. These compounds are typically made from a mixture of epoxy resins and stone dust, which allows them to blend seamlessly with the surrounding stone. Follow the manufacturer’s instructions carefully when using stone repair compounds.
After applying the repair compound, allow it to cure completely before sanding it smooth and blending it with the surrounding stone. This will create a seamless repair that is virtually invisible to the naked eye. Once the repairs are complete and the surface is clean and dry, you can proceed with the sealing process.
Remember that proper surface preparation is an investment in the longevity and beauty of your stone surfaces. By taking the time to prepare the surface correctly, you can ensure that the sealer adheres properly and provides long-lasting protection against stains, water damage, and other forms of deterioration.
Applying Sealer Evenly and Thoroughly
Proper application is crucial for achieving uniform protection and a consistent appearance. Applying the sealer evenly ensures that all areas of the stone are adequately protected. Uneven application can result in patchy protection and an inconsistent finish.
Use a high-quality applicator, such as a paint brush, roller, or sprayer, depending on the type of sealer and the size of the surface. Follow the manufacturer’s instructions for the recommended application method. Apply the sealer in thin, even coats, overlapping each stroke slightly to ensure complete coverage.
Avoid applying too much sealer at once, as this can lead to pooling or streaking. If excess sealer accumulates on the surface, wipe it off immediately with a clean, dry cloth. For porous stones, apply multiple coats of sealer, allowing each coat to dry completely before applying the next.
Pay close attention to edges, corners, and grout lines, as these areas are often more susceptible to moisture and staining. Use a small brush or applicator to apply sealer to these areas with precision. Inspect the surface carefully after each coat to ensure that all areas are evenly covered.
When using a brush to apply sealer, choose a high-quality brush with synthetic bristles. Natural bristles can absorb the sealer and become stiff, making it difficult to achieve an even application. Synthetic bristles are more resistant to absorption and will provide a smoother, more consistent finish.
When using a roller, choose a roller cover with a short nap. A long nap roller cover can hold too much sealer and lead to uneven application. A short nap roller cover will provide a thinner, more even coat of sealer.
When using a sprayer, be sure to adjust the nozzle to create a fine mist. A coarse spray can result in uneven coverage and pooling. Hold the sprayer at a consistent distance from the surface and overlap each pass slightly to ensure complete coverage.
Regardless of the application method you choose, it’s important to work in a well-ventilated area. Sealer fumes can be harmful, so be sure to wear a respirator or mask to protect yourself. Open windows and doors to provide adequate ventilation.
After applying each coat of sealer, inspect the surface carefully for any missed spots or areas of uneven coverage. Touch up any imperfections with a small brush or applicator. Allow each coat of sealer to dry completely before applying the next coat.
By following these tips, you can ensure that you apply sealer evenly and thoroughly, achieving optimal protection and a consistent appearance for your stone surfaces. Remember that patience and attention to detail are key to a successful sealing project.
Curing and Drying Time for Stone Sealers
Allowing the sealer to cure and dry properly is essential for achieving optimal performance. The curing process allows the sealer to fully bond with the stone and develop its protective properties. Rushing the curing process can compromise the sealer’s effectiveness and longevity.
The recommended curing and drying time will vary depending on the type of sealer, the ambient temperature, and the humidity level. Refer to the manufacturer’s instructions for specific guidelines. Generally, most sealers require at least 24 to 72 hours to fully cure.
- Keep the sealed surface clean and dry
- Avoid heavy foot traffic
- Protect from spills
- Maintain consistent temperature
- Ensure adequate ventilation
During the curing period, avoid placing heavy objects on the sealed surface or exposing it to water or chemicals. Protect the surface from spills and stains by covering it with a clean cloth or plastic sheeting. Ensure adequate ventilation in the area to promote proper drying.
Understanding the difference between drying time and curing time is crucial. Drying time refers to the time it takes for the sealer to become dry to the touch. Curing time, on the other hand, refers to the time it takes for the sealer to fully harden and develop its protective properties.
Even though a sealer may feel dry to the touch after a few hours, it is still important to allow it to cure for the recommended amount of time. During the curing process, the sealer undergoes chemical reactions that strengthen its bond with the stone and enhance its resistance to stains and water damage.
Temperature and humidity play a significant role in the curing process. High humidity can slow down the curing process, while low humidity can speed it up. Similarly, warm temperatures can accelerate curing, while cold temperatures can slow it down.
It’s important to maintain a consistent temperature and humidity level during the curing period to ensure optimal results. Avoid exposing the sealed surface to extreme temperature fluctuations or high humidity levels. Consider using a dehumidifier or air conditioner to control the humidity level in the area.
After the sealer has fully cured, it’s important to test its effectiveness. Pour a small amount of water on the sealed surface and observe whether it beads up or soaks into the stone. If the water beads up, the sealer is providing adequate protection. If the water soaks in, it may be necessary to apply another coat of sealer.
By following these guidelines, you can ensure that your stone sealer cures and dries properly, providing long-lasting protection and enhancing the beauty of your stone surfaces. Remember that patience is key to a successful sealing project.
Maintaining Sealed Stone Surfaces
Regular maintenance is essential for preserving the beauty and protection of sealed stone surfaces. Proper care and cleaning can extend the life of the sealer and prevent damage to the stone. Neglecting maintenance can lead to staining, erosion, and the need for more frequent resealing.
Clean sealed stone surfaces regularly with a pH-neutral cleaner specifically designed for stone. Avoid using harsh chemicals, abrasive cleaners, or scouring pads, as these can damage the sealer and the stone. Wipe up spills immediately to prevent staining.
Use mats or rugs in high-traffic areas to protect the stone from scratches and wear. Consider using furniture pads under heavy objects to prevent damage to the surface. Inspect the sealed surface regularly for signs of wear or damage, such as scratches, stains, or discoloration.
Reseal the stone as needed, following the manufacturer’s instructions. The frequency of resealing will depend on the type of sealer, the level of traffic, and the environmental conditions. Typically, stone surfaces should be resealed every one to three years.
When cleaning sealed stone surfaces, it’s important to use the correct cleaning techniques. Avoid using excessive amounts of water, as this can penetrate the sealer and damage the stone. Use a damp mop or cloth to clean the surface, and dry it thoroughly afterwards.
For stubborn stains, consider using a stone-safe stain remover. Follow the manufacturer’s instructions carefully and test the product in an inconspicuous area first. Avoid using bleach or other harsh chemicals, as these can damage the sealer and the stone.
To prevent scratches and wear, consider using a stone floor polish. Stone floor polish can help to protect the sealer and the stone from damage. Apply the polish according to the manufacturer’s instructions.
When resealing stone surfaces, it’s important to follow the same steps as when initially sealing the stone. Clean the surface thoroughly, allow it to dry completely, and apply the sealer evenly and thoroughly. Allow the sealer to cure for the recommended amount of time before using the surface.
Regular maintenance is key to preserving the beauty and protection of sealed stone surfaces. By following these tips, you can keep your stone surfaces looking their best for years to come.
Also, be mindful of the types of cleaning products used in the vicinity of your sealed stone. Even if the cleaner isn’t directly applied to the stone, fumes and overspray from harsh chemicals can gradually degrade the sealer over time. Opt for gentler, stone-friendly alternatives whenever possible.
Troubleshooting Common Sealing Problems
Even with careful planning and execution, sealing problems can sometimes arise. Knowing how to identify and address these issues can save you time and money. Here are some common problems and their solutions.
One common issue is streaking or cloudiness, which can occur if the sealer is applied too thickly or unevenly. To fix this, use a solvent-based cleaner to remove the excess sealer and reapply a thin, even coat. Another problem is peeling or flaking, which may indicate that the surface was not properly prepared before sealing.
To correct peeling or flaking, remove the old sealer completely and clean the surface thoroughly before resealing. Staining can occur if the sealer is not effective or if spills are not cleaned up promptly. Use a stone-safe stain remover to address existing stains and reseal the surface with a higher-quality sealer.
If the sealer appears dull or lackluster, it may be time to reseal the surface. Before resealing, clean the stone thoroughly and consider using an enhancing sealer to restore its natural color and luster. Testing the sealer in an inconspicuous area before applying it to the entire surface is always a good idea.
Another common problem is the appearance of white spots or haziness on the sealed surface. This is often caused by moisture trapped beneath the sealer. To fix this, try using a heat gun or hair dryer to gently warm the surface and evaporate the moisture. If this doesn’t work, you may need to remove the sealer and allow the stone to dry completely before resealing.
Sometimes, sealers can become sticky or tacky, especially in humid environments. This can be caused by over-application of the sealer or by using a sealer that is not compatible with the stone. To fix this, try wiping the surface with a clean, dry cloth. If this doesn’t work, you may need to remove the sealer and reapply a different type of sealer.
If you notice that the sealer is wearing away quickly in high-traffic areas, it may be necessary to apply a more durable sealer or to reseal the surface more frequently. Consider using a sealer that is specifically designed for high-traffic areas.
In some cases, sealers can cause the stone to darken or change color. This is more common with enhancing sealers, but it can also occur with other types of sealers. To prevent this, always test the sealer in an inconspicuous area before applying it to the entire surface. If you don’t like the way the sealer changes the color of the stone, choose a different sealer.
If you encounter any sealing problems that you are unable to resolve on your own, it’s best to consult with a stone care professional. They can diagnose the problem and recommend the best course of action.
Remember, proper preparation, application, and maintenance are key to preventing sealing problems. By taking the time to do things right, you can protect your stone surfaces and keep them looking their best for years to come.
Conclusion
Effective stone sealing is essential for preserving the beauty and longevity of your stone surfaces. By understanding stone porosity, choosing the right sealer, and following proper application and maintenance techniques, you can protect your investment and enjoy the timeless elegance of stone for years to come.
Whether you’re working with granite, marble, limestone, or any other type of stone, the principles outlined in this guide will help you achieve optimal results. Don’t underestimate the power of proactive care when it comes to preserving your stone.
Stone sealing is not just a one-time task; it’s an ongoing process that requires attention and care. By incorporating regular maintenance into your routine, you can extend the life of your sealer and prevent costly repairs down the road. Think of it as an investment in the long-term beauty and value of your home or property.
As you embark on your stone sealing journey, remember to be patient and meticulous. Take the time to research the best products and techniques for your specific stone type and application. Don’t be afraid to seek advice from stone care professionals or experienced DIYers.
With the right knowledge and tools, you can achieve professional-quality results and enjoy the timeless beauty of stone for generations to come. So, go ahead and embrace the art of stone sealing and unlock the full potential of your stone surfaces.