
Achieving flawless stone work requires attention to detail, and the proper application of stone grout is paramount. A well-executed stone grout application not only enhances the aesthetic appeal of your stone project but also provides essential structural integrity. Let’s explore the methods for achieving the perfect stone grout application.
This guide will walk you through each step, from selecting the appropriate grout type to curing and sealing your work. Whether you’re a seasoned stone mason or a DIY enthusiast, mastering these techniques will ensure your stone projects stand the test of time.
Understanding the nuances of stone grout application is essential for both the longevity and beauty of your stone installations. We will cover everything from choosing the right type of grout to the final steps of curing and sealing.
Choosing the Right Type of Grout for Your Stone
Selecting the correct type of grout is the first critical step in any successful stone project. The choice depends on several factors, including the type of stone, the joint size, and the intended use of the installation.
There are three primary types of grout: sanded grout, unsanded grout, and epoxy grout, each with its own set of advantages and disadvantages. Understanding these differences will help you make an informed decision that suits your specific needs.
Sanded grout is ideal for wider joints, typically those larger than 1/8 inch. The sand provides bulk and reduces shrinkage, preventing cracks in larger grout lines. It’s important to consider the texture of the stone when using sanded grout, as it can scratch polished surfaces.
Unsanded grout, on the other hand, is best for narrow joints less than 1/8 inch wide. Its smooth consistency allows it to fill these tight spaces effectively without scratching delicate stone surfaces. Unsanded grout is also preferable for vertical surfaces, as it is less likely to sag during application.
Epoxy grout is the most durable and stain-resistant option, making it perfect for high-traffic areas or places exposed to moisture, such as kitchens and bathrooms. It’s also chemical-resistant, which is beneficial in industrial or commercial settings. Epoxy grout is more expensive and can be more difficult to work with than sanded or unsanded grout.

Beyond these three main types, consider polymer-modified grouts. These grouts incorporate polymers for increased flexibility and adhesion, making them suitable for installations subject to movement or vibration.
Also, consider the color of the grout. Grout color can significantly impact the overall appearance of your stone project, so choose a color that complements the stone and achieves your desired aesthetic. You can find grout in a wide array of colors, or even mix custom colors to perfectly match your stone.
When choosing grout, think about the environment it will be exposed to. Exterior applications will require a grout that can withstand freeze-thaw cycles and UV exposure, while interior applications may prioritize stain resistance and ease of cleaning.
Don’t forget to read the manufacturer’s specifications for each grout type. This will provide detailed information on its suitability for different applications, as well as any specific installation requirements.
Consider the porosity of your stone when selecting grout. Highly porous stones may require a non-staining grout or a pre-grout sealer to prevent discoloration from grout pigments.
Ultimately, the best type of grout for your stone project will depend on a careful evaluation of all these factors. Take the time to research your options and choose a grout that meets your specific needs and preferences.
Preparing Stone Joints for Grout Application
Proper preparation of the stone joints is essential for ensuring the grout adheres correctly and provides a long-lasting, aesthetically pleasing finish. This process involves cleaning the joints, removing debris, and ensuring the stones are properly spaced.
Begin by thoroughly cleaning the joints with a brush and vacuum to remove any loose dirt, dust, or mortar fragments. A shop vacuum with a narrow nozzle attachment works best for this task, allowing you to reach deep into the joints.
For stubborn debris, you may need to use a small chisel or grout saw to carefully scrape away any hardened mortar or adhesive. Be cautious not to damage the edges of the stones during this process, as chips and scratches can detract from the final appearance.
Once the joints are clean, inspect the spacing between the stones. Consistent spacing is crucial for a uniform grout line, which enhances the overall look of the installation. Use shims or spacers to adjust the stones as needed, ensuring a consistent gap throughout the project.
Dampen the stone surfaces lightly before applying the grout. This will help prevent the stone from absorbing moisture from the grout too quickly, which can lead to cracking or uneven curing. Use a sponge or spray bottle to apply a thin layer of water, avoiding saturation.
Consider using a grout saw to refine the joints, ensuring they are of uniform depth and width. This creates a more consistent surface for the grout to adhere to, resulting in a stronger and more visually appealing finish.
For natural stone, it’s important to remove any loose or flaking pieces before applying grout. These loose pieces can prevent the grout from adhering properly and may eventually fall out, leaving gaps in the grout lines.
If you’re working with porous stones, consider applying a pre-grout sealer to the edges of the stones. This will help prevent grout pigments from staining the stone, especially when using dark or heavily pigmented grouts.
Pay attention to the substrate beneath the stones. Ensure it is stable, level, and free of any contaminants that could interfere with the grout’s adhesion. A properly prepared substrate is essential for a long-lasting and durable installation.
Take your time with the preparation process, as it is the foundation for a successful grout application. Rushing through this step can lead to problems down the road, so invest the necessary time and effort to ensure the joints are properly prepared.
Remember to wear appropriate safety gear, such as gloves and eye protection, when cleaning and preparing the stone joints. This will protect you from dust, debris, and potential irritants.
Mixing Grout to the Correct Consistency
Achieving the correct grout consistency is crucial for proper application and curing. Grout that is too dry will be difficult to work with and may not adhere properly, while grout that is too wet can shrink and crack as it dries.
Always follow the manufacturer’s instructions for the specific type of grout you are using. These instructions will provide the recommended water-to-grout ratio, which is essential for achieving the desired consistency.
| Grout Type | Water to Grout Ratio | Consistency |
|---|---|---|
| Sanded Grout | Follow manufacturer’s instructions, typically around 1 part water to 3 parts grout | Thick, like peanut butter |
| Unsanded Grout | Follow manufacturer’s instructions, typically around 1 part water to 2.5 parts grout | Smooth, creamy |
| Epoxy Grout | Pre-mixed components, follow specific product guidelines | Similar to a thick paste |
| Polymer-Modified Grout | Follow manufacturer’s instructions, ratios vary | Typically a thick, workable paste |
Use a clean mixing container and a grout mixing paddle attached to a drill for best results. Add the water gradually to the dry grout, mixing continuously until you achieve a smooth, uniform consistency. Avoid adding too much water at once, as this can lead to clumping.
After mixing, allow the grout to slake for the time specified by the manufacturer. This allows the polymers and additives to fully hydrate, resulting in a stronger and more workable grout.
If you’re using epoxy grout, it’s crucial to mix the two components thoroughly and according to the manufacturer’s instructions. Inaccurate mixing can lead to improper curing and a weak, brittle grout.
Consider the temperature and humidity when mixing grout. High temperatures can cause the grout to dry out too quickly, while high humidity can slow down the curing process. Adjust the water-to-grout ratio slightly to compensate for these conditions.
Always mix grout in small batches to ensure it remains workable throughout the application process. Grout that sits for too long can begin to harden and become difficult to apply.
If you’re using a colored grout, be sure to mix it thoroughly to ensure the pigment is evenly distributed. Uneven mixing can result in streaky or blotchy grout lines.
Use a timer to ensure you’re mixing the grout for the recommended amount of time. This is especially important for epoxy grouts, which require precise mixing to achieve optimal results.
Don’t be afraid to experiment with the water-to-grout ratio slightly to achieve your desired consistency. However, always stay within the manufacturer’s recommended range to avoid compromising the grout’s performance.
Applying Grout Evenly and Thoroughly
Proper grout application is crucial for both the aesthetic appeal and structural integrity of your stone work. The goal is to fill each joint completely, ensuring a consistent and uniform finish.
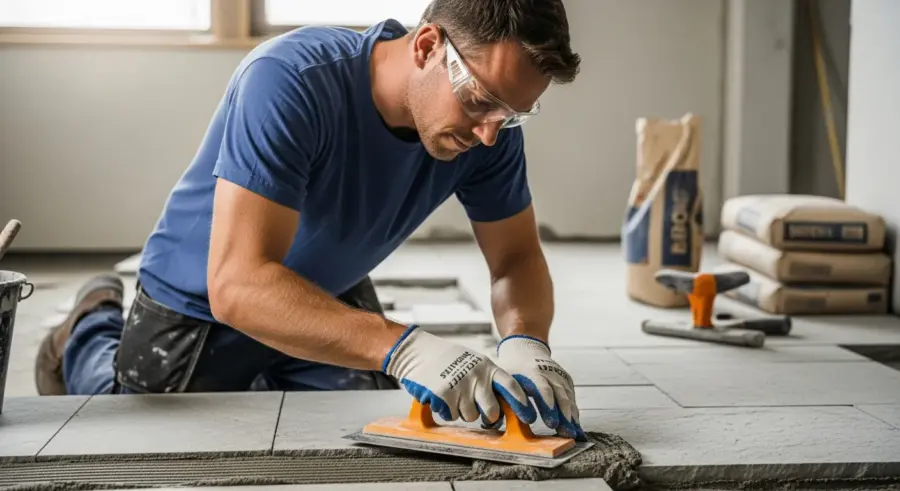
Using a grout float, apply the grout to the stone surface at a 45-degree angle, pressing it firmly into the joints. Work in small sections, ensuring each joint is completely filled. Overfill the joints slightly, as the excess grout will be removed later.
For larger areas, work in a systematic manner, such as in a grid pattern, to ensure complete coverage. Pay close attention to corners and edges, as these areas are often overlooked and can be prone to voids.
If you’re using epoxy grout, work quickly, as it tends to set faster than other types of grout. Follow the manufacturer’s instructions for application time and cleanup procedures.
Periodically inspect your work to ensure there are no air pockets or gaps in the grout lines. Use the tip of the grout float or a small tool to push grout into any voids you find.
When working with irregular stone shapes, take extra care to fill all the nooks and crannies with grout. Use a small grout float or even your fingers (with gloves) to ensure complete coverage.
For vertical surfaces, apply the grout from the bottom up to prevent it from sagging. This will help ensure a more even and consistent grout line.
Use a margin trowel to scoop grout from the mixing container and place it onto the grout float. This will help you control the amount of grout you’re applying and prevent spills.
Overlap your grout strokes slightly to ensure there are no gaps or seams in the grout lines. This will create a stronger and more visually appealing finish.
Clean your grout float frequently to remove any hardened grout buildup. This will help you maintain a smooth and consistent application.
Consider using a grout bag for intricate or hard-to-reach areas. This will allow you to apply the grout precisely and efficiently.
Work in manageable sections to prevent the grout from drying out before you have a chance to clean it up. This is especially important when working in hot or dry conditions.
Removing Excess Grout Without Damaging the Stone
Removing excess grout is a critical step in achieving a clean and professional finish. Timing is crucial: you want the grout to be firm enough to remove easily but not so hard that it requires excessive force.
Wait approximately 15-30 minutes after applying the grout, or as recommended by the manufacturer, before beginning the cleanup process. Use a damp sponge to gently wipe away the excess grout from the stone surface, rinsing the sponge frequently in clean water.
- Use a clean, damp sponge
- Rinse the sponge frequently
- Avoid excessive pressure
- Work in small sections
- Change the water often
Avoid using excessive pressure, as this can remove grout from the joints or damage the stone surface. Work in small sections, and be sure to change the water frequently to prevent spreading a thin film of grout over the stone.
Use a grout sponge specifically designed for cleaning grout. These sponges have rounded edges that help prevent them from digging into the grout lines.
If you’re working with porous stones, consider using a grout release agent before applying the grout. This will make it easier to remove the excess grout without staining the stone.
For epoxy grout, use a specialized epoxy grout sponge and cleaner. Epoxy grout is more difficult to remove than other types of grout and requires specific cleaning products.
Use a circular motion when wiping away the excess grout. This will help loosen the grout and prevent it from smearing across the stone surface.
If you’re having trouble removing the excess grout, try using a grout haze remover. Follow the manufacturer’s instructions carefully, and test it in an inconspicuous area first to ensure it doesn’t damage the stone.
Use a soft, dry cloth to buff the stone surface after cleaning with a damp sponge. This will remove any remaining grout residue and leave the stone with a clean, polished finish.
Inspect your work carefully after cleaning to ensure all the excess grout has been removed. Use a flashlight to check for any hidden grout residue in corners or crevices.
Be patient and take your time with the cleanup process. Rushing through this step can result in a messy and unprofessional finish.
Addressing Common Grout Application Issues
Even with careful preparation and application, several common issues can arise during the grouting process. Understanding these issues and how to address them will help you achieve a flawless final result.
One common problem is grout haze, a thin film of grout residue that can appear on the stone surface after cleanup. This can usually be removed with a grout haze remover, following the manufacturer’s instructions carefully.
Another issue is cracking or crumbling grout, which can be caused by improper mixing, rapid drying, or movement in the substrate. If you notice cracks, remove the affected grout and reapply, ensuring proper mixing and curing techniques.
Uneven grout lines can also detract from the overall appearance of the installation. This can be corrected by carefully removing the high spots with a grout saw or small chisel and then filling in the low spots with fresh grout.
Discoloration can occur if the grout is not sealed properly or if it is exposed to staining agents. Sealing the grout after it has cured can prevent this, and regular cleaning can help maintain its appearance.
Efflorescence, a white powdery deposit that can appear on the grout surface, is caused by mineral salts migrating to the surface. This can be removed with a specialized efflorescence cleaner.
If the grout is too soft or crumbly, it may be due to overwatering during mixing or improper curing. Remove the affected grout and reapply, ensuring the correct water-to-grout ratio and proper curing conditions.
Pinholing, small holes or voids in the grout surface, can be caused by air trapped in the grout mix. To prevent this, mix the grout thoroughly and avoid overworking it during application.
Shrinkage cracks can occur if the grout dries too quickly or if the joints are too wide. Use a grout that is specifically designed for wider joints, and ensure proper curing conditions.
If the grout color is uneven, it may be due to inconsistent mixing or variations in the stone porosity. Mix the grout thoroughly, and consider applying a pre-grout sealer to the stone to even out the porosity.
Mold and mildew growth can occur in damp or humid environments. Clean the affected areas with a mold and mildew cleaner, and ensure proper ventilation to prevent future growth.
Always address grout issues promptly to prevent them from worsening. Early intervention can save you time and money in the long run.
Curing and Sealing Grout for Long-Lasting Protection
Curing and sealing are the final steps in the grout application process, and they are crucial for ensuring the longevity and durability of your work. Curing allows the grout to harden properly, while sealing protects it from stains and moisture.
Allow the grout to cure for at least 24-72 hours, or as recommended by the manufacturer, before sealing. During this time, keep the area dry and avoid heavy traffic to prevent damage to the grout lines.
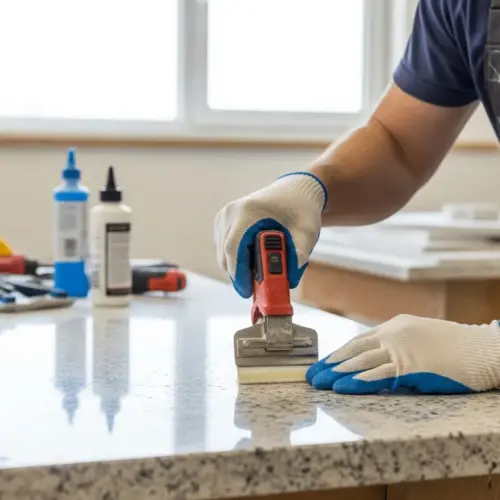
Apply a high-quality grout sealer using a small brush or applicator, following the manufacturer’s instructions. Ensure the sealer is designed for the type of grout you have used. Apply the sealer evenly over the grout lines, avoiding excess application on the stone surface.
Wipe away any excess sealer from the stone surface with a clean cloth to prevent a sticky or glossy residue. Allow the sealer to dry completely before exposing the area to moisture or heavy use.
Reapply the grout sealer every 1-2 years, or as needed, to maintain its protective properties. Regular cleaning with a pH-neutral cleaner will also help prolong the life of the grout and keep it looking its best.
Consider using a penetrating sealer, which soaks into the grout and provides long-lasting protection from within. These sealers are particularly effective for porous grouts.
Apply the sealer in thin, even coats to prevent buildup and ensure proper penetration. Multiple thin coats are better than one thick coat.
Test the sealer in an inconspicuous area before applying it to the entire surface. This will ensure it doesn’t discolor or damage the stone.
Allow the sealer to cure completely before exposing the grout to moisture or heavy traffic. This will ensure it forms a strong and durable protective barrier.
Choose a sealer that is appropriate for the environment. Exterior applications will require a sealer that is resistant to UV exposure and freeze-thaw cycles.
Consider using a color-enhancing sealer to deepen the color of the grout and stone. These sealers can add richness and vibrancy to your installation.
Clean the grout thoroughly before sealing to remove any dirt, grime, or residue that could interfere with the sealer’s performance.
Advanced Stone Grout Application Techniques
For those looking to elevate their stone grout application skills, several advanced techniques can further enhance the final result. These techniques often involve specialized tools and a deeper understanding of stone and grout properties.
One such technique is color-matching grout to the stone for a seamless, integrated look. This requires careful selection of grout pigments and may involve custom mixing to achieve the perfect match.
Another advanced technique is using textured grout to create a more rustic or natural appearance. This involves adding aggregates to the grout mix or using specialized tools to create texture in the grout lines.
For intricate stone patterns, using a pre-mixed, flexible grout can help prevent cracking and ensure the grout lines conform to the complex shapes. These grouts are designed to accommodate slight movements in the stone without compromising the integrity of the installation.
When working with porous stones, consider applying a pre-grout sealer to the stone surface to prevent staining from the grout pigments. This will make cleanup easier and ensure a more uniform color across the entire installation.
Using a diamond-embedded grout removal tool can help to precisely remove grout without damaging the surrounding stone, allowing for seamless repairs or alterations.
Epoxy coating the grout lines after installation can provide an extra layer of protection against stains and moisture, especially in high-traffic areas.
Creating a concave or convex grout profile can add visual interest and enhance the overall aesthetic of the stone installation. This requires specialized tools and techniques.
Using a heated grout float can help to improve the workability of certain types of grout, making them easier to apply and clean up.
Applying a grout stain to existing grout lines can change their color and refresh the look of the stone installation without having to remove and replace the grout.
Using a laser level to ensure perfectly straight grout lines can enhance the precision and professionalism of the stone installation.
Maintaining and Cleaning Your Stone Grout
Proper maintenance and cleaning are essential for preserving the appearance and longevity of your stone grout. Regular cleaning helps prevent the buildup of dirt, grime, and stains, while proper maintenance ensures the grout remains in good condition.
Clean your stone grout regularly using a pH-neutral cleaner and a soft brush or sponge. Avoid using harsh chemicals or abrasive cleaners, as these can damage the grout and stone surfaces.
For stubborn stains, create a paste of baking soda and water and apply it to the affected area. Let it sit for a few minutes before scrubbing gently with a soft brush and rinsing with clean water.
Inspect your grout lines periodically for cracks, crumbling, or discoloration. Address any issues promptly to prevent further damage and maintain the integrity of the installation.
Reapply grout sealer every 1-2 years, or as needed, to maintain its protective properties. This will help prevent staining and moisture damage, ensuring your stone grout looks its best for years to come.
Consider using a grout brush with stiff bristles to scrub away stubborn dirt and grime. However, be careful not to damage the grout lines.
Steam cleaning can be an effective way to remove dirt and grime from grout lines without using harsh chemicals. However, be sure to test it in an inconspicuous area first to ensure it doesn’t damage the grout or stone.
Avoid using bleach-based cleaners on colored grout, as they can cause discoloration. Opt for a color-safe cleaner instead.
Wipe up spills immediately to prevent them from staining the grout. The longer a spill sits, the more difficult it will be to remove.
Consider using a grout pen to touch up discolored or stained grout lines. These pens contain a colored sealant that can restore the grout’s original appearance.
Place mats or rugs in high-traffic areas to protect the grout from dirt and wear. This will help prolong its life and keep it looking its best.
Regularly vacuum or sweep the stone surface to remove loose dirt and debris that can scratch or damage the grout.
Conclusion
Mastering the art of stone grout application is a rewarding endeavor that significantly enhances the beauty and durability of your stone projects. By selecting the right type of grout, preparing the joints properly, and applying the grout evenly, you can achieve a professional and long-lasting result.
Remember to follow the manufacturer’s instructions for mixing, curing, and sealing to ensure optimal performance. With the right techniques and a little patience, your stone installations will stand the test of time.