Stone cladding is an excellent way to enhance the aesthetic appeal and durability of any building. It involves applying a layer of real or manufactured stone to a wall surface, providing a beautiful and protective finish. Whether you’re aiming for a rustic, modern, or classic look, proper stone cladding installation is essential for achieving the desired results.
This comprehensive guide will walk you through each step of the process, ensuring a successful and long-lasting stone cladding project. By following these guidelines, you’ll be able to transform your property with the timeless beauty of stone.
From preparing the wall surface to applying the final touches, we’ll cover everything you need to know for a professional-quality stone cladding installation. Let’s get started and discover how to bring the elegance of natural stone cladding to your home or building.
Preparing the Wall Surface for Cladding
Before beginning any stone cladding installation, it’s essential to properly prepare the wall surface. This step ensures that the cladding adheres correctly and provides a stable, long-lasting finish. A well-prepared surface is the foundation of a successful stone cladding project.
Start by inspecting the existing wall for any damage, such as cracks, holes, or loose material. Repair any imperfections with appropriate patching compounds or fillers to create a smooth and even surface.
Next, clean the wall thoroughly to remove any dirt, dust, grease, or other contaminants. Use a pressure washer or a stiff brush with a cleaning solution to ensure a clean surface for proper adhesion.
If the wall is painted or has a sealant, consider removing it to expose the bare surface. This step is especially important for exterior stone cladding, where weather exposure can compromise adhesion. A clean, bare surface provides the best bond for the cladding material.
Consider the wall’s material when preparing it. Concrete walls may require a different approach than wood-framed walls. Understanding the substrate is crucial for proper adhesion and longevity of the cladding.
For wood-framed walls, ensure the sheathing is structurally sound and free from rot or decay. Replace any damaged sheathing before proceeding with the cladding installation. This will prevent future problems and ensure a stable base for the stone.
Applying a moisture barrier to the wall is also a good practice, especially in areas with high humidity or rainfall. This barrier will protect the wall from moisture damage and prevent mold growth behind the cladding. A proper moisture barrier is a key component of a durable and long-lasting installation.
Check the wall for plumb and level. Correct any significant deviations to ensure a uniform and aesthetically pleasing finish. A level and plumb wall will make the installation process much easier and result in a better-looking final product.
Finally, consider applying a scratch coat of mortar to the wall surface. This provides a textured surface for the stone cladding to adhere to. The scratch coat should be allowed to cure properly before proceeding with the stone installation.
Choosing the Right Stone Cladding Material
Selecting the appropriate stone cladding material is crucial for achieving the desired aesthetic and ensuring the longevity of your project. Various types of stone are available, each with unique characteristics and applications. Consider the style you want to achieve and the specific requirements of your project.
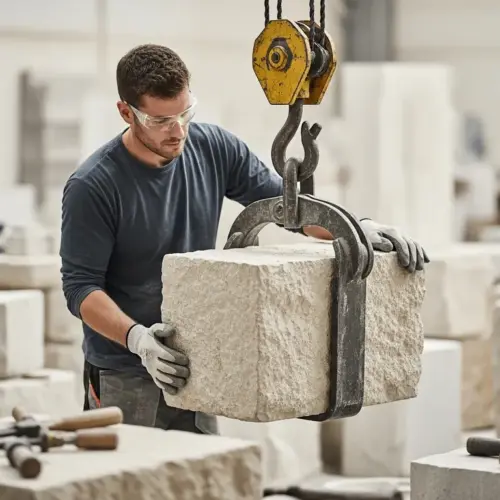
Natural stone cladding offers a timeless and authentic look, with options like granite, limestone, and slate. These materials provide exceptional durability and a unique appearance, but they can be more expensive and require specialized installation techniques.
Thin stone veneer is a lighter and more cost-effective alternative to full-thickness natural stone. It’s easier to install and offers a similar aesthetic, making it a popular choice for both interior and exterior applications.
Manufactured stone cladding, also known as faux stone, is made from concrete or other composite materials. It replicates the look of natural stone at a lower cost and is available in a wide range of colors and textures. Choose a material that complements your building’s architecture and meets your budget.
Consider the climate in your area when choosing a stone cladding material. Some stones are more resistant to freeze-thaw cycles than others. Selecting a stone that is appropriate for your climate will ensure its longevity and prevent damage.
Think about the color and texture of the stone and how it will complement the existing architecture of your building. Consider the surrounding landscape and choose a stone that blends in harmoniously. The right stone can enhance the overall aesthetic of your property.
Research the different types of stone and their specific properties. Some stones are more porous than others and may require sealing to prevent staining. Understanding the properties of the stone will help you make an informed decision.
Don’t forget to factor in the cost of installation when choosing your stone cladding material. Natural stone typically requires more specialized installation techniques, which can increase the overall cost. Thin stone veneer and manufactured stone are generally easier to install, which can save you money on labor costs.
Finally, consider the environmental impact of your stone cladding choice. Natural stone requires quarrying, which can have a significant environmental impact. Manufactured stone is often made from recycled materials, making it a more sustainable option.
Comparing Stone Cladding Materials
Different stone cladding materials offer various benefits and drawbacks. Understanding these differences can help you make an informed decision for your project. Consider factors like cost, durability, and ease of installation when selecting your material.
Natural stone offers unmatched authenticity but can be expensive and heavy. Thin stone veneer provides a balance of aesthetics and practicality, while manufactured stone is the most budget-friendly option.
| Material | Cost | Durability | Installation |
|---|---|---|---|
| Natural Stone | High | Excellent | Specialized |
| Thin Stone Veneer | Medium | Good | Easier |
| Manufactured Stone | Low | Good | Easy |
| Brick Cladding | Medium | Excellent | Skilled |
Let’s delve deeper into the nuances of each material. This will provide a more comprehensive understanding of their respective strengths and weaknesses.
Natural stone, while boasting unparalleled aesthetic appeal, demands a significant investment. The weight of natural stone also necessitates a robust structural support system. This can further increase the overall project cost.
Thin stone veneer offers a more accessible entry point into the realm of stone cladding. It retains a considerable degree of the natural stone’s visual charm. The reduced weight simplifies installation and minimizes structural reinforcement requirements.
Manufactured stone presents the most economical pathway to achieving a stone-clad facade. Advances in manufacturing techniques have significantly enhanced the realism of faux stone. However, it’s crucial to select high-quality manufactured stone to avoid an artificial appearance.
Brick cladding, although not technically stone, serves as a viable alternative with its own distinct advantages. Brick offers exceptional durability and resistance to weathering. Its classic aesthetic complements a wide range of architectural styles.
Ultimately, the optimal choice hinges on a careful evaluation of your priorities. Weigh the factors of budget, aesthetic preferences, structural considerations, and long-term maintenance requirements. A well-informed decision will ensure a satisfying and enduring outcome.
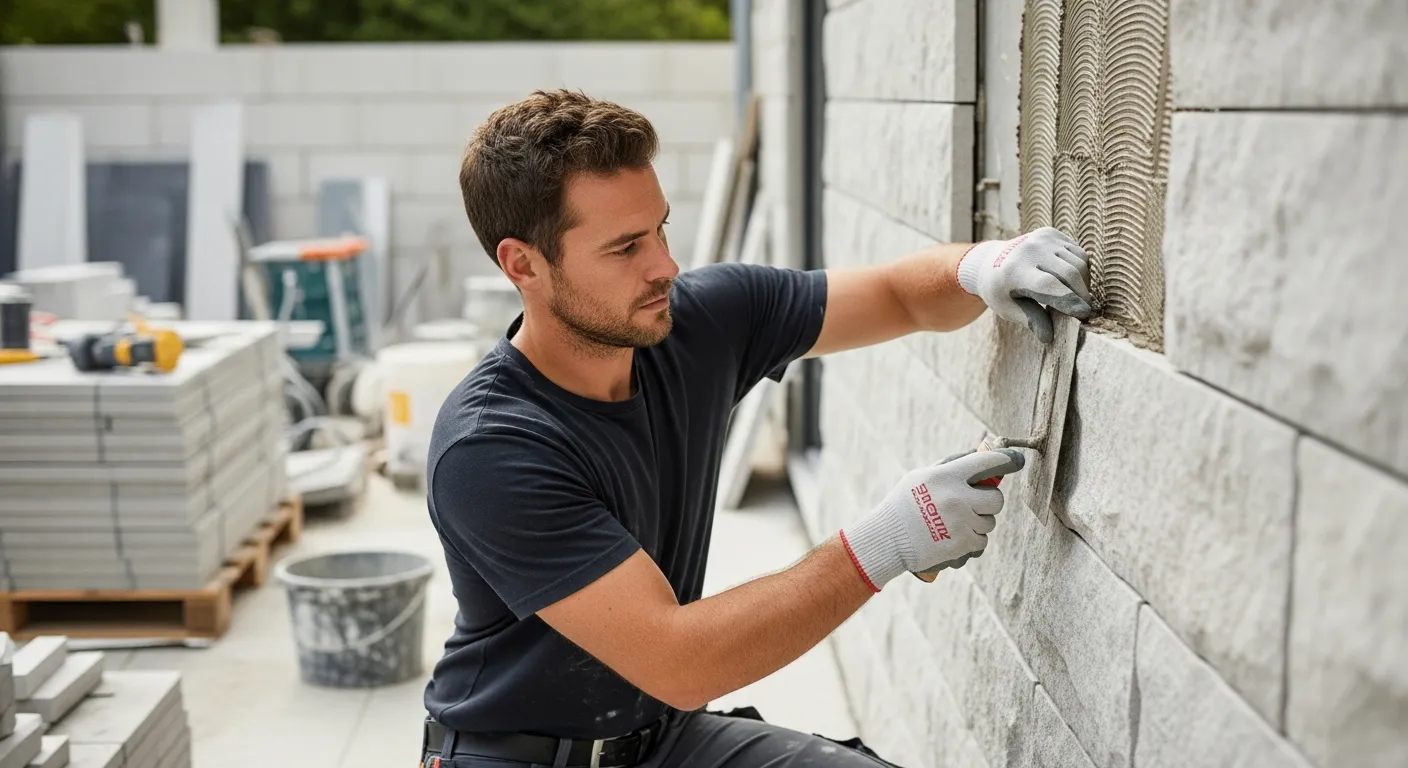
Applying Mortar or Adhesive
The method you use to apply mortar or adhesive is a critical step in stone cladding installation. Proper application ensures a strong bond between the stone and the wall surface. Always follow the manufacturer’s instructions for the specific product you’re using.
For traditional mortar applications, mix the mortar according to the manufacturer’s recommendations, achieving a consistent and workable consistency. Apply a layer of mortar to the back of each stone and to the wall surface, ensuring full coverage.
When using adhesive, select a product specifically designed for stone cladding and suitable for the substrate. Apply the adhesive to the back of the stone and press it firmly against the wall, following the manufacturer’s guidelines for application thickness and curing time.
Ensure that the mortar or adhesive is evenly distributed to prevent air pockets or weak spots. Use a notched trowel to create ridges in the adhesive, which will help to improve the bond. Take your time and pay attention to detail to achieve a secure and lasting installation.
The type of mortar or adhesive you choose will depend on the type of stone cladding you are using. Consult the manufacturer’s recommendations for the best product to use with your specific stone. Using the wrong product can lead to adhesion problems and premature failure of the cladding.
When mixing mortar, use clean water and follow the manufacturer’s instructions carefully. Over-watering the mortar can weaken it and make it difficult to work with. Under-watering the mortar can make it too stiff and difficult to apply.
Apply the mortar or adhesive in a consistent thickness to ensure even support for the stone. Use a notched trowel to create ridges in the mortar or adhesive, which will help to increase the surface area for bonding. The depth of the notches should be appropriate for the size and weight of the stone.
Press the stone firmly into the mortar or adhesive and wiggle it slightly to ensure good contact. Remove any excess mortar or adhesive that squeezes out from between the stones. Use a clean, damp sponge to wipe away any residue from the surface of the stone.
Allow the mortar or adhesive to cure completely before grouting the joints. The curing time will vary depending on the product and the weather conditions. Follow the manufacturer’s instructions for the recommended curing time.
Installing the Stone Cladding
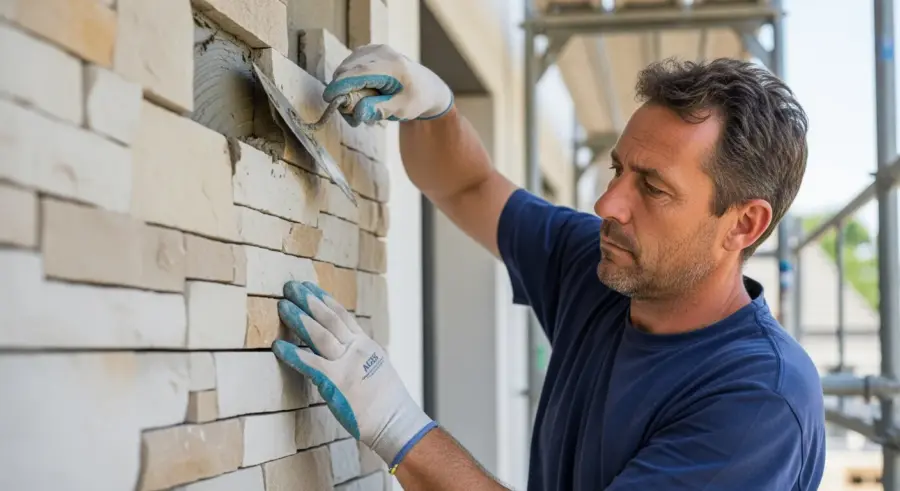
With the mortar or adhesive applied, it’s time to install the stone cladding. This process requires careful placement and attention to detail to achieve a visually appealing and structurally sound finish. Start by planning your layout to ensure a balanced and aesthetically pleasing design.
Begin at the bottom of the wall and work your way up, placing each stone carefully and pressing it firmly into the mortar or adhesive. Use spacers to maintain consistent joint widths between the stones, creating a uniform and professional look.
For larger stones, consider using mechanical fasteners, such as screws or anchors, to provide additional support. Ensure that the fasteners are appropriate for the type of stone and the wall substrate. This is especially important for exterior stone cladding, where wind and weather can exert significant force.
Periodically check the alignment and level of the stones to ensure a straight and even installation. Use a level and shims to make any necessary adjustments. Take breaks as needed to maintain focus and prevent errors.
Dry-fitting the stones before applying mortar or adhesive is a crucial step. This allows you to visualize the final layout and make any necessary adjustments. It also helps you identify any stones that need to be cut or shaped to fit properly.
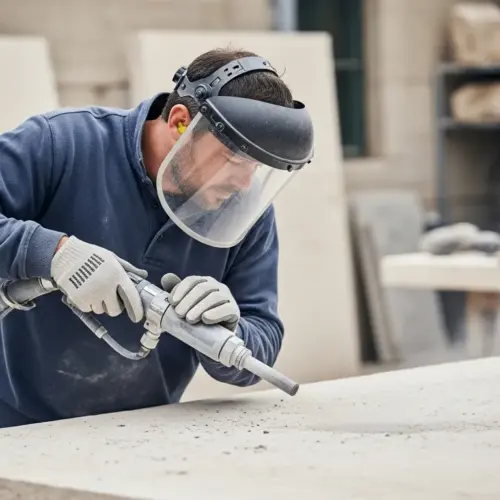
When cutting stones, use a wet saw with a diamond blade. This will ensure a clean and precise cut. Always wear safety glasses and gloves when cutting stones. Protect yourself from flying debris and sharp edges.
Stagger the joints between the stones to create a more natural and visually appealing look. Avoid creating long, continuous vertical joints. This can weaken the cladding and make it more susceptible to cracking.
Pay attention to the details, such as corners and edges. Use corner stones or miter the edges of the stones to create a clean and professional finish. Proper attention to detail will elevate the overall look of your stone cladding project.
Clean up any excess mortar or adhesive as you go. This will make it easier to grout the joints later. Use a clean, damp sponge to wipe away any residue from the surface of the stones. Preventing the mortar from hardening on the stone’s surface will save you time and effort later.
Tips for Successful Stone Cladding Installation
Achieving a professional-quality stone cladding installation requires attention to detail and careful planning. Here are some tips to help ensure a successful project. Proper preparation and execution can make all the difference in the final result.
Always start with a clean and properly prepared surface. Use high-quality materials and follow the manufacturer’s instructions. A well-prepared surface and quality materials are essential for a lasting installation.
- Plan your layout carefully
- Use spacers for consistent joints
- Check alignment and level regularly
- Use mechanical fasteners for large stones
- Take breaks to maintain focus
Consider the weather conditions when planning your installation. Avoid installing stone cladding in extreme temperatures or during heavy rain. These conditions can affect the curing time of the mortar or adhesive and compromise the bond.
Protect the stone cladding from damage during installation. Use drop cloths to protect the surrounding surfaces from mortar or adhesive splatters. Handle the stones carefully to avoid chipping or cracking them.
Invest in the right tools for the job. A wet saw with a diamond blade is essential for cutting stones. A notched trowel is necessary for applying mortar or adhesive. A level and shims are needed for ensuring proper alignment.
Don’t be afraid to ask for help. If you’re not comfortable installing stone cladding yourself, hire a professional. A skilled installer will have the experience and expertise to ensure a successful project.
Take your time and don’t rush the installation process. Stone cladding is a permanent investment, so it’s important to do it right. Rushing the job can lead to mistakes and a less-than-desirable result.
Inspect the finished installation carefully for any imperfections. Touch up any areas that need attention. A final inspection will ensure that your stone cladding project is completed to your satisfaction.
Document the installation process with photos or videos. This will be helpful for future maintenance or repairs. It will also serve as a record of your hard work and a testament to your craftsmanship.
Grouting and Finishing the Cladding
After the stone cladding is installed, grouting and finishing are essential steps to complete the project. Grouting fills the joints between the stones, providing a weather-resistant seal and enhancing the overall appearance. Finishing touches add the final polish and ensure a professional look.
Choose a grout color that complements the stone and enhances the desired aesthetic. Mix the grout according to the manufacturer’s instructions, achieving a smooth and consistent consistency. Apply the grout to the joints using a grout bag or trowel, ensuring that all gaps are completely filled.
Once the grout has partially set, use a damp sponge to clean off any excess from the surface of the stones. Be careful not to remove too much grout from the joints. Shape and smooth the grout lines with a jointing tool to create a uniform and professional finish.
Allow the grout to cure completely according to the manufacturer’s instructions. Apply a sealant to protect the stone and grout from moisture and stains. Inspect the finished cladding for any imperfections and make any necessary touch-ups.
The type of grout you choose will depend on the type of stone cladding you have installed. Sanded grout is typically used for wider joints, while unsanded grout is used for narrower joints. Epoxy grout is a more durable and stain-resistant option, but it is also more expensive.
When mixing grout, use clean water and follow the manufacturer’s instructions carefully. Over-watering the grout can weaken it and make it difficult to work with. Under-watering the grout can make it too stiff and difficult to apply.
Apply the grout in a consistent thickness to ensure a uniform appearance. Use a grout bag or trowel to force the grout into the joints, making sure to fill all gaps completely. Avoid leaving any air pockets in the joints.
Clean the surface of the stones with a damp sponge as you go. This will prevent the grout from hardening on the surface and making it difficult to remove later. Be careful not to remove too much grout from the joints.
Allow the grout to cure completely before applying a sealant. The curing time will vary depending on the product and the weather conditions. Follow the manufacturer’s instructions for the recommended curing time.
Maintaining Stone Cladding
Proper maintenance is essential for preserving the beauty and extending the lifespan of your stone cladding. Regular cleaning and inspection can prevent damage and keep your cladding looking its best. A little maintenance goes a long way in preserving the integrity of your investment.
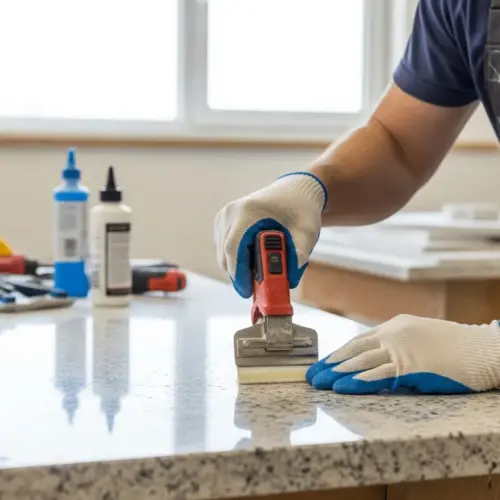
Clean the stone cladding regularly with a mild detergent and water, using a soft brush or sponge. Avoid using harsh chemicals or abrasive cleaners, which can damage the stone. Rinse thoroughly with clean water to remove any soap residue.
Inspect the cladding periodically for any cracks, loose stones, or damaged grout. Repair any imperfections promptly to prevent further damage. Reapply sealant as needed to protect the stone and grout from moisture and stains.
For exterior stone cladding, consider applying a water repellent to protect against weathering and freeze-thaw damage. Trim any vegetation that may come into contact with the cladding, as it can trap moisture and promote mold growth. With proper care and maintenance, your stone cladding will continue to enhance the beauty of your property for years to come.
Establish a regular cleaning schedule to prevent dirt and grime from building up on the stone. The frequency of cleaning will depend on the environment and the type of stone. Areas with high pollution or heavy rainfall may require more frequent cleaning.
Use a pressure washer with a low-pressure nozzle to clean exterior stone cladding. Be careful not to damage the stone or grout. Avoid using high pressure, which can erode the stone and damage the joints.
Remove any stains or spills as soon as possible. Use a specialized stain remover for stone to avoid damaging the surface. Test the stain remover in an inconspicuous area first to ensure that it does not discolor the stone.
Repair any cracks or loose stones promptly to prevent further damage. Use a flexible sealant to fill cracks and reattach loose stones with mortar or adhesive. Ignoring these issues can lead to more extensive and costly repairs in the future.
Reapply sealant every few years to protect the stone and grout from moisture and stains. The frequency of sealant application will depend on the type of sealant and the weather conditions. A well-maintained sealant will prolong the life of your stone cladding.
Addressing Common Stone Cladding Problems
Even with careful installation and maintenance, stone cladding can sometimes encounter problems. Knowing how to address these issues can save you time and money. Early detection and prompt repair are key to preventing further damage.
Efflorescence, a white powdery deposit on the surface of the stone, is a common issue caused by mineral salts migrating to the surface. Clean efflorescence with a specialized cleaner and ensure proper drainage to prevent recurrence.
Cracks and loose stones can occur due to settling, weather exposure, or improper installation. Repair cracks with a flexible sealant and reattach loose stones with mortar or adhesive.
Mold and mildew can grow on stone cladding in damp or shaded areas. Clean affected areas with a mildew cleaner and improve ventilation to prevent future growth. Addressing these common problems promptly will help maintain the beauty and integrity of your stone cladding.
Water damage is a significant threat to stone cladding, especially in regions with harsh winters. Ensure proper drainage to divert water away from the cladding. Inspect for any signs of water penetration and address them immediately.
Staining can occur from various sources, including dirt, oil, and rust. Identify the source of the stain and use an appropriate cleaner to remove it. Protect the stone from future staining by applying a sealant.
Spalling, or the flaking of the stone surface, can be caused by freeze-thaw cycles or improper installation. Repair spalling by removing the damaged stone and replacing it with a new one. Ensure that the new stone is properly sealed to prevent future spalling.
Insect infestations can also pose a threat to stone cladding, particularly in areas with wood-boring insects. Inspect the cladding regularly for signs of infestation and take appropriate measures to control the pests. Protect the wood framing behind the cladding with a wood preservative.
Graffiti can be a nuisance on stone cladding. Remove graffiti as soon as possible using a specialized graffiti remover. Protect the cladding from future graffiti by applying an anti-graffiti coating.
Conclusion
Stone cladding installation is a rewarding project that can significantly enhance the aesthetic appeal and value of your property. By following the steps outlined in this comprehensive guide, you can achieve a professional-quality finish that will last for years to come. Remember, careful preparation, proper material selection, and attention to detail are key to a successful stone cladding project.
Whether you choose natural stone, thin stone veneer, or manufactured stone, the timeless beauty of stone cladding will transform your building into a stunning masterpiece. With proper maintenance, your stone cladding will continue to impress and protect your property for generations.